
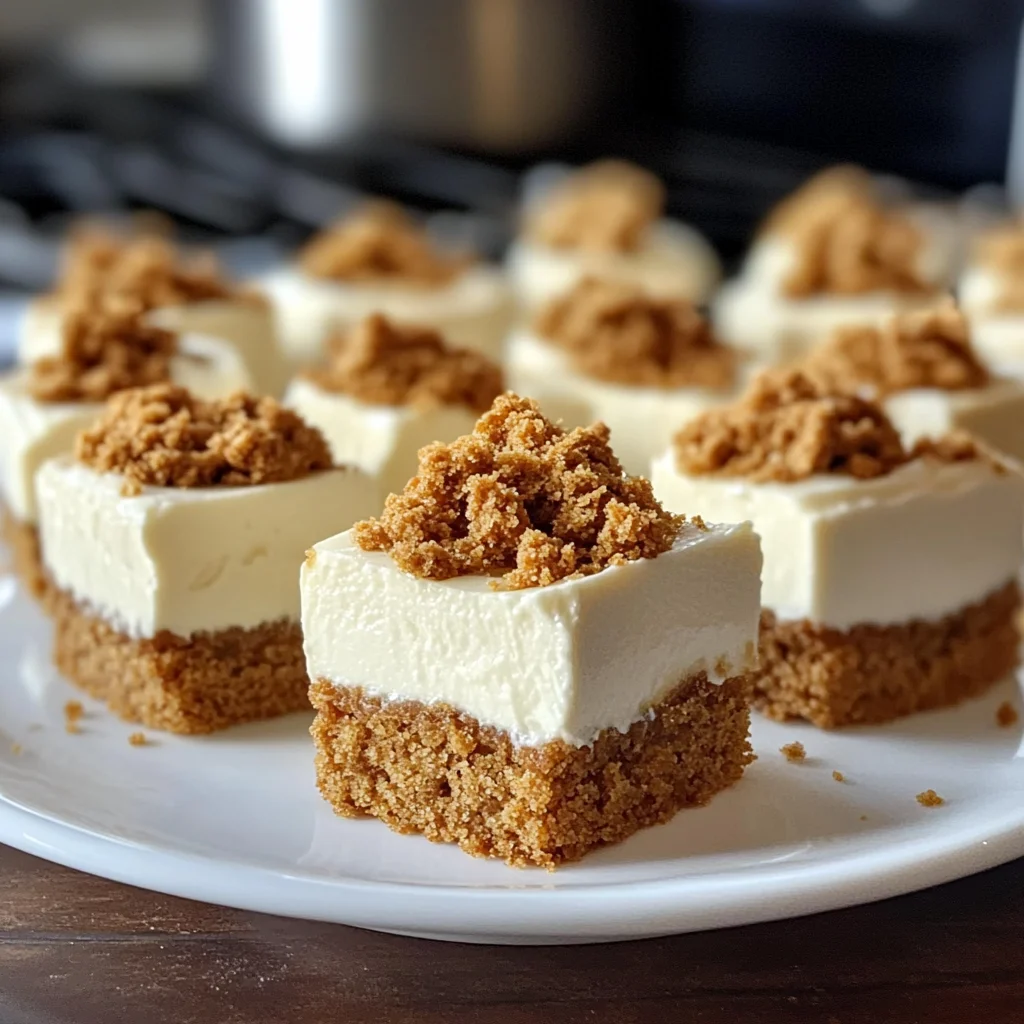
Introduction to Mini Biscoff Cheesecakes
Picture this: a long, hectic day finally winding down, and you crave something sweet to lift your spirits. That’s where these Mini Biscoff Cheesecakes shine! With their creamy filling and crunchy cookie crust, they’re the perfect way to treat yourself after a busy day.
Whether you need a delightful dessert for a family gathering or a quick indulgence just for you, these cheesecakes are a dream come true. They not only impress with their flavor but are simple enough to make, even when time isn’t on your side. Let’s dive into this sweet adventure together!
Why You’ll Love This Mini Biscoff Cheesecakes
Table of Contents
Imagine sinking your fork into a cheesecake that’s both creamy and dreamy! These Mini Biscoff Cheesecakes are not just quick to whip up; they deliver a flavor explosion that will dance on your taste buds. Plus, they save you time in the kitchen, allowing you to spend more moments with family or catch up on that book you’ve been meaning to read. Trust me, these little delights will soon become your go-to dessert!
Ingredients for Mini Biscoff Cheesecakes

Gathering the right ingredients makes a world of difference. For these Mini Biscoff Cheesecakes, you’ll need a delightful mix that comes together beautifully.
- Biscoff cookie crumbs: The star of the show! These give us a sweet, spiced flavor and a lovely crunch. You can easily make crumbs from whole Biscoff cookies if needed.
- Melted butter: This binds the cookie crumbs, creating a sturdy base for our cheesecakes. Feel free to swap it out with coconut oil for a unique twist.
- Cream cheese: The creamy backbone of our dessert. Make sure it’s at room temperature for a smooth blending experience.
- Heavy cream: Adds a rich texture to the filling, making it luscious and decadent. You can use whipped topping as an alternative.
- Powdered sugar: Sweetens things up without grittiness. If you want a natural option, try using maple sugar!
- Vanilla extract: A touch of vanilla enhances the overall flavor. Opt for pure vanilla for a more robust taste.
- Biscoff spread: This creamy goodness amps up the Biscoff flavor. Make sure to get a nice layer on top for added richness!
- Crumble Biscoff cookies: These aren’t just for the crust! A sprinkle on top adds visual appeal and an extra crunch.
For the exact measurements, be sure to check the bottom of the article where you can find them available for printing. Happy baking!
How to Make Mini Biscoff Cheesecakes
Step 1: Prepare the Baking Setup
First things first, preheat your oven to 350°F (175°C). While it heats up, pull out a 12-cup muffin tin and line each cup with paper liners. Trust me, this makes for an easier cleanup and ensures your cheesecakes look great!
Step 2: Make the Cookie Crust
Now, let’s focus on the crust! In a medium bowl, combine your Biscoff cookie crumbs with the melted butter. Stir it well until the crumbs are fully coated. You’ll know it’s ready when the mixture starts to hold together like damp sand. This little step is super important for that perfect crunch!
Step 3: Bake the Crust
Next, spoon about one tablespoon of your cookie crumb mixture into each muffin cup. Press it down firmly with the back of a spoon. We want a solid crust that will hold all that delicious cheesecake filling. Once you’ve shaped them, pop the muffin tin into your preheated oven and bake for just 5 minutes. This quick bake sets the crust, allowing it to become that delightful crunch we’re going for. After baking, let the crusts cool completely before the next step.
Step 4: Prepare the Cheesecake Filling
While your crusts are cooling, it’s filling time! Grab a large mixing bowl and beat your cream cheese with an electric mixer until it’s super smooth and creamy. A smooth mixture lays the foundation for our luscious cheesecakes. Now, add the heavy cream, powdered sugar, and vanilla extract, and continue beating on medium speed. You want this mixture to thicken up, so don’t rush through it! When it reaches that creamy consistency, add in the Biscoff spread and give it another good mix. You’re looking for a thick, smooth filling that sings of Biscoff joy!
Step 5: Fill the Crusts
Here comes the fun part—filling those crusts! Spoon or pipe the glorious Biscoff cheesecake mixture onto each cooled cookie crust. You can fill each cup nearly to the top, but be careful not to overflow. Each little cheesecake deserves a generous filling, don’t you think?
Step 6: Chill for Perfect Texture
To achieve that dreamy texture, place the mini cheesecakes in the fridge to chill for at least 3 hours. Patience is key here, but if you can manage it, letting them chill overnight really intensifies the flavors! Imagine the luxurious taste when you finally take that first bite.
Step 7: Add the Topping
Once they’ve chilled and set, it’s time for the grand finale! Remove your cheesecakes from the fridge, and sprinkle each one with crumbled Biscoff cookies. This little touch not only looks pretty but adds a nice extra crunch. Now, they’re ready to serve! You can enjoy them right away, or store them in an airtight container in the fridge for whenever that sweet craving hits.
Tips for Success
- Always ensure your cream cheese is at room temperature for easier blending.
- If time allows, chill the cheesecakes overnight for deeper flavors.
- Feel free to double the recipe if you’re expecting guests!
- Use a piping bag for a neat and pretty filling right to the top.
- Store any leftovers in an airtight container to keep them fresh.
Equipment Needed
- Muffin tin: A standard 12-cup muffin tin works best. If you don’t have one, a silicone mold can also do the trick.
- Mixing bowls: A medium and a large bowl will help you make the crust and the filling.
- Electric mixer: Use a hand mixer or stand mixer for smooth results. Whisking by hand is an option, but it’s a workout!
- Spoon or piping bag: A spoon is perfect for filling. A piping bag adds a touch of elegance.
- Spatula: Use it to smooth out the filling for a polished look.
Variations
- Chocolate Biscoff Cheesecake: Add melted chocolate to the filling for a mocha twist! Replace half of the Biscoff spread with chocolate spread for additional richness.
- Vegan Version: Use a dairy-free cream cheese and coconut whipped cream. Swap the Biscoff cookies for vegan-friendly biscuits to keep everything plant-based.
- Gluten-Free Option: Substitute Biscoff cookies with gluten-free cookies or your favorite gluten-free graham crackers, making this recipe accessible for those with dietary restrictions.
- Fruit Topping: Top the cheesecakes with fresh fruit like strawberries or raspberries for a burst of color and freshness!
- Spiced Cheesecake: Add a pinch of cinnamon or nutmeg to the cheesecake filling for a warm, spiced flavor that complements the Biscoff beautifully.
Serving Suggestions
- Pair with Coffee: The rich flavors of the Mini Biscoff Cheesecakes are even better with a warm cup of coffee or espresso.
- Fresh Berries: Serve with a side of fresh berries for a refreshing contrast to the creamy sweetness.
- Elegant Plating: Arrange the cheesecakes on a beautiful platter and garnish with mint leaves for a touch of elegance.
- Sweet Sauce: Drizzle caramel or chocolate sauce over the top for extra indulgence.
- Ice Cream: A scoop of vanilla or caramel ice cream makes for a delightful dessert combination!
FAQs about Mini Biscoff Cheesecakes
Q: Can I make Mini Biscoff Cheesecakes ahead of time?
A: Absolutely! In fact, making them a day in advance allows the flavors to develop. Just keep them covered in the fridge until it’s time to serve.
Q: How do I know when the cheesecakes are set?
A: You’ll know they’re ready when they are firm to the touch and the filling doesn’t jiggle excessively. Chilling for at least 3 hours is essential!
Q: Can I use a different type of cookie for the crust?
A: Definitely! While Biscoff cookies give a unique flavor, you can use graham crackers or even Oreos for something different.
Q: What if I have leftovers? How should I store them?
A: Store any leftover Mini Biscoff Cheesecakes in an airtight container in the fridge. They should stay fresh for up to 5 days—if they last that long!
Q: Is there a way to make these cheesecakes healthier?
A: Yes! You can reduce the sugar by using less powdered sugar in the filling. Additionally, consider substituting low-fat cream cheese and using Greek yogurt to lighten up the recipe!
Final Thoughts
Making these Mini Biscoff Cheesecakes is more than just following a recipe; it’s about creating sweet moments that bring joy. From the first stir of cookie crumbs to the final sprinkle of Biscoff on top, each step is a celebration of flavor and love. Whether you share them with family or keep them all to yourself, they’re sure to bring smiles. So grab your apron, embrace the whirlwind of life, and whip up a batch of these delightful desserts! Trust me, every bite will remind you of the sweet, small pleasures we cherish the most.
PrintMini Biscoff Cheesecakes
Mini Biscoff Cheesecakes are deliciously sweet, easy-to-make desserts featuring a crunchy Biscoff cookie crust, rich cream cheese filling, and topped with crumbled Biscoff cookies.
- Prep Time: 20 minutes
- Cook Time: 5 minutes
- Total Time: 3 hours 25 minutes
- Yield: 12 mini cheesecakes 1x
- Category: Dessert
- Method: Baking and Chilling
- Cuisine: American
- Diet: Vegetarian
Ingredients
- 1 1/2 cups Biscoff cookie crumbs
- 1/4 cup melted butter
- 2 cups cream cheese
- 1 cup heavy cream
- 1/2 cup powdered sugar
- 1 teaspoon vanilla extract
- 1/2 cup Biscoff spread
- 1/4 cup Biscoff cookies, crumbled
Instructions
- Preheat your oven to 350°F (175°C) and prepare a 12-cup muffin tin by lining each cup with paper liners.
- In a medium bowl, combine the Biscoff cookie crumbs and melted butter, stirring until the crumbs are evenly coated and the mixture begins to hold together.
- Spoon about one tablespoon of the cookie crumb mixture into each muffin cup and press it down firmly with the back of a spoon to create a solid crust.
- Place the muffin tin in the oven and bake for 5 minutes to set the crust. After baking, remove the tin from the oven and allow the crusts to cool completely.
- While the crusts cool, beat the cream cheese in a large mixing bowl with an electric mixer until smooth and creamy.
- Add the heavy cream, powdered sugar, and vanilla extract to the cream cheese and beat on medium speed until the mixture thickens and becomes smooth.
- Add the Biscoff spread to the mixture and beat again until fully incorporated and the filling is thick and smooth.
- Spoon or pipe the Biscoff cheesecake mixture onto each cooled cookie crust, filling each cup almost to the top.
- Smooth the tops of the cheesecakes with a spatula, making sure they are even.
- Place the mini cheesecakes in the fridge to chill for at least 3 hours, or until fully set.
- Once chilled, remove the cheesecakes from the fridge and top each one with crumbled Biscoff cookies.
- Serve immediately or store the cheesecakes in an airtight container in the refrigerator until ready to enjoy.
Notes
- Make sure the cream cheese is at room temperature for easier mixing.
- You can substitute the Biscoff spread with any other cookie spread if desired.
- For a stronger flavor, let the cheesecakes chill overnight before serving.
Nutrition
- Serving Size: 1 cheesecake
- Calories: 300
- Sugar: 16g
- Sodium: 250mg
- Fat: 22g
- Saturated Fat: 12g
- Unsaturated Fat: 8g
- Trans Fat: 0g
- Carbohydrates: 26g
- Fiber: 1g
- Protein: 4g
- Cholesterol: 60mg