Introduction to Oreo Rice Krispie Treats
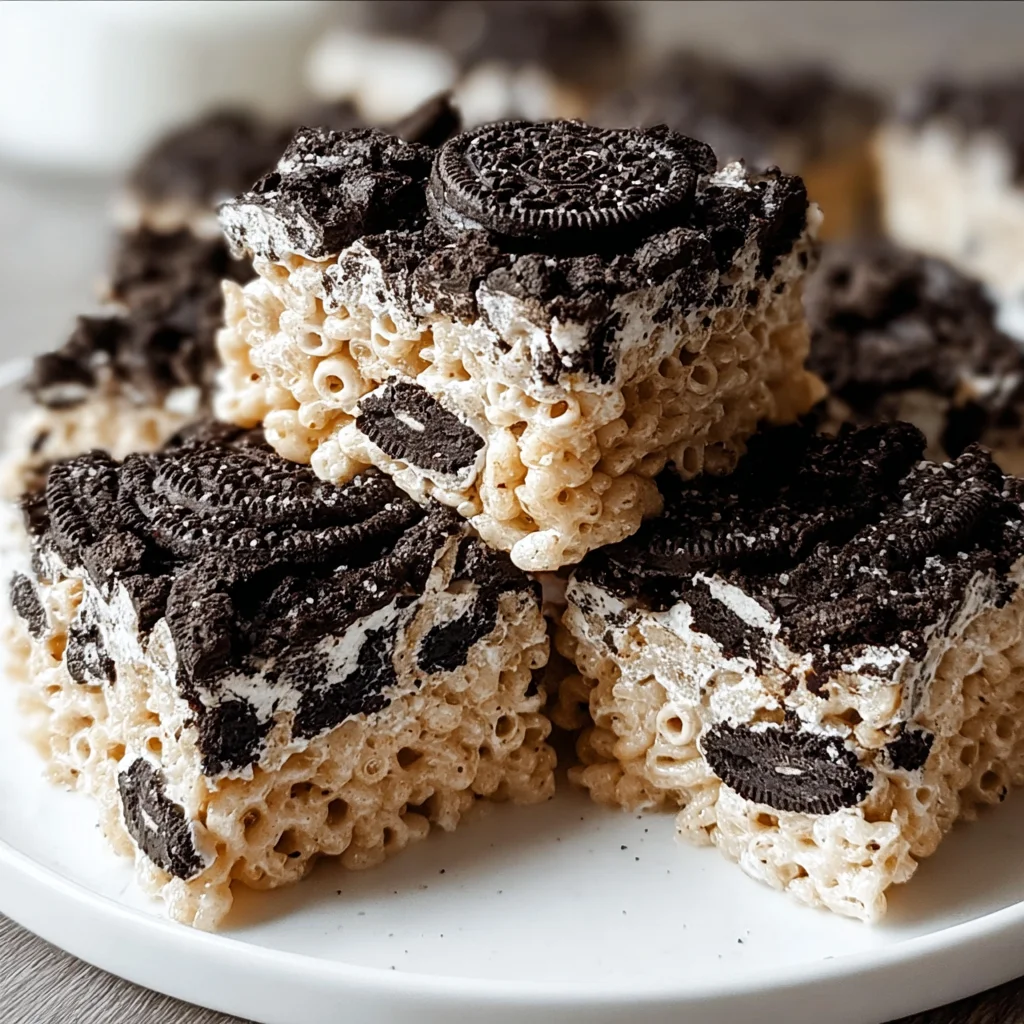
As a busy mom, I know finding the perfect dessert can feel like searching for a needle in a haystack. That’s where these Oreo Rice Krispie Treats come in! They’re not just a nostalgic childhood snack; they’re a fun twist that brings smiles all around the table. With the crunch of Rice Krispies and the rich flavor of Oreos, these treats manage to be both simple and indulgent. Plus, they fit perfectly into your hectic schedule, requiring just a quick stovetop whip-up. Trust me, you’ll want to keep this recipe close—it’s a delightful crowd-pleaser!
Why You’ll Love This Oreo Rice Krispie Treats
These Oreo Rice Krispie Treats are a lifesaver when your sweet tooth strikes! They’re quick to whip up—ready in just 15 minutes! With no baking involved, you can enjoy deliciousness without the hassle. Each bite melts in your mouth with a perfect blend of crunch and creaminess. Plus, they’re a fun way to engage the kids in the kitchen and create lasting memories together. What’s not to love?
Ingredients for Oreo Rice Krispie Treats
To create these delightful Oreo Rice Krispie Treats, you’ll need a handful of simple ingredients. Each one plays a special role in making these treats irresistible!
- Rice Krispies cereal: This crunchy base provides that signature texture and quick crunch. It’s light yet satisfying!
- Oreo cookies: The star of the show! Roughly chopped, these add a burst of chocolaty goodness and that familiar creamy filling. Don’t skip this one!
- Mini marshmallows: These sweet, gooey wonders bind everything together, creating that oh-so-soft emotional center of the treat.
- Unsalted butter: Melting into the mixture, it adds richness and a beautiful glossy finish. Unsalted is key here to control the flavors.
- Vanilla extract: A splash elevates the overall flavor profile, harmonizing the sweetness and the cookie’s depth.
- Extra crushed Oreos (optional): A delicious topping that adds texture and looks stunning on presentation. Who can resist more Oreos?
If you’re intrigued by variations or substitutions, you might try using gluten-free Rice Krispies or even experimenting with flavored marshmallows for a fun twist. Exact measurements are waiting at the bottom of the article if you’re ready to dive into this delicious adventure!

How to Make Oreo Rice Krispie Treats
Prepare the Baking Dish
Start by grabbing a 9×13-inch baking dish. You can grease it lightly with butter or a non-stick spray. If you want an even easier removal, line the dish with parchment paper, leaving some overhang. This little trick will help you lift out the bars smoothly later, making your serving a breeze. Trust me, tackling the cleanup before you dive into deliciousness is half the fun!
Melt the Butter
In a large pot, toss in your butter and turn the heat to low. Keeping the heat low is crucial; it prevents the butter from burning and turning brown. We want it to melt gently, becoming a smooth pool of creamy goodness. Stir it occasionally, and you’ll be rewarded with the delightful aroma of melting butter wafting through your kitchen!
Melt the Marshmallows
Next, it’s time to add those mini marshmallows into the melted butter. Stir them continuously until they completely melt down into a gooey, smooth mixture. This step is key; if you don’t stir enough, you might end up with sticky lumps. Aim for that velvety texture that makes these Oreo Rice Krispie Treats so addictive. You’ll know it’s ready when it looks like melted marshmallow magic!
Combine Ingredients
Now comes the fun part! Remove the pot from the heat and gently fold in the Rice Krispies cereal and chopped Oreos. Be patient as you mix; we want every Rice Krispie and Oreo to capture that sweet, melted marshmallow goodness. The key here is to fold, not stir aggressively. Overmixing can crush the Oreos too much, losing their delightful texture. You’re aiming for a delightful combination that’s beautifully coated but not a homogenous mass!
Transfer and Set
Once everything’s combined, pour the mixture into your prepared baking dish. Using a spatula, gently press it down to create an even layer. Don’t pack it too tightly; otherwise, your Oreo Rice Krispie Treats will be as dense as a brick! After spreading it evenly, let the treats sit at room temperature for about an hour. Patience is key—allowing them to set properly will ensure they hold together beautifully when sliced!
Tips for Success
- Use fresh mini marshmallows for the best gooey consistency.
- Mix gently to keep those Oreo chunks nice and intact.
- Don’t skip the parchment paper; it makes removal a breeze!
- Feel free to customize toppings—drizzled chocolate is a fantastic add-on!
- Store leftovers in an airtight container to keep them fresh.
Equipment Needed
- Large pot: A sturdy pot for melting. Alternatively, a microwave-safe bowl works in a pinch!
- Spatula: A silicone spatula makes mixing easy; however, any sturdy spatula will do.
- Baking dish (9×13-inch): If you don’t have one, a similar-sized pan can serve just as well.
- Parchment paper: This is optional but helpful for easy removal.
Variations on Oreo Rice Krispie Treats
- Peanut Butter Delight: Add a scoop of creamy peanut butter to the melted marshmallows for a nutty twist!
- Mint Oreo Treats: Swap regular Oreos for Mint Oreos to give a refreshing minty flavor.
- Chocolate Drizzle: After setting, drizzle melted chocolate over the top for extra decadence.
- Nut-Free Option: Replace regular butter with dairy-free alternatives if you’re catering to allergies.
- Rainbow Sprinkles: Add colorful sprinkles in the mix for a fun presentation, especially for kids’ parties.
Serving Suggestions with Oreo Rice Krispie Treats
- Pair these delightful Oreo Rice Krispie Treats with a scoop of vanilla ice cream for a heavenly dessert.
- Enjoy with a cold glass of milk to complement the sweetness and enhance the flavors.
- Serve on a colorful plate and add a sprinkle of extra crushed Oreos for a fun presentation.
- Consider them as a perfect snack for movie nights or school lunches!
FAQs about Oreo Rice Krispie Treats
Curious about these delightful Oreo Rice Krispie Treats? Here are some common questions and answers that may help you out!
Can I make these treats ahead of time?
Absolutely! You can make Oreo Rice Krispie Treats a day in advance and store them in an airtight container. They’ll stay fresh and delicious for a few days. Just make sure to keep them cool to avoid melting!
What can I use instead of Rice Krispies?
If you’re looking to switch things up, try using Cornflakes or another crispy cereal. You can even use gluten-free options for a similar crunch, so no one misses out on the fun!
How do I store leftovers?
To keep your treats fresh, store them in an airtight container at room temperature. Avoid refrigeration as it can make them too hard. You’ll want them soft and chewy!
Can I freeze Oreo Rice Krispie Treats?
Yes! These treats freeze beautifully. To freeze, cut them into bars and wrap each piece in plastic wrap before placing them in a freezer-safe bag. They’ll remain tasty for up to two months.
Can I add other mix-ins or toppings?
Definitely! Feel free to get creative with mix-ins, like nuts or different flavors of marshmallows. You can also top them with melted chocolate or sprinkles for extra flair. The only limit is your imagination!
Final Thoughts on Oreo Rice Krispie Treats
Creating these Oreo Rice Krispie Treats is not just about satisfying a sweet tooth; it’s about making memories in the kitchen. Each batch you whip up brings a burst of joy, whether it’s for a family gathering or a cozy movie night. The blend of textures and flavors appeals to everyone, bringing smiles to faces big and small. I love how simple ingredients can come together to create such deliciousness. So, roll up your sleeves, gather your loved ones, and let’s start making some sweet memories together! You won’t regret diving into this delightful treat!
PrintOreo Rice Krispie Treats are a must-try dessert!
Oreo Rice Krispie Treats are a delicious and fun twist on the classic Rice Krispie treat, combining crunchy cereal, creamy marshmallows, and the decadent flavor of Oreo cookies.
- Prep Time: 10 minutes
- Cook Time: 5 minutes
- Total Time: 15 minutes
- Yield: 12 bars 1x
- Category: Dessert
- Method: Stovetop
- Cuisine: American
- Diet: Vegetarian
Ingredients
- 6 cups Rice Krispies cereal
- 20 Oreo cookies, roughly chopped
- 1 (10 oz) bag mini marshmallows
- 4 tablespoons unsalted butter
- 1 teaspoon vanilla extract
- Optional: extra Oreos crushed on top
Instructions
- Prepare a 9×13-inch baking dish by greasing lightly or lining with parchment paper.
- In a large pot, melt butter over low heat.
- Add marshmallows and stir until completely melted and smooth.
- Stir in vanilla extract.
- Remove from heat and quickly fold in Rice Krispies cereal and chopped Oreos until evenly coated.
- Transfer mixture into the prepared pan, pressing down gently with a spatula. Do not pack too firmly, or bars will be too dense.
- Sprinkle extra crushed Oreos on top if desired.
- Let set for about 1 hour at room temperature before slicing into bars.
Notes
- For best results, use fresh marshmallows.
- Optional toppings can include drizzled chocolate or additional crushed Oreos.
Nutrition
- Serving Size: 1 bar
- Calories: 210
- Sugar: 8g
- Sodium: 100mg
- Fat: 8g
- Saturated Fat: 5g
- Unsaturated Fat: 0g
- Trans Fat: 0g
- Carbohydrates: 31g
- Fiber: 1g
- Protein: 1g
- Cholesterol: 15mg