
Introduction to Cherry Pistachio Cheesecake
Hey there, fellow food lovers! If you’re like me, dessert is often the best part of any meal, especially when it’s a stunning Cherry Pistachio Cheesecake. This recipe is not only a visual showstopper but also packed with flavor, combining rich cream cheese with the sweetness of cherries and the crunch of pistachios. Whether you’re looking to impress guests or just treat yourself after a busy day, this cheesecake is the perfect solution. It’s simple, yet elegant—just what a busy mom or professional needs to brighten up any day!
Why You’ll Love This Cherry Pistachio Cheesecake
This Cherry Pistachio Cheesecake is a delightful mix of ease, speed, and taste that will captivate your family and friends. It takes just a little prep time, allowing you to focus on those you love. The balanced flavors of tart cherries and nutty pistachios make it a memorable treat for any occasion. Plus, its stunning appearance will have everyone reaching for seconds, making it the star of your dessert table!
Ingredients for Cherry Pistachio Cheesecake
Now let’s talk about the ingredients that come together to create this delightful Cherry Pistachio Cheesecake. Each element brings its unique flavor and texture to the dessert, making it a true culinary masterpiece. Remember, the exact quantities are listed at the bottom of the article for your convenience.
- Graham cracker crumbs: These form the base of our crust, adding a sweet crunch that complements the creamy filling.
- Unsalted butter: Melted to bind the crumbs together, it adds richness without overpowering the other flavors.
- Cream cheese: The star of the cheesecake! It gives that heavenly smooth texture that melts in your mouth with every bite.
- Granulated sugar: Sweetens the cheesecake just enough, balancing the tartness of the cherries beautifully.
- Vanilla extract: A splash of this adds a warm, inviting flavor that enhances the overall taste.
- Eggs: These are essential for structure. They help create that lovely creamy consistency we all crave in a cheesecake.
- Sour cream: Adds a tangy depth and a layer of creaminess that elevates the cheesecake experience.
- Fresh cherries: These gems provide a burst of juicy flavor and a gorgeous pop of color, making your cheesecake visually appealing.
- Pistachios: Crunchy and nutty, they add texture and a delightful contrast to the creaminess of the filling. Plus, they look fantastic sprinkled on top!
By using these ingredients, you’ll create a cheesecake that’s rich, flavorful, and unforgettable. Don’t hesitate to explore substitutions based on your preferences—like using a different nut for the crust or swapping in frozen cherries if fresh isn’t available. Cooking is all about experimenting, after all!

How to Make Cherry Pistachio Cheesecake
Ready to whip up this delicious Cherry Pistachio Cheesecake? Let’s dive straight into the process. Just follow these easy steps, and you’ll be amazed at how simple it is to create this decadent dessert.
Step 1: Prepare the Crust
Start by mixing graham cracker crumbs and melted butter in a medium bowl. This mixture should resemble wet sand. Now, press it firmly into the bottom and up the sides of a 9-inch springform pan. Don’t be shy—make sure it’s packed tight! This is where the magic starts, so pop the pan into the fridge for about 30 minutes to let it set.
Step 2: Create the Cheesecake Batter
In a large mixing bowl, beat the softened cream cheese, sugar, and vanilla extract until the mixture is smooth and creamy. This step is crucial, so take your time ensuring there are no lumps. Once that’s done, add the eggs one at a time, mixing well after each addition. Lastly, fold in the sour cream for that extra creaminess. Oh, I can already smell the goodness!
Step 3: Mix the Cherries and Pistachios
Now for the fun part—fold in 1½ cups of the fresh cherries and 1/3 cup of chopped pistachios into your creamy cheesecake batter. Be gentle here; we want the cherries to stay whole for bursts of flavor later. For a delightful swirl, warm up some cherry preserves slightly. Then, gently marble it into the batter to create beautiful swirls.
Step 4: Bake the Cheesecake
Carefully pour the cheesecake batter into your prepared crust, smoothing the top with a spatula. Bake at 325°F for 60 to 70 minutes. The edges will be set while the center should jiggle slightly. When the time is up, turn off the oven, crack the door open a little, and let the cheesecake cool in there for about an hour. This helps prevent cracks. Trust me; the aroma wafting through your kitchen will be heavenly!
Step 5: Cool and Refrigerate
Once cooled, remove the cheesecake from the oven and let it cool completely at room temperature. This step is essential for achieving that perfect creamy texture. Cover it and refrigerate for at least 4 hours or overnight if you can wait. I often make mine a day in advance to ensure all the flavors come together beautifully.
Step 6: Add the Whipped Cream
Before serving, whip some heavy cream with powdered sugar until it reaches stiff peaks. Feel free to use a hand mixer for this; it’s so much faster! Spread or pipe the whipped cream on top of your chilled cheesecake. It adds a light and airy touch, balancing out the richness of the cheesecake.
Step 7: Garnish and Serve
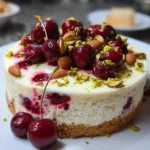
Finally, for that finished touch, garnish with the remaining fresh cherries, a sprinkle of chopped pistachios, and a dash of lime zest for brightness. Slice that gorgeous Cherry Pistachio Cheesecake and serve chilled. Not only will it taste amazing, but the presentation will also have your family and friends in awe!
Tips for Success
- Always use room temperature cream cheese for a smoother batter.
- To prevent cracks, avoid overmixing. Just blend until smooth.
- Consider using a water bath when baking to keep the cheesecake moist.
- Ensure your cherries are pitted completely; no one wants a surprise!
- Make this cheesecake a day in advance for the best flavor!
Equipment Needed
- 9-inch springform pan: Essential for easy removal. A regular cake pan can work, too, but presentation may suffer.
- Mixing bowls: Use various sizes. A large one for the batter and a smaller one for the crust.
- Electric mixer: A hand mixer speeds up that creamy batter. A whisk can be used, but be prepared for a workout!
- Spatula: For folding in ingredients and smoothing the batter. A silicone spatula is great for scraping.
Variations
- Chocolate Cherry Pistachio Cheesecake: Add some melted dark chocolate to the batter for a rich twist!
- Vegan Version: Swap cream cheese for a plant-based cream cheese and use aquafaba instead of eggs for a creamy texture.
- Gluten-Free Crust: Use gluten-free graham cracker crumbs or ground almonds mixed with coconut oil as a base.
- Mixed Berry Variation: Replace cherries with a combination of blueberries and raspberries for a colorful cheesecake.
- Reduced Sugar Option: Use a sugar substitute like stevia or monk fruit to make a lower-sugar version without compromising flavor.
Serving Suggestions for Cherry Pistachio Cheesecake
- Pair this cheesecake with a cup of freshly brewed coffee for a delightful afternoon treat.
- Serve with a dollop of vanilla ice cream on the side for an extra layer of indulgence.
- For a refreshing twist, complement with fresh mint leaves for a pop of color.
- Drizzle with chocolate or caramel sauce for a rich finishing touch.
- Present on a beautiful platter, garnished with more cherries and pistachios for added visual appeal.
FAQs about Cherry Pistachio Cheesecake
Got questions about making Cherry Pistachio Cheesecake? You’re in good company! Here are some common queries, along with my insights to help you create this delightful dessert effortlessly.
Can I use frozen cherries instead of fresh?
Absolutely! Just make sure to thaw and drain them well before adding to your cheesecake batter. Fresh cherries do taste better, but frozen can work in a pinch!
How do I prevent cracks in my cheesecake?
Preventing cracks is easier than you think! Avoid overmixing your batter and consider using a water bath during baking. This helps keep the temperature steady and moist, ensuring a smooth surface.
Can I make this cheesecake in advance?
Yes! In fact, making it the day before you plan to serve it is highly recommended. This allows the flavors to develop further and makes for a more delicious dessert.
What’s the best way to store leftovers?
To keep your Cherry Pistachio Cheesecake fresh, cover it tightly with plastic wrap or place it in an airtight container. It can be stored in the refrigerator for up to five days.
Can I swap out the pistachios for another nut?
Definitely! Almonds, walnuts, or even hazelnuts can work as delicious alternatives. Just remember to chop them finely for that perfect texture in your cheesecake!
Final Thoughts
Creating this Cherry Pistachio Cheesecake is more than just baking; it’s an experience filled with joy and creativity. Each layer represents a moment spent in the kitchen, blending flavors and creating memories. When I serve this stunning dessert, it’s like presenting my love and effort on a plate. It brings my family together, sparking smiles and laughter over that creamy, rich slice. Whether it’s for a celebration or a simple family dinner, this cheesecake will surely leave a lasting impression. It’s comforting to know that something so delightful can come from my own hands!
PrintCherry Pistachio Cheesecake: A Delightful Twist to Impress!
A delicious and visually stunning cherry pistachio cheesecake that combines rich cream cheese with fresh cherries and crunchy pistachios.
- Prep Time: 30 minutes
- Cook Time: 60-70 minutes
- Total Time: Overnight (including cooling and chilling)
- Yield: 12 servings 1x
- Category: Dessert
- Method: Baking
- Cuisine: American
- Diet: Vegetarian
Ingredients
- 2 cups graham cracker crumbs
- 1/2 cup unsalted butter, melted
- 3 packages (24 oz) cream cheese, softened
- 1 cup granulated sugar
- 1 teaspoon vanilla extract
- 3 large eggs
- 1 cup sour cream
- 2 cups fresh cherries, pitted and halved
- 1/2 cup pistachios, chopped
Instructions
- Combine graham cracker crumbs with melted butter in a bowl. Press the mixture firmly into the bottom and up the sides of a 9-inch springform pan. Refrigerate for 30 minutes to set.
- Beat cream cheese, sugar, and vanilla extract until smooth and creamy. Add eggs one at a time, beating well after each addition. Fold in sour cream until fully incorporated.
- Gently fold 1½ cups of cherries and 1/3 cup of chopped pistachios into the cheesecake batter. Warm cherry preserve slightly and swirl into the batter for beautiful marbling effect.
- Pour the batter into the prepared crust. Bake at 325°F for 60-70 minutes until the edges are set but the center still jiggles slightly. Turn off the oven, crack the door open, and let the cheesecake cool in the oven for 1 hour.
- Remove from oven and cool completely at room temperature. Refrigerate for at least 4 hours or overnight for best results.
- Whip heavy cream with powdered sugar until stiff peaks form. Pipe or spread the whipped cream on top of the chilled cheesecake.
- Garnish with remaining fresh cherries, chopped pistachios, and lime zest. Slice and serve chilled for the best flavor and texture.
Notes
- For best results, make this cheesecake a day ahead to allow flavors to develop fully.
- To prevent cracks, avoid overmixing the batter and use a water bath when baking.
- Fresh cherries work best, but frozen cherries can be used if thawed and well-drained.
- For a deeper flavor, try using brown sugar in the crust instead of regular graham crackers.
- Store leftover cheesecake covered in the refrigerator for up to 5 days.
Nutrition
- Serving Size: 1 slice
- Calories: 400
- Sugar: 25g
- Sodium: 300mg
- Fat: 25g
- Saturated Fat: 15g
- Unsaturated Fat: 5g
- Trans Fat: 0g
- Carbohydrates: 35g
- Fiber: 2g
- Protein: 6g
- Cholesterol: 100mg