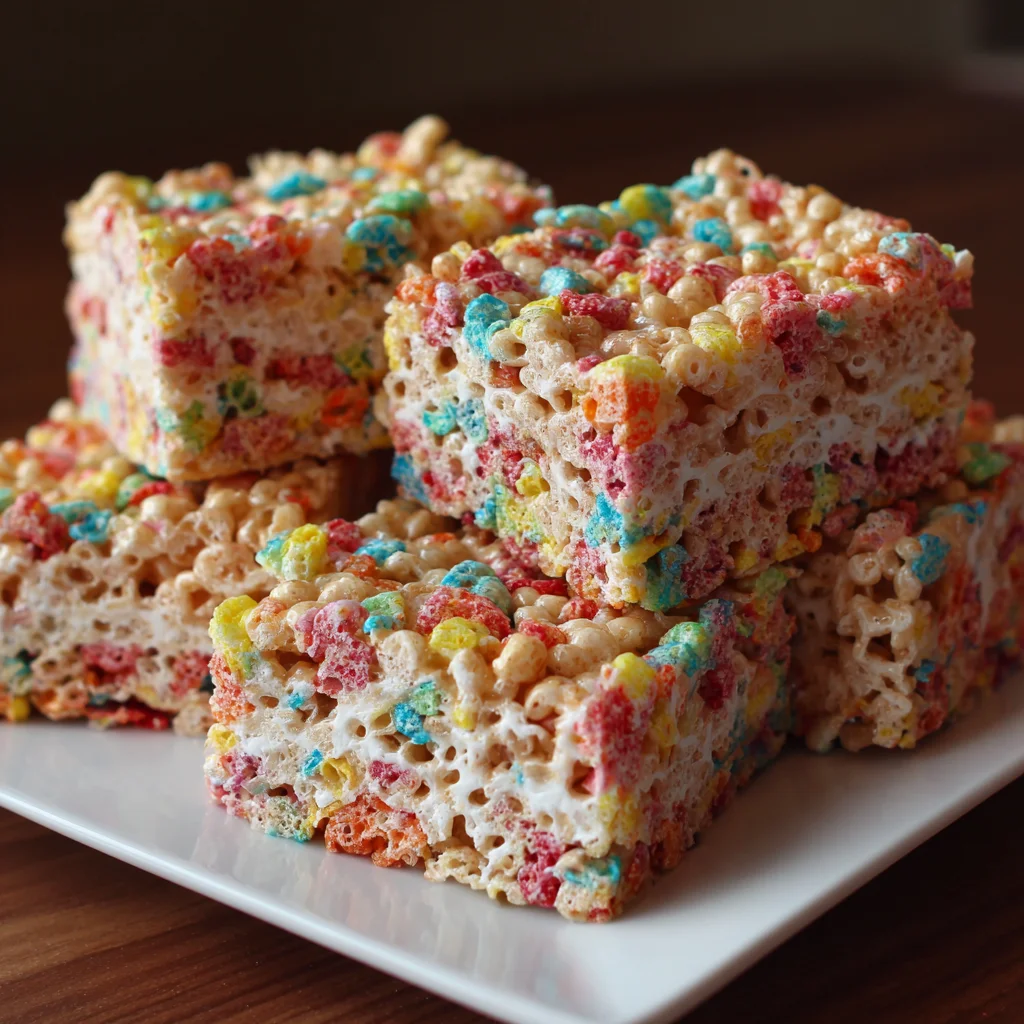
Introduction to Fruity Pebble Krispie Treats
There’s nothing quite like diving into a batch of Fruity Pebble Krispie Treats after a long day. As a busy mom, I know how precious every moment can be. These colorful, chewy delights not only satisfy a sweet tooth but also bring smiles all around. With just a few ingredients and minimal effort, you can whip up these tasty treats that even picky eaters will love! Imagine a dessert that’s as fun to make as it is to eat—this is it. Let’s sprinkle a little joy into your kitchen with these cheerful snacks!
Why You’ll Love This Fruity Pebble Krispie Treats
These Fruity Pebble Krispie Treats are your ticket to sweet bliss! With just a handful of ingredients, they come together in under thirty minutes, making them a perfect quick solution for those hectic days. They’re irresistibly chewy and bursting with colorful flavor. Plus, they require no baking—just a few simple steps, and you’ll have a crowd-pleaser that brightens everyone’s day. Who could resist?
Ingredients for Fruity Pebble Krispie Treats
Gather your ingredients, and let the fun begin! Here’s what you’ll need for your Fruity Pebble Krispie Treats:
- Salted butter: Provides richness and helps bind the ingredients together, giving that deliciously chewy texture.
- Mini marshmallows: The stars of this recipe! They melt down to create that gooey goodness we love in Rice Krispie treats.
- Pure vanilla extract: A splash of vanilla elevates the flavors, adding warmth and depth to your treats.
- Fruity Pebbles cereal: The joyful crunch that makes these treats pop with color and flavor. You can absolutely find it at your local grocery store!
Feel free to mix things up with optional ingredients or substitutions! For instance, you could try using unsalted butter if you prefer more control over the saltiness. If you’re feeling adventurous, toss in some chocolate chips or nuts for extra texture. These delightful treats can even be made gluten-free by choosing a suitable cereal. You’ll find the exact measurements down below, perfect for printing or saving.

How to Make Fruity Pebble Krispie Treats
Now that we’ve got our ingredients, let’s dive into making these delightful Fruity Pebble Krispie Treats! Follow these simple steps, and you’ll have a colorful, chewy dessert that’s sure to bring smiles.
Step 1: Prepare the Baking Dish
First things first, grab a 9-inch square baking dish. Line it with parchment paper, leaving some overhang on the sides. This makes it easier to lift out your treats once they’ve set. Trust me, this little trick saves time and keeps cleanup a breeze!
Step 2: Melt the Butter and Marshmallows
In a large saucepan, melt the salted butter over medium heat. As it melts, drop in all but 1 cup of the mini marshmallows. Stir gently with a spatula until everything is melted and smooth. This is where the magic begins! Keep an eye on it; you don’t want burnt marshmallows. Dropping the heat to low helps.
Step 3: Mix in Vanilla and Cereal
Once your marshmallow mixture is gooey and delightful, remove it from heat. Stir in that teaspoon of pure vanilla extract; the aroma alone will make you smile! Gently fold in the Fruity Pebbles and the remaining marshmallows. This is the fun part—watch those colors blend! Be careful not to overmix; we want that tasty crunch to shine through.
Step 4: Transfer to Baking Dish and Spread
Now, pour the mixture into your prepared baking dish. Using your fingertips, press the mixture down gently. Remember, packing it too tightly makes it hard as a rock, and we want these treats to stay chewy! Just spread it out evenly, and it will do the rest.
Step 5: Allow to Set and Enjoy
Finally, let your Fruity Pebble Krispie Treats sit at room temperature for about an hour. This allows them to set perfectly. Once they have cooled, lift them out of the dish using the parchment overhang. Cut into squares, and enjoy these sweet, colorful bites! You might even want to share, but I won’t tell if you don’t.
Tips for Success
- Keep the heat low when melting marshmallows to avoid burning.
- Don’t pack the mixture too tightly for extra chewiness!
- Use silicone spatulas for easy mixing and cleanup.
- Let the treats cool completely for best slicing results.
- Store leftovers in an airtight container to maintain freshness.
- Mix in some rainbow sprinkles or chocolate chips for a fun twist!
Equipment Needed for Making Fruity Pebble Krispie Treats
- 9-inch square baking dish: A glass dish works well, but metal is fine too.
- Large saucepan: Choose one with a sturdy base to prevent burning.
- Spatula: A silicone one is great for easy mixing.
- Parchment paper: Wax paper can be an alternative, but won’t release as easily.
Variations of Fruity Pebble Krispie Treats
- Chocolate Lovers: Substitute half of the Fruity Pebbles with chocolate cereal for a delicious duo of flavors.
- Nutty Crunch: Add chopped nuts like almonds or walnuts for an extra crunch and nutty flavor contrast.
- Dairy-Free Version: Use dairy-free butter and marshmallows to create a suitable treat for those avoiding dairy.
- Chocolate Drizzle: Drizzle melted chocolate over the top for a decadent finish that makes these treats even more irresistible.
- Rainbow Treats: Mix in colorful sprinkles or edible glitter to give your treats an extra festive look, perfect for celebrations!
Serving Suggestions with Fruity Pebble Krispie Treats
- Pair with Milk: A tall glass of cold milk brings out the sweetness perfectly.
- Ice Cream Delight: Serve the treats as a sundae topping with a scoop of vanilla ice cream.
- Colorful Presentation: Arrange them on a vibrant platter for parties, adding some fresh fruit alongside.
- Perfect for Lunchboxes: Individually wrap each treat for a fun lunch snack that kids will adore!
FAQs about Fruity Pebble Krispie Treats
Can I make these Fruity Pebble Krispie Treats ahead of time?
Yes, you can! Just store them in an airtight container at room temperature. They stay fresh for up to a week, making them perfect for prepping snacks in advance.
Can I use other cereals for this recipe?
Absolutely! While Fruity Pebbles are the star here, you can swap it out with other cereals like Cocoa Pebbles or Rice Krispies. The fun flavors will still shine through!
What’s the best way to cut these treats?
To cut them easily, let them cool completely. Use a sharp knife or pizza cutter for clean edges. You could also dampen the knife slightly to help with the stickiness.
Are Fruity Pebble Krispie Treats gluten-free?
Fruity Pebbles are generally gluten-free, but always check the packaging to confirm as ingredients may vary. If in doubt, opt for a gluten-free cereal that you love!
How can I get creative with these treats?
The sky’s the limit! Mix in chocolate chips, nuts, or even drizzle some caramel or chocolate on top. You can also layer them with other dessert bars for an interesting twist!
Final Thoughts
Making Fruity Pebble Krispie Treats is not just about indulging in a sweet treat; it’s about bringing joy and laughter into your kitchen. As you whip up this colorful confection, you create lasting memories with your loved ones. There’s something magical about crafting a simple dessert that delights both the young and the young at heart. So, gather your family and celebrate the little moments together, one delicious square at a time. These treats are more than just dessert; they’re a sugary hug that warms the soul and brightens even the busiest days!
PrintFruity Pebble Krispie Treats that Everyone Will Love!
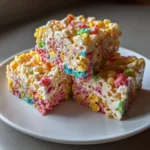
Fruity Pebble Krispie Treats are a colorful, chewy dessert made with crunchy cereal and marshmallows that everyone will love!
- Prep Time: 15 minutes
- Cook Time: 10 minutes
- Total Time: 1 hour 25 minutes
- Yield: 12 servings 1x
- Category: Dessert
- Method: Stovetop
- Cuisine: American
- Diet: Vegetarian
Ingredients
- 6 Tablespoons salted butter
- 16 ounce bag mini marshmallows divided
- 1 teaspoon pure vanilla extract
- 6 cups Fruity Pebbles cereal
Instructions
- Line a 9-inch square baking dish with parchment paper. Set aside.
- In a large saucepan, melt butter over medium heat. Once melted, add in all but 1 cup of the marshmallows. Reduce heat to low and continue stirring until completely melted.
- Remove from heat and stir in the vanilla. Add the cereal and the remaining 1 cup of marshmallows and gently stir until combined.
- Pour into the prepared baking dish. Press GENTLY with your fingertips just until completely spread out (the harder you pack them in, the harder they are to eat).
- Allow to set, about 1 hour. Cut and enjoy!
Notes
- For best results, avoid packing the mixture too tightly.
- Store in an airtight container to keep them fresh.
Nutrition
- Serving Size: 1 piece
- Calories: 150
- Sugar: 14g
- Sodium: 60mg
- Fat: 5g
- Saturated Fat: 3g
- Unsaturated Fat: 1g
- Trans Fat: 0g
- Carbohydrates: 24g
- Fiber: 0g
- Protein: 1g
- Cholesterol: 15mg