Introduction to Chicken Kiev with Garlic Butter Recipe
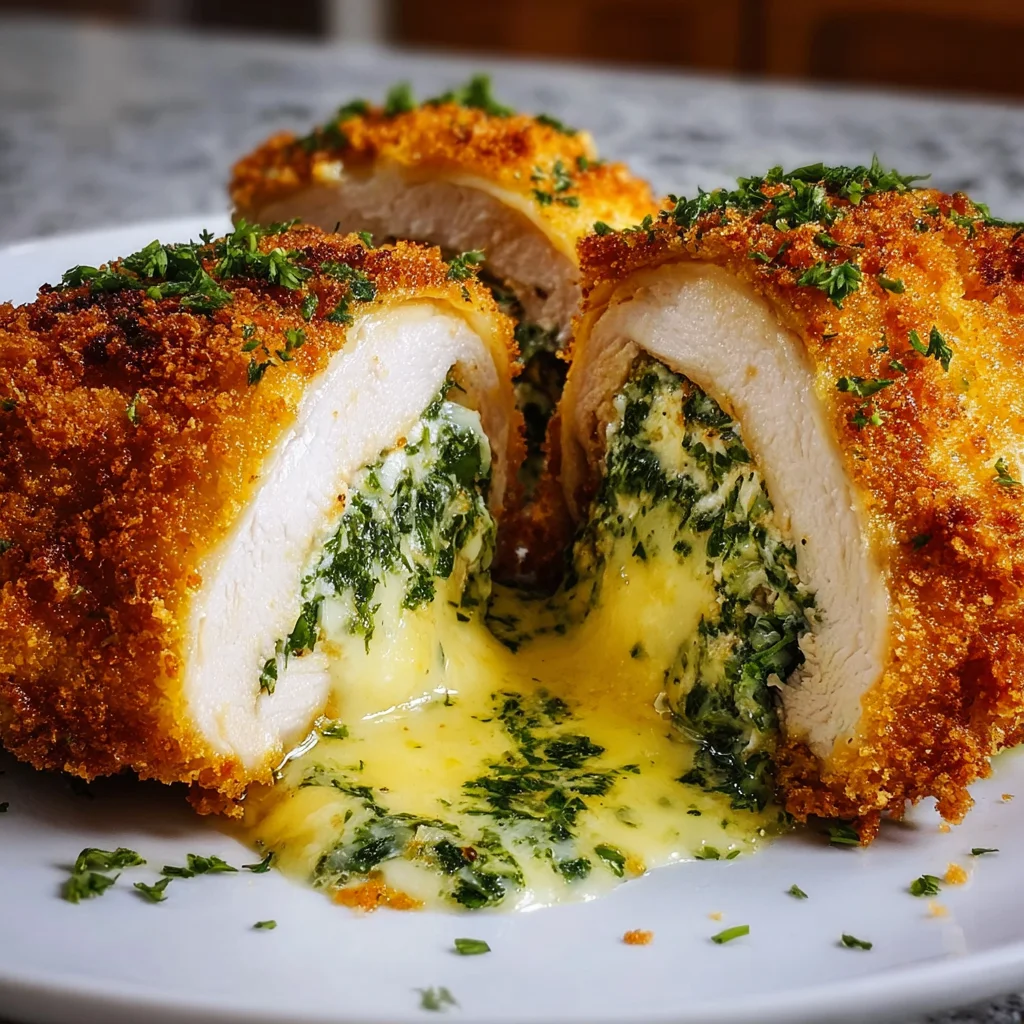
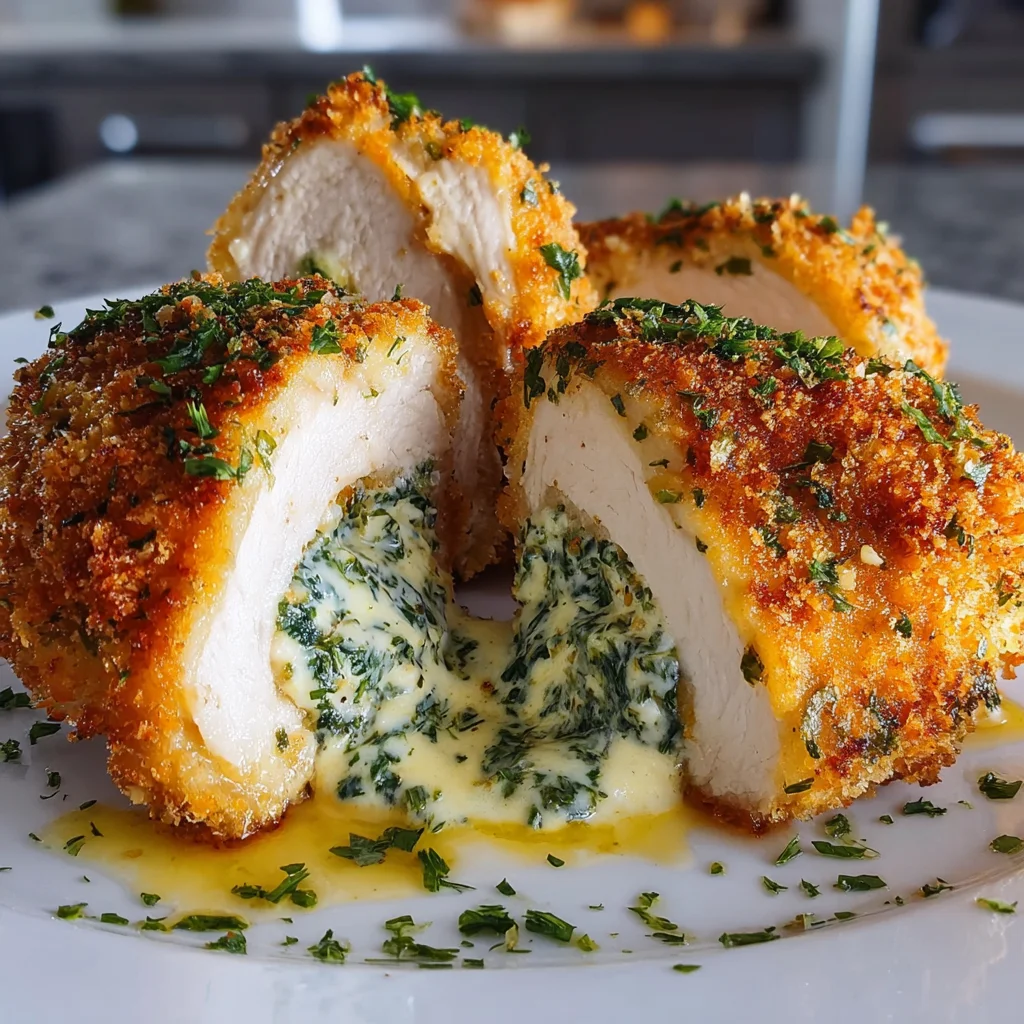
Welcome to my kitchen! Today, I’m excited to share my Chicken Kiev with Garlic Butter Recipe, a favorite that never fails to impress. Whether you’re a busy mom rushing between errands or a professional juggling meetings, this dish provides a quick yet flavorful solution for dinner. Imagine the crunch of the exterior giving way to a buttery, garlicky center—it’s pure comfort! It’s not just a meal; it’s an experience that brings joy to your family table. Let’s dive in and master this delightful dish together!
Why You’ll Love This Chicken Kiev with Garlic Butter Recipe
This Chicken Kiev with Garlic Butter Recipe is your ticket to easy, delicious home cooking. It combines tender chicken breasts with a luscious garlic butter filling that’s simply irresistible. Plus, it’s quick to prepare—perfect for those hectic weeknights when you need a meal that pleases everyone. With just a handful of ingredients and a cooking method that transforms your kitchen into a cozy eatery, you’ll be hooked!
Ingredients for Chicken Kiev with Garlic Butter Recipe
Gathering the right ingredients is the first step towards creating that heavenly Chicken Kiev with Garlic Butter. Here’s what you’ll need:
- Unsalted Butter: The star player! It’s perfect for making the garlic butter filling that melts beautifully during cooking.
- Garlic: Freshly minced garlic adds amazing flavor. It’s the essence of the dish, giving it that signature punch.
- Fresh Parsley: This herb adds a pop of color and a fresh taste to the butter. Feel free to swap parsley with herbs like thyme or basil for a twist.
- Lemon Juice: Just a splash helps brighten the garlic butter and balances the richness.
- Salt and Black Pepper: Essential seasonings that enhance all the flavors. You can adjust the quantities according to your taste.
- Boneless, Skinless Chicken Breasts: The main protein that envelops that beautiful garlic butter. Chicken thighs can also work for a juicier bite!
- All-Purpose Flour: This is for the first layer of coating, which adds structure and helps the eggs stick.
- Large Eggs: Beaten eggs create a binding glue for breadcrumbs—crucial for that crispy finish!
- Breadcrumbs: Panko or regular works here. Panko adds extra crunch, while regular gives a traditional texture.
- Paprika: A little sprinkle adds both flavor and a warm color to the breading.
- Vegetable Oil: Used for frying, choose an oil with a high smoke point like canola or peanut oil. For a healthier option, you can bake them instead!
For exact measurements, check the bottom of the article; they’re all ready for printing. Happy cooking!
How to Make Chicken Kiev with Garlic Butter Recipe
Now, let’s get to the fun part—making this delightful Chicken Kiev with Garlic Butter! I promise, the steps are simple, and each one builds towards that mouthwatering moment when you take your first bite. Follow along as I guide you step-by-step!
Prepare Garlic Butter
The garlic butter is the heart of this Chicken Kiev. It’s what makes each bite special!
Start by taking your softened unsalted butter and placing it in a bowl. Add in the minced garlic, chopped parsley, lemon juice, salt, and pepper.
Mix everything together until it forms a cohesive, fragrant blend. This is the moment to taste it! Adjust the seasonings if necessary.
Once combined, shape the butter mixture into a log—think of forming a perfect little sausage shape. Wrap it tightly in plastic wrap and pop it in the freezer for about 20 minutes. This will make it firm and easier to manage when we stuff the chicken.
Prepare Chicken Kiev
Now onto the chicken! Start by placing your boneless, skinless chicken breasts between two sheets of plastic wrap or parchment paper.
With a meat mallet, gently pound the chicken until it’s about half an inch thick. This helps tenderize it and makes rolling easier.
Once pounded, place a piece of the frozen garlic butter log in the center of each chicken breast. Fold the sides over the butter, then roll it up tightly, tucking in the ends like a burrito. Make sure it’s well sealed to avoid any escaping butter!
Next, set up a breading station. In one dish, place all-purpose flour seasoned with salt and pepper. In another bowl, beat the eggs. Finally, in a third dish, combine breadcrumbs with paprika.
Carefully coat each chicken roll starting with the flour, then dip into the eggs, and finally coat with breadcrumbs. This three-step process creates a fantastic crispy exterior.
Once coated, place the chicken back in the fridge for another 20 minutes. This chilling step will help the coating stick better during cooking!
Cook Chicken Kiev
It’s time to cook our creations! Heat a large skillet over medium heat and add enough vegetable oil to cover the bottom.
Once hot, carefully add the chicken rolls to the pan, seam side down. Fry for about 4-5 minutes on each side, until they are golden brown and crispy. Use tongs to turn them gently—trust me, it’s worth it!
After frying, transfer the Chicken Kiev to a baking sheet and pop them in a preheated oven at 350°F (175°C). Bake for 15–18 minutes, or until the chicken is cooked through. The internal temperature should reach 165°F for safety.
Serve Chicken Kiev
Finally, let those beauties relax for a moment before serving. This allows the juices to redistribute, keeping them moist.
When ready, carefully remove any toothpicks used to secure the rolls. Plate each Chicken Kiev and watch the garlic butter ooze out with every slice. It’s a showstopper!
Serve it alongside your favorite sides, and enjoy the satisfied smiles around the table!
Tips for Success
- Always freeze the garlic butter long enough for it to solidify; this prevents it from leaking during cooking.
- For even cooking, ensure chicken breasts are of uniform thickness before rolling.
- Using a meat thermometer helps you ensure the chicken is cooked through without drying it out.
- Keep your frying oil at the right temperature; too hot, and you’ll burn the coating, too low, and it’ll be greasy.
- Don’t rush the chilling step; it gives your Chicken Kiev the perfect crispy exterior!
Equipment Needed
- Meat Mallet: A great tool for pounding chicken. A heavy skillet can also do the trick.
- Knife: For slicing and dicing. A good chef’s knife is ideal.
- Mixing Bowls: A set helps you keep organized—use any large bowls you have on hand.
- Frying Pan: A large skillet works best. Just ensure it’s deep enough to hold oil.
- Baking Sheet: Use one for transferring the chicken to the oven. A roasting pan is a suitable alternative.
Variations for Chicken Kiev with Garlic Butter Recipe
- Herb Swap: Instead of parsley, try using fresh thyme, dill, or even basil for a different flavor profile.
- Spicy Kick: Add a pinch of red pepper flakes or a dash of hot sauce to the garlic butter for those who enjoy a little heat.
- Cheesy Delight: Incorporate a bit of shredded cheese, like mozzarella or cheddar, into the garlic butter for an extra gooey filling.
- Gluten-Free Option: Substitute regular breadcrumbs with gluten-free panko crumbs or crushed gluten-free crackers for those with dietary restrictions.
- Vegetable Filling: For a lighter twist, mix in chopped sun-dried tomatoes or sautéed mushrooms into the garlic butter.
Serving Suggestions
- Classic Mashed Potatoes: The creamy texture complements the crispy Chicken Kiev perfectly.
- Fresh Garden Salad: A light salad with vinaigrette adds brightness to your meal.
- Wine Pairing: Serve with a chilled glass of Chardonnay or Sauvignon Blanc for a wonderful balance.
- Presentation: Garnish with fresh parsley or lemon wedges for a pop of color on the plate.
FAQs about Chicken Kiev with Garlic Butter Recipe
Got questions about my Chicken Kiev with Garlic Butter Recipe? You’re not alone! Let’s address some common queries that might help you in your cooking adventure.
Can I prepare the garlic butter in advance?
Absolutely! You can make the garlic butter a day or two ahead of time. Just keep it refrigerated until you’re ready to use it.
What’s the best way to store leftover Chicken Kiev?
Store any leftovers in an airtight container in the fridge for up to three days. Reheat them in the oven for the best results.
Can I bake the Chicken Kiev instead of frying?
Yes! If you prefer a healthier option, bake them at 375°F (190°C) for about 25-30 minutes. Just make sure they’re golden brown and cooked through.
What sides go well with Chicken Kiev?
This dish pairs perfectly with sides like mashed potatoes, steamed vegetables, or a fresh salad. You can’t go wrong!
Can I freeze Chicken Kiev before cooking?
Definitely! Prepare the Chicken Kiev as directed, then freeze them before cooking. When ready, just fry or bake straight from the freezer!
Final Thoughts
Creating my Chicken Kiev with Garlic Butter Recipe has become more than just a cooking experience for me; it’s a cherished family tradition. Each tender bite bursts with flavor, bringing smiles and satisfaction around the dinner table. Whether it’s a busy weeknight or a special occasion, this dish effortlessly elevates the moment, making it memorable. The fresh garlic aroma that fills your kitchen adds to the joy of cooking, reminding me why I love sharing meals with loved ones. So roll up your sleeves and dive into this culinary adventure—your family will thank you for it!
PrintChicken Kiev with Garlic Butter Recipe That Delights!
A delightful Chicken Kiev recipe featuring tender chicken breasts filled with garlic butter.
- Prep Time: 30 minutes
- Cook Time: 20 minutes
- Total Time: 50 minutes
- Yield: 4 servings 1x
- Category: Main Course
- Method: Frying and Baking
- Cuisine: Ukrainian
- Diet: Low Fat
Ingredients
- For the Garlic Butter:
- 1/2 cup unsalted butter, softened
- 2 cloves garlic, minced
- 2 tablespoons fresh parsley, finely chopped
- 1 teaspoon lemon juice
- 1/4 teaspoon salt
- 1/4 teaspoon black pepper
- For the Chicken Kiev:
- 4 boneless, skinless chicken breasts
- 1/2 cup all-purpose flour
- 2 large eggs, beaten
- 1 cup breadcrumbs (panko or regular)
- 1/2 teaspoon paprika
- Vegetable oil, for frying
Instructions
- Prepare Garlic Butter: Mix butter, garlic, parsley, lemon juice, 1/4 tsp salt, and 1/4 tsp pepper. Shape into a log, freeze until firm.
- Prepare Chicken Kiev: Pound chicken breasts, place butter log in center, roll up tightly. Coat with salt and pepper. Coat in flour, eggs, and breadcrumbs with paprika. Chill.
- Cook Chicken Kiev: Fry in oil until golden, then bake at 350°F (175°C) for 15–18 minutes.
- Serve: Remove toothpicks before serving.
Notes
- For a cleaner butter center, ensure butter is very cold and chicken is sealed well.
- Serve with mashed potatoes or a fresh salad.
Nutrition
- Serving Size: 1 piece
- Calories: 350
- Sugar: 1g
- Sodium: 600mg
- Fat: 20g
- Saturated Fat: 10g
- Unsaturated Fat: 8g
- Trans Fat: 0g
- Carbohydrates: 16g
- Fiber: 1g
- Protein: 25g
- Cholesterol: 140mg


