Introduction to Banana White Cake Truffles
Sometimes, life throws a million things at us, and we all deserve a sweet escape. That’s why I love making Banana White Cake Truffles. These little bite-sized treats are the answer to any sweet craving, whether you’re a busy mom juggling kids’ activities or a professional balancing meetings and deadlines. With their moist banana cake base and creamy filling, they’re like a hug in dessert form! Plus, these truffles require no baking and come together quickly, making them perfect for anyone short on time yet big on flavor.
Why You’ll Love This Banana White Cake Truffles
These Banana White Cake Truffles are a delightful way to satisfy your sweet tooth without the fuss of a traditional dessert. The process is simple and quick, making it a rewarding experience. Just imagine those luscious bites melting in your mouth, bringing smiles all around. Plus, they’re a fantastic way to use up ripe bananas, turning something ordinary into extraordinary treats your family will adore!
Ingredients for Banana White Cake Truffles
Gathering the right ingredients is the first step to creating these delightful truffles. Here’s what you’ll need to make the magic happen:
- White Cake Mix: This is the base of our truffle. Be sure to use heat-treated cake mix to eliminate any raw flour concerns.
- Cream Cheese: Softened cream cheese adds a luscious, creamy filling. Did you know you can swap it with a vegan alternative for a plant-based version?
- Vanilla Extract: Just a teaspoon will elevate the flavor, making each bite taste like a dream!
- Crushed Pineapple: For a tropical twist! Make sure it’s well drained; excess moisture can ruin the texture.
- Chopped Walnuts: These add a wonderful crunch. If you have nut allergies, feel free to leave them out.
- Banana: Ripe bananas bring natural sweetness and flavor. Overripe ones work the best for this recipe!
- White Candy Coating: This is the delicious shell that wraps the truffles. It melts beautifully and sets perfectly for a sweet finish.
- Chocolate Melting Wafers: Used for drizzling on top, adding a rich contrast to the sweetness of the coating.
- Rainbow Sprinkles: These are purely for decoration, adding a fun pop of color! Optional, but who doesn’t love sprinkles?
- Stemmed Maraschino Cherries: This is the classic topping that not only looks great but adds an extra sweet surprise!
For exact measurements, don’t forget to check the bottom of the article, where I’ve included those handy details for printing. Happy gathering!
How to Make Banana White Cake Truffles
Ready to embark on your sweet adventure? Let’s dive into making these Banana White Cake Truffles! Follow these simple steps, and you’ll have delicious treats that everyone will love. Make sure to gather your ingredients and get excited as we move along!
Step 1: Prepare Your Workspace
Start by lining a large cookie sheet with parchment paper. This will help keep your truffles from sticking. Organize your ingredients within reach to make the process smooth. A little prep goes a long way!
Step 2: Make the Cake Base
In a medium mixing bowl, combine your heat-treated white cake mix, softened cream cheese, and vanilla extract. Mix them together until you achieve a smooth, dough-like consistency. Using an electric mixer can make this step easier, but mixing by hand works just as well, especially if you enjoy getting into the mix!
Step 3: Add Flavorful Ingredients
Now, it’s time to enhance your mixture! Gently fold in the drained crushed pineapple, chopped walnuts, and sliced banana. Ensure everything is evenly distributed. This is where your banana white cake truffles get their unique flavor and delightful texture!
Step 4: Shape the Truffles
Using a 1-2 inch cookie scoop, portion out the mixture. Roll each portion into a smooth ball with your palms, aiming for a size between 1 and 1½ inches. This keeps your truffles uniform and looking beautiful!
Step 5: Chill to Firm Up
Once you’ve shaped all your truffles, it’s chilling time! Place the truffle balls on your prepared parchment paper and refrigerate for about 1 hour. This cooling step ensures they firm up, making them easier to coat later on.
Step 6: Melt the White Chocolate Coating
About 5-10 minutes before the chilling finishes, melt your white candy coating. Place it in a microwave-safe bowl and microwave at 50% power in 1-minute intervals, stirring between each cycle until fully melted. This gradual heating avoids any clumping or burning!
Step 7: Coat Each Truffle
Now, it’s time for the fun part! Dip each chilled truffle ball into the melted candy coating, ensuring you cover it completely. Once coated, return your truffles to the parchment paper to set. The sweetness is starting to shine through!
Step 8: Decorate
Next, melt your chocolate melting wafers using the same microwave method for smoothness. Spoon a dollop of the melted chocolate on top of each truffle. Finish by placing a stemmed maraschino cherry and adding a sprinkle of rainbow sprinkles for that festive touch!
Step 9: Final Chill Before Serving
Finally, return the decorated truffles to the refrigerator for another 30 minutes. This final chill helps set the coating and keep everything perfectly in place. Trust me, once you take that first bite, you’ll be glad you took the time!
Tips for Success
- Make sure your cream cheese is at room temperature for easy mixing.
- Use a cookie scoop for uniform truffle sizes; it makes a difference in presentation!
- Let your truffles chill long enough; this ensures better coating and flavor melding.
- Double-check your melted chocolate temperature—too hot can make it seize.
- Get creative with decorations! Change up the sprinkles and toppings for variety.
Equipment Needed
- Mixing Bowl: A large bowl will do, but a stand mixer can save time.
- Cookie Scoop: A handy tool for uniform truffles; a spoon works too!
- Parchment Paper: Essential for easy removal; foil can be an alternative.
- Microwave-Safe Bowl: For melting chocolate; a double boiler is great if you prefer.
- Refrigerator: Just a regular one will do; freezer works in a pinch.
Variations on Banana White Cake Truffles
- Chocolate Banana Truffles: Substitute half the white candy coating with milk or dark chocolate for an indulgent twist.
- Nut-Free Version: Omit the walnuts or replace them with crushed graham crackers or rice cereal for extra crunch.
- Pineapple-Free Option: Use mashed ripe bananas for a smoother texture or add coconut flakes for a tropical flair.
- Gluten-Free Alternative: Opt for a gluten-free white cake mix to easily make these truffles suitable for all diets.
- Personalized Decorations: Experiment with different toppings like crushed candies, nuts, or flavored drizzles for a unique presentation!
Serving Suggestions for Banana White Cake Truffles
- Pair these truffles with a steaming cup of coffee or tea for a delightful afternoon treat.
- Serve alongside fresh fruit to balance the sweetness.
- For a festive touch, arrange on a decorative platter with colorful napkins.
- Include them in dessert trays for gatherings or potlucks—everyone will love them!
FAQs about Banana White Cake Truffles
As a passionate home cook, I’ve gathered some common questions about Banana White Cake Truffles. Let’s clear up any confusion, so you can whip these up with ease!
Can I use other fruits instead of bananas?
Absolutely! If bananas aren’t your thing, you can try using chopped strawberries or peaches. Just keep in mind that they may alter the flavor and moisture content.
How long do the truffles last in the fridge?
These Banana White Cake Truffles can be stored in an airtight container for up to one week. Just make sure they’re chilled first to maintain that delicious coating!
Can I make these truffles ahead of time?
You sure can! Prepare the truffles a day or two in advance. Just store them in the fridge, and they’ll be ready to impress your family or guests!
What can I substitute for cream cheese?
If you’re looking for a dairy-free option, try using a vegan cream cheese alternative. It works surprisingly well and keeps the creamy consistency we love!
Can I freeze Banana White Cake Truffles?
Yes, you can! They freeze wonderfully. Just place them in a freezer-safe container for up to three months. Thaw them in the fridge before serving for the best texture.
Final Thoughts
Banana White Cake Truffles are more than just a treat; they’re a sweet reminder of life’s simple joys. Every bite transports me back to cozy family gatherings and laughter-filled days. I love how easy they are to make, yet they never fail to impress. Whether you enjoy them solo or share them with loved ones, these delightful morsels bring smiles all around. So next time you have ripe bananas lying around, skip the traditional banana bread and dive into these playful, sweet truffles. Trust me, they’ll become a cherished favorite in your home!
PrintBanana White Cake Truffles

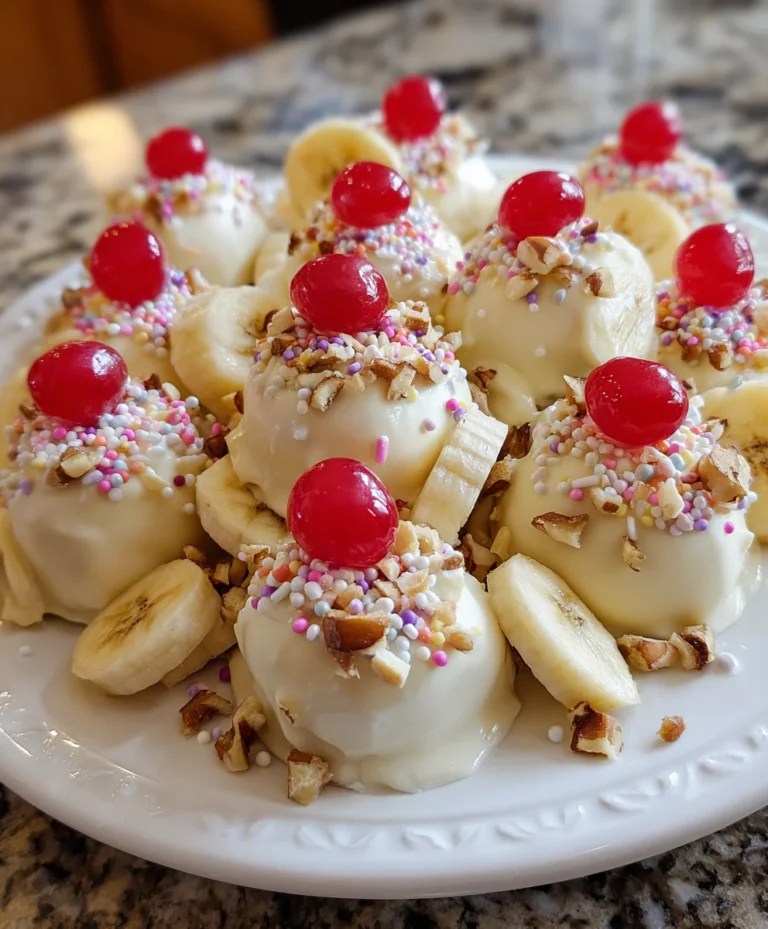
Banana White Cake Truffles are delicious bite-sized treats made with a moist banana cake base, creamy filling, and coated in sweet white chocolate.
- Prep Time: 20 minutes
- Cook Time: 10 minutes
- Total Time: 2 hours
- Yield: 24 truffles 1x
- Category: Dessert
- Method: Chilling, Coating
- Cuisine: American
- Diet: Vegetarian
Ingredients
- 15.25 oz box white cake mix, heat treated
- 8 oz block cream cheese, softened to room temperature
- 1 teaspoon vanilla extract
- ½ cup crushed pineapple, very well drained
- ¾ cup chopped walnuts
- 1 banana, sliced
- 8 oz white candy coating
- ½ cup chocolate melting wafers
- Rainbow sprinkles
- Stemmed maraschino cherries
Instructions
- Line a large cookie sheet with parchment paper; set aside.
- In a medium mixing bowl, cream together the cake mix, softened cream cheese, and vanilla extract until a dough-like consistency is achieved.
- Fold in crushed pineapple, chopped walnuts, and sliced banana until evenly distributed.
- Using a 1-2 inch cookie scoop, portion the mixture and roll into smooth balls between 1 and 1½ inches in diameter using your palms.
- Place the truffle balls on the prepared parchment and refrigerate for 1 hour.
- About 5-10 minutes before chilling completes, gently melt white candy coating in a microwave-safe bowl at 50% power in 1-minute intervals, stirring between each, until fully melted.
- Dip each chilled truffle ball into the melted candy coating, ensuring complete coverage. Return coated truffles to parchment paper.
- Refrigerate coated truffles for an additional 30 minutes to set.
- Melt chocolate melting wafers using the same method until smooth and silky.
- Spoon a small dollop of melted chocolate atop each truffle, place a stemmed maraschino cherry, and sprinkle with rainbow sprinkles.
- Return decorated truffles to refrigerator for 30 minutes before serving.
Notes
- Ensure the cake mix is heat treated to eliminate any potential raw flour concerns.
- For a vegan option, substitute the cream cheese with a vegan alternative and use plant-based white chocolate.
- Make sure the pineapple is well drained to prevent excess moisture in the truffle mixture.
Nutrition
- Serving Size: 1 truffle
- Calories: 150
- Sugar: 12g
- Sodium: 100mg
- Fat: 7g
- Saturated Fat: 3g
- Unsaturated Fat: 2g
- Trans Fat: 0g
- Carbohydrates: 20g
- Fiber: 1g
- Protein: 2g
- Cholesterol: 10mg