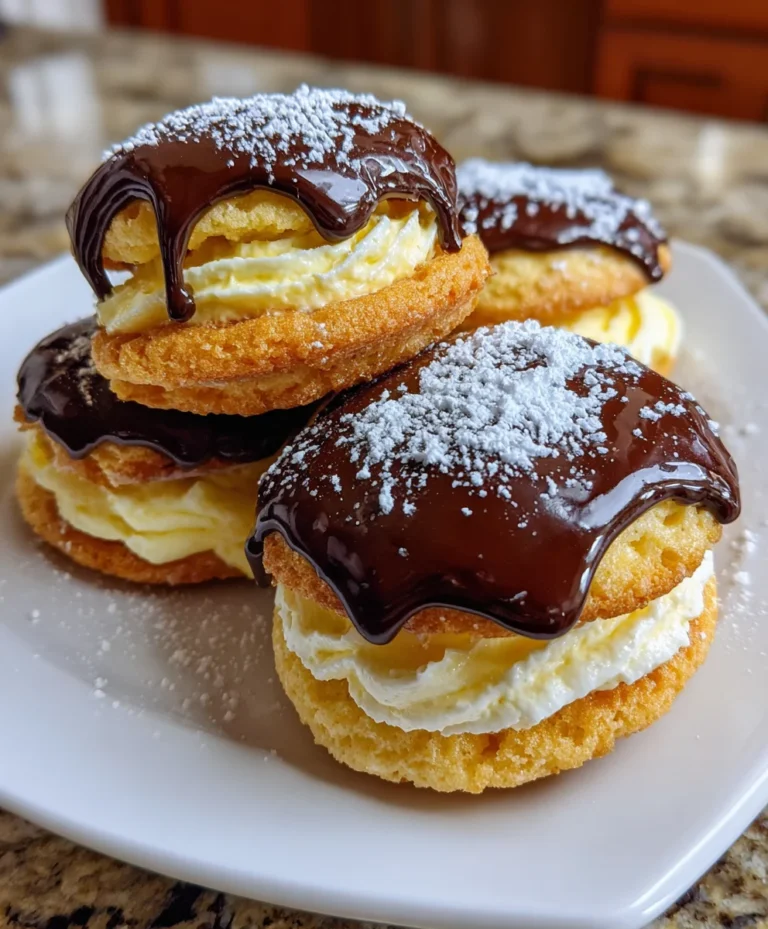
Introduction to Boston Cream Pie Cookies
As a busy mom who loves to whip up delicious treats, I often seek quick and delightful recipes. Boston Cream Pie Cookies are just that! These tasty bites blend the rich flavors of a classic Boston cream pie, all wrapped in the comforting embrace of cookies. Perfect for snack time or a sweet ending to a family dinner, these cookies bring joy with every bite. If you’re short on time but still want to impress loved ones, this recipe is a delightful solution. Let’s dive into the wonderful world of baking these scrumptious cookies together!
Why You’ll Love This Boston Cream Pie Cookies
These Boston Cream Pie Cookies are not just a delight for the taste buds; they’re a lifesaver for busy days. With simple ingredients and quick steps, I can whip them up in under an hour. The rich chocolate glaze and creamy filling make them feel luxurious without the fuss. Plus, they’re perfect for satisfying sweet cravings or sharing during gatherings, giving you both ease and heartwarming moments in the kitchen.
Ingredients for Boston Cream Pie Cookies
To create these delightful Boston Cream Pie Cookies, you’ll need a handful of simple yet essential ingredients that are probably already in your kitchen. Here’s what you’ll gather:
- Unsalted Butter: This provides richness and helps create a tender cookie base. Remember, softened butter mixes better, so take it out of the fridge ahead of time.
- Granulated Sugar: Essential for sweetness and a light texture, sugar helps your cookies spread and golden beautifully.
- Large Eggs: These bind everything together and add moisture. They also help with the cookie’s rise, giving it a lovely lift!
- Vanilla Extract: A must-have for that warm, comforting flavor that enhances the entire cookie experience.
- All-Purpose Flour: The main structure of your cookies, flour provides stability and a nice chewy texture that everyone loves.
- Baking Powder: This leavening agent helps the cookies rise, making them light and airy, without being flat.
- Salt: Just a pinch balances the sweetness and enhances all the flavors within the cookies.
- Heavy Cream: The star of your creamy filling! Whipping this up gives you a luscious texture that mirrors a classic pie.
- Powdered Sugar: To sweeten your cream filling without grittiness. It blends easily, giving you that smooth consistency.
- Semi-Sweet Chocolate Chips: Used for the delectable glaze, these add a rich chocolatey taste that makes each cookie sing!
- Unsalted Butter (for glaze): This adds a glossy finish to your chocolate, making it irresistible.
For those seeking dietary changes or alternatives, feel free to substitute with coconut cream for a dairy-free option or use whole wheat flour for added fiber. The exact measurements for these ingredients can be found at the bottom of the article, making it easy for you to print and follow along! Happy baking!
How to Make Boston Cream Pie Cookies
Ready to dive into the baking magic? Let me guide you through this delightful process of creating Boston Cream Pie Cookies step by step. Each step is like a new chapter in our cozy baking adventure!
Step 1: Preheat Oven
First things first—let’s get that oven warmed up! Preheat your oven to 350°F (175°C). While you wait, line your baking sheet with parchment paper. This will prevent sticking and make cleanup a breeze!
Step 2: Mix Butter and Sugar
In a large bowl, cream together the softened butter and granulated sugar. This might seem simple, but trust me, taking the time to mix them well is crucial! Creaming incorporates air, giving your cookies that light and fluffy texture we all adore.
Step 3: Add Eggs and Vanilla
Next, beat in those two large eggs, one at a time. Each egg brings richness to the cookies. Then, add a teaspoon of vanilla extract—it’s like a warm hug for your batter. It enhances all the flavors perfectly!
Step 4: Combine Dry Ingredients
Now, it’s time for the dry ingredients! In a separate bowl, whisk together the all-purpose flour, baking powder, and salt. This mix ensures even distribution and stops the baking powder from clumping, giving your cookies a lovely rise.
Step 5: Combine Mixtures
Slowly add the dry mixture into the wet ingredients, giving it a gentle fold until just combined. Overmixing can lead to tough cookies, so mix it just until you see no more flour. Keep that dough soft and inviting!
Step 6: Scoop Dough
Using a cookie scoop or a tablespoon, drop the dough onto the prepared baking sheet. Space them about two inches apart, as they will spread while baking. This little tip helps everyone have room to shine!
Step 7: Bake
Now, slide those gems into your preheated oven and bake for 15-20 minutes. Keep an eye on them! They’re ready when the edges are lightly golden. Once done, let them cool on a wire rack—a little patience goes a long way here.
Step 8: Prepare Cream Filling
While your cookies cool, grab a medium bowl to whip together the heavy cream, powdered sugar, and a teaspoon of vanilla. Use a hand mixer to beat the mixture until soft peaks form. This will make your filling wonderfully fluffy!
Step 9: Fill Cookies
Once the cookies are cool, take half and spoon or pipe the cream filling onto the bottom of each. Place the other half on top like a delicious little sandwich. Voilà! You have Boston Cream Pie-inspired cookie sandwiches!
Step 10: Make Chocolate Glaze
To make the glaze, melt your chocolate chips and a tablespoon of unsalted butter in a microwave-safe bowl. Microwave in 30-second intervals, stirring in between, until smooth. This will make your glaze delightful and shiny!
Step 11: Glaze Cookies
Dip the tops of your filled cookies into that chocolate glaze, letting any excess drip off. Place them back on the wire rack to set. This is where the magic happens as they transform into a stunning treat!
Tips for Success
- Let your butter soften at room temperature for an easier mixing process.
- Chill the filled cookies for about 30 minutes before glazing to perfect their presentation.
- Use high-quality chocolate for the glaze to really elevate the flavor.
- Don’t rush cooling; warm cookies can make the filling ooze out!
- Experiment with different fillings like lemon curd for a twist on the classic!
Equipment Needed
- Baking sheet: A standard sheet works well, but you can use any flat, oven-safe pan.
- Parchment paper: Great for easy cleanup; foil can work in a pinch, too.
- Mixing bowls: You’ll need multiple bowls—one for wet, another for dry ingredients.
- Hand mixer: A stand mixer is ideal but a whisk will work if you’re up for a workout!
- Cookie scoop: If you don’t have one, a tablespoon does the trick just fine.
Variations
- Dairy-Free: Substitute heavy cream with coconut cream and use dairy-free chocolate chips for a delicious alternative.
- Gluten-Free: Swap all-purpose flour for a gluten-free blend, making sure it includes xanthan gum to help achieve the right texture.
- Nutty Twist: Add chopped nuts like walnuts or pecans to the dough for a crunchy surprise in every bite.
- Flavor Infusion: Experiment with almond extract instead of vanilla for a nutty note that complements the chocolate beautifully.
- Fruit Filling: Replace the cream filling with flavored jams or fresh fruit puree for a fruity twist.
Serving Suggestions
- Pair these Boston Cream Pie Cookies with a warm cup of coffee or tea for a delightful afternoon treat.
- Serve alongside fresh berries to add a burst of color and freshness on your dessert platter.
- For special occasions, arrange the cookies on a tiered cake stand for an elegant presentation.
- Consider whipping up a light vanilla ice cream to serve as a side; it complements the cookies beautifully.
- A sprinkle of cocoa powder or powdered sugar on top elevates their visual appeal.
FAQs about Boston Cream Pie Cookies
Can I make Boston Cream Pie Cookies ahead of time?
Absolutely! You can bake the cookies in advance. Just store them in an airtight container for up to three days. Wait to add the cream filling and chocolate glaze until you’re ready to serve to keep them fresh and delightful!
What can I use instead of heavy cream for the filling?
If you’re looking for alternatives, coconut cream or whipped topping can work wonders. They provide a similar lusciousness while accommodating various dietary needs.
How should I store the leftover cookies?
Keep any leftover Boston Cream Pie Cookies in an airtight container in the fridge. They should last for about a week, so no worries if you need to pace yourself on indulging!
Can I freeze the cookies?
Yes, freezing these cookies is an option! Flash freeze them after baking and cooling, then store them in a freezer bag. They’ll be ready to enjoy any time, just thaw and add the filling and glaze!
What if I don’t have chocolate chips for the glaze?
No problem! You can use any chocolate bar, just chop it up and follow the same melting instructions for the glaze. It’ll still taste divine!
Final Thoughts
Baking Boston Cream Pie Cookies is not just about creating a sweet treat; it’s an experience filled with laughter, anticipation, and love. Each step unravels a simple joy, bringing family together around the kitchen. The delightful blend of chocolate and creamy filling brings smiles that linger long after the last cookie is enjoyed. These cookies remind me of cherished moments and the importance of taking time to savor life, even on busy days. As you bake these, may you create delicious memories that warm your heart and sweeten your home. Happy baking, my friends!
PrintBoston Cream Pie Cookies

Boston Cream Pie Cookies are a delightful, sweet treat combining the flavors of a classic Boston cream pie with the ease of cookie preparation.
- Prep Time: 20 minutes
- Cook Time: 20 minutes
- Total Time: 40 minutes
- Yield: 24 cookies 1x
- Category: Dessert
- Method: Baking
- Cuisine: American
- Diet: Vegetarian
Ingredients
- 1 cup unsalted butter, softened
- 1 cup granulated sugar
- 2 large eggs
- 1 teaspoon vanilla extract
- 2 cups all-purpose flour
- 1 teaspoon baking powder
- ½ teaspoon salt
- 1 cup heavy cream
- 2 tablespoons powdered sugar
- 1 teaspoon vanilla extract
- 1 cup semi-sweet chocolate chips
- 1 tablespoon unsalted butter
Instructions
- Preheat Oven: Preheat your oven to 350°F (175°C). Line a baking sheet with parchment paper.
- Mix Butter and Sugar: In a large bowl, cream together the softened butter and granulated sugar until light and fluffy.
- Add Eggs and Vanilla: Beat in the eggs one at a time, followed by the vanilla extract.
- Combine Dry Ingredients: In a separate bowl, whisk together the flour, baking powder, and salt.
- Combine Mixtures: Gradually add the dry ingredients to the wet ingredients, mixing until just combined.
- Scoop Dough: Using a cookie scoop or tablespoon, drop the dough onto the prepared baking sheet, spacing them about 2 inches apart.
- Bake: Bake in the preheated oven for 15-20 minutes, or until the edges are lightly golden. Remove from the oven and cool on a wire rack.
- Prepare Cream Filling: In a medium bowl, whip together the heavy cream, powdered sugar, and vanilla extract until soft peaks form.
- Fill Cookies: Once the cookies are completely cool, spoon or pipe the cream filling onto the bottom of half the cookies, then top with the remaining cookies to create sandwiches.
- Make Chocolate Glaze: In a microwave-safe bowl, combine the chocolate chips and butter. Microwave in 30-second intervals, stirring in between, until melted and smooth.
- Glaze Cookies: Dip the tops of the filled cookies into the chocolate glaze, allowing any excess to drip off. Place them back on the wire rack to set.
Notes
- Make sure the butter is softened for easier mixing.
- Chill the cookies before glazing for better presentation.
- Use quality chocolate for the glaze for the best flavor.
Nutrition
- Serving Size: 1 cookie
- Calories: 180
- Sugar: 10g
- Sodium: 150mg
- Fat: 9g
- Saturated Fat: 5g
- Unsaturated Fat: 3g
- Trans Fat: 0g
- Carbohydrates: 24g
- Fiber: 1g
- Protein: 2g
- Cholesterol: 25mg