Introduction to Cheesecake Banana Pudding Bites
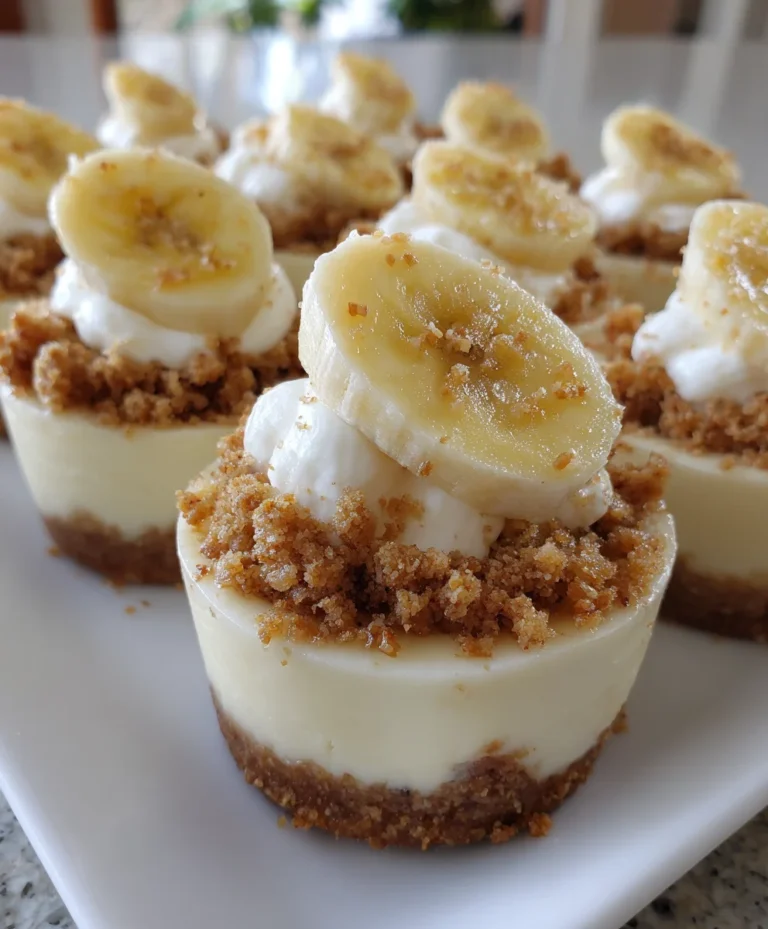
I often find myself searching for delightful treats that don’t require hours in the kitchen. That’s where Cheesecake Banana Pudding Bites come to the rescue! These little gems are not only a tasty solution but also a visual delight, perfect for impressing family and friends. With the creamy layers of cheesecake and banana pudding, each bite feels like a mini celebration. Whether it’s for an after-dinner dessert or a midday snack, these bites are just the quick fix you need to satisfy your sweet cravings without the hassle.
Why You’ll Love This Cheesecake Banana Pudding Bites
You’ll fall for these Cheesecake Banana Pudding Bites for their simplicity and deliciousness. They’re a fantastic no-bake dessert option, perfect for those hectic days when time is limited. In just a few minutes, you can whip up these layered delights. Plus, the combination of creamy cheesecake and sweet banana pudding creates a flavor explosion that even picky eaters will adore. Trust me; your family will be begging for more!
Ingredients for Cheesecake Banana Pudding Bites
Gathering the right ingredients is key to crafting these delicious Cheesecake Banana Pudding Bites. Here’s what you’ll need:
- Graham cracker crumbs: These form the tasty crust that holds everything together. You can crush whole graham crackers if needed.
- Granulated sugar: Just a little sweetness to enhance the crust.
- Unsalted butter: This helps to bind the crust and adds richness. Make sure it’s melted for easy mixing.
- Cream cheese: The heart of the cheesecake filling, it offers a smooth and creamy texture. Ensure it’s softened to avoid lumps.
- Powdered sugar: This sweetens the filling and gives it a light, airy quality.
- Heavy cream: Whipping this will create a light texture that elevates the dessert. Don’t skip it!
- Vanilla extract: A splash brings out the richness and ties all the flavors together.
- Vanilla pudding: This layer adds an irresistible creaminess and flavor. You can use instant or cook-and-serve options.
- Ripe banana: Using a fresh banana adds natural sweetness and pairs perfectly with the other layers.
- Crushed Nilla wafers: These are the cherry on top, adding a delightful crunch when coated around the cheesecake bites.
- Extra banana slices: Use these for garnish, bringing freshness and color to your delightful bites.
You can find the exact quantities of each ingredient at the bottom of the article, ready for easy printing. Enjoy the fun of making your Cheesecake Banana Pudding Bites, and feel free to explore ingredient alternatives that suit your taste!
How to Make Cheesecake Banana Pudding Bites
Now comes the fun part! Making Cheesecake Banana Pudding Bites is easy and enjoyable. With each step, you’ll feel like a culinary artist in your own kitchen. Let’s dive in and create these delightful treats together!
Step 1: Prepare the Crust
Mixing the Ingredients
Start by grabbing a mixing bowl. Combine your graham cracker crumbs, granulated sugar, and melted butter. Mix until it’s all blended and resembles wet sand. If you can, use your hands for a personal touch! The texture should easily clump together when pressed.
Step 2: Assemble the Crust in Molds
Pressing Firmly
Now, take a tablespoon of your crust mixture and evenly distribute it into your bite-sized cups or molds. Don’t be shy—press firmly to pack it down. This creates a strong base to hold all those delicious layers. Think of it as building a solid foundation for a tasty treat!
Step 3: Make the Cheesecake Filling
Beating Ingredients Together
In a clean mixing bowl, beat your softened cream cheese with powdered sugar on medium speed. You want it to turn smooth, with no lumps. Then, add in the heavy cream and vanilla extract. Keep beating until the filling becomes light and fluffy, almost like a cloud of cheesecake goodness!
Step 4: Layer Vanilla Pudding
Spreading Evenly
Take a spoonful of vanilla pudding and spread it gently over each crust layer. Make sure to cover the crust evenly. This layer isn’t just tasty; it adds a beautiful creaminess that pairs perfectly with the cheesecake. It’s like a surprise under all that cheesecake goodness!
Step 5: Add Banana Slices
Even Distribution
Now, it’s banana time! Place the sliced bananas over the pudding layer. Spread them out evenly across each cup, ensuring every bite has a hint of fresh banana. It’s like a warm hug from nature, adding sweetness and flavor!
Step 6: Top with Cheesecake Filling
Smoothing the Surface
Next, scoop that delightful cheesecake filling on top of the banana layer. Use a spatula to smooth it out, so it looks even and inviting. This is where you build the height for your bites. You want to make sure each one is an irresistible little tower of sweetness!
Step 7: Coat with Crushed Nilla Wafers
Ensuring Crunch
It’s the final touch! Gently press the assembled cheesecake bites into a bowl of crushed Nilla wafers. The goal is to coat the outer sides for that satisfying crunch. Just imagine biting into creamy layers with a delightful crunch—pure bliss!
Step 8: Refrigerate the Bites
Achieving Firmness
Pop these beauties into the refrigerator for at least two hours. This step is crucial since it helps the filling set properly. While you wait, you can dream about how tasty these Cheesecake Banana Pudding Bites will be. They will be firm and ready to impress anyone who takes a bite!
Tips for Success
- Always start with softened cream cheese to avoid lumps in your filling.
- Use a measuring cup for precise layering of crust and filling.
- Refrigerate the bites longer than two hours if possible; it enhances firmness.
- Opt for ripe bananas; they add the best flavor and sweetness.
- Experiment with different toppings for a fun twist on the recipe!
Equipment Needed
- Mixing bowls: Essential for combining ingredients; any standard bowl will do.
- Measuring cups and spoons: For accurate ingredient measurements.
- Hand mixer: Ideal for beating the cheesecake filling; a whisk works too.
- Silicone molds or bite-sized cups: Perfect for shaping the bites; muffin tins can work in a pinch.
- Spoon or spatula: Great for layering and smoothing the fillings.
Variations
- Chocolate Lovers: Add a layer of chocolate pudding instead of vanilla for a decadent chocolate twist.
- Dairy-Free Option: Substitute cream cheese and heavy cream with coconut cream and dairy-free cream cheese for a delightful dairy-free treat.
- Nutty Flavor: Mix in crushed nuts like walnuts or almonds into the crust for an added nutty crunch.
- Berry Bliss: Layer in some fresh berries like strawberries or blueberries between the banana slices for a pop of color and flavor.
- Granola Crunch: Replace crushed Nilla wafers with granola for a heartier, health-conscious option.
- Banana Chocolate Chip: Toss some mini chocolate chips into the cheesecake filling for an indulgent surprise.
Serving Suggestions
- Pair these bites with a cup of chilled coffee or tea for a delightful afternoon treat.
- Serve on a beautiful platter with fresh banana slices and mint leaves for a pop of color.
- For an extra special touch, drizzle with caramel or chocolate sauce before serving.
- Consider adding a scoop of vanilla ice cream alongside for a delectable dessert experience.
FAQs about Cheesecake Banana Pudding Bites
Can I make Cheesecake Banana Pudding Bites ahead of time?
Absolutely! These delightful bites can be prepared in advance. Just store them in the refrigerator for up to two days. This makes them a perfect option for parties or a busy weeknight dessert!
What if I don’t have graham cracker crumbs?
No worries! You can use crushed cookies like Oreos or digestive biscuits as a fun alternative for the crust. Each will bring a unique flavor while still creating that delicious base.
Can I use different fruit instead of bananas?
Definitely! While bananas are lovely, feel free to swap them for other fruits like strawberries or peaches. Just make sure they pair nicely with the cheesecake and pudding layers!
How should I store any leftovers?
Store any leftover Cheesecake Banana Pudding Bites in an airtight container in the refrigerator. They’ll stay fresh for a couple of days, but you might find they disappear much quicker!
Is this dessert suitable for kids?
Absolutely! These Cheesecake Banana Pudding Bites are not only fun to eat but also a delicious way to enjoy fruit and creamy textures. They’re sure to be a hit with children and adults alike!
Final Thoughts
Making Cheesecake Banana Pudding Bites isn’t just about whipping up a dessert; it’s creating a moment of joy in your busy life. The method is easy, and the result is utterly delightful—a sweet harmony of flavors and textures in every bite. As you relish these treats, you’ll likely find smiles around the table, turning dessert into a shared experience of happiness. Trust me, once you take that first bite, you’ll understand why these little bites become a staple in my kitchen. They’re simply irresistible, just like those cherished moments we create with our loved ones!
PrintCheesecake Banana Pudding Bites
Cheesecake Banana Pudding Bites are a delicious layered dessert featuring a graham cracker crust, creamy cheesecake filling, banana pudding, and fresh banana slices, topped with crushed Nilla wafers.
- Prep Time: 20 minutes
- Cook Time: 0 minutes
- Total Time: 2 hours 20 minutes
- Yield: 12 bites 1x
- Category: Dessert
- Method: No-Bake
- Cuisine: American
- Diet: Vegetarian
Ingredients
- 240 g graham cracker crumbs
- 25 g granulated sugar
- 60 ml unsalted butter, melted
- 225 g cream cheese, softened
- 60 g powdered sugar
- 120 ml heavy cream
- 2.5 ml vanilla extract
- 120 ml vanilla pudding
- 1 ripe banana, sliced
- 32 g crushed Nilla wafers
- Extra banana slices, for garnish
Instructions
- In a bowl, thoroughly combine graham cracker crumbs, granulated sugar, and melted butter until the mixture resembles wet sand.
- Distribute a small portion of the crust mixture into each bite-sized cup or silicone mold and press firmly to compact into an even base.
- In a clean mixing bowl, beat softened cream cheese and powdered sugar on medium speed until smooth with no lumps. Add heavy cream and vanilla extract, continuing to beat until the filling is light and mousse-like.
- Spoon a thin layer of vanilla pudding over each prepared crust base in the molds.
- Arrange banana slices over the pudding in each bite, ensuring even distribution.
- Cover the banana pudding layer with the whipped cheesecake filling, smoothing to achieve a level top.
- Gently press the set cheesecake bites into crushed Nilla wafers, ensuring the outer sides are evenly coated for crunch.
- Refrigerate the assembled bites for a minimum of 2 hours or until the filling is completely firm.
- Before serving, arrange extra banana slices on top of each bite for a fresh finish.
Notes
- Make sure the cream cheese is softened to avoid lumps in the filling.
- Refrigerating the bites longer enhances the firmness of the filling.
- Use fresh bananas for the best flavor and presentation.
Nutrition
- Serving Size: 1 bite
- Calories: 150
- Sugar: 10 g
- Sodium: 100 mg
- Fat: 9 g
- Saturated Fat: 5 g
- Unsaturated Fat: 2 g
- Trans Fat: 0 g
- Carbohydrates: 15 g
- Fiber: 1 g
- Protein: 2 g
- Cholesterol: 30 mg