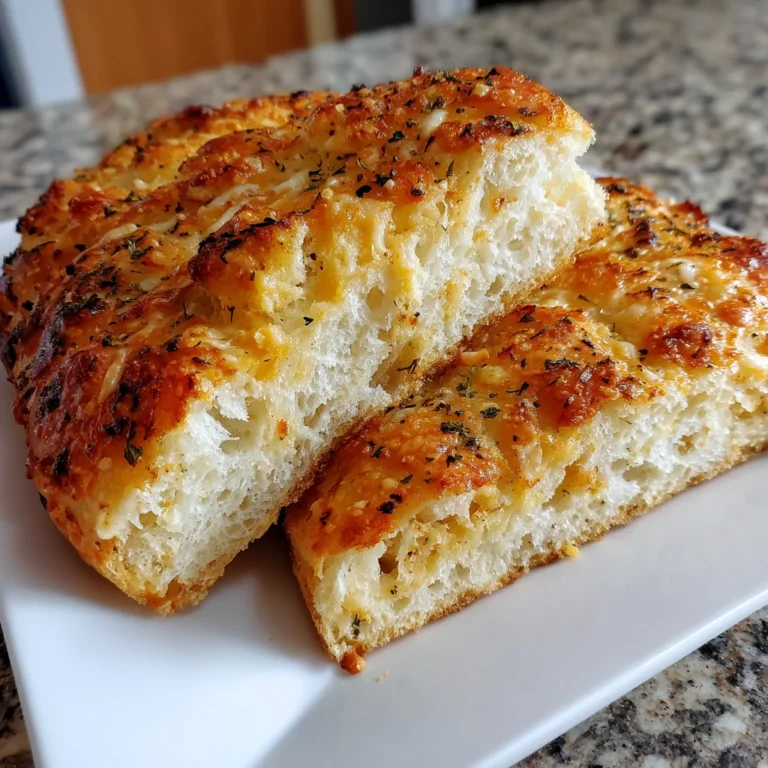
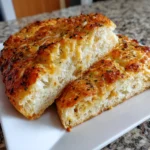
Introduction to Cheesy Asiago Bread
There’s something magical about the aroma of fresh bread wafting through the house. It makes any day feel special, doesn’t it? This Cheesy Asiago Bread is a delightful way to bring that warmth into your kitchen. Perfect for busy moms and professionals alike, it’s not just about the taste—though, believe me, the rich Asiago flavor steals the show! This recipe is a quick solution for a busy day, yet it impresses your loved ones. Whether it’s a casual family dinner or a gathering with friends, this cheesy delight will leave everyone coming back for more!
Why You’ll Love This Cheesy Asiago Bread
This Cheesy Asiago Bread is a game changer for busy weeks! It’s simple and quick, making it perfect for weekdays. The soft, slightly sticky texture opens up a world of cheesy goodness that’s hard to resist. Plus, it pairs beautifully with anything—soups, salads, or as a stand-alone snack. Imagine enjoying warm, cheesy slices straight from the oven; it’s a comforting hug on a plate!
Ingredients for Cheesy Asiago Bread
Let’s dive into the delicious components that make up this Cheesy Asiago Bread. Each ingredient plays a vital role in creating that delightful cheesy aroma and soft texture!
- Bread Flour: This gives the bread its structure. You can use all-purpose flour, but bread flour enhances that chewy texture.
- Instant Yeast: The magic ingredient for rising! It provides quick fermentation, making it ideal for time-strapped cooks like me.
- Salt: Essential for flavor! It enhances all the other ingredients and regulates yeast activity during rising.
- Granulated Sugar: Just a touch to feed the yeast and help with that lovely golden crust.
- Black Pepper: Adds a subtle kick to the bread, balancing the richness of the cheese.
- 2% Milk: Provides moisture and a hint of creaminess. You can substitute with plant-based milk or buttermilk for a dairy-free option.
- Salted Butter: Brings in richness and flavor. If you prefer a lighter option, unsalted butter can work too!
- Asiago Cheese: The star of the show! Its sharp and nutty flavor is why we all love this bread. Feel free to mix in other cheeses for a fun twist!
- Egg: Used for an egg wash to achieve a beautiful golden crust. You can skip this if you’re vegan or omit the egg wash for a softer top.
- Warm Water: Just a small amount to blend with the egg for washing. It helps in creating a good glaze.
You’ll find more detailed measurements at the bottom of the article, ready for printing when you’re ready to bake!
How to Make Cheesy Asiago Bread
Let’s roll up those sleeves and get ready to create something truly special! Making Cheesy Asiago Bread is easier than you might think. Follow these simple steps, and you’ll have a loaf that impresses.
Making the Dough
Start by mixing 1 ½ cups of bread flour, instant yeast, sugar, salt, and black pepper in a stand mixer bowl. This combination will set the foundation for your fluffy loaves.
Next, warm the milk and butter in the microwave until it reaches about 120-130ºF. This warm mixture will activate the yeast, making it lively and bubbly!
Combine the milk mixture into the flour blend, mixing on low speed until smooth. Add 1 ¼ cups of shredded Asiago cheese, mixing just until incorporated. This step infuses the magic of cheese into our dough.
Gradually mix in the remaining flour until a soft, slightly sticky dough forms. You’ll know it’s ready when kneaded for about 5 minutes using the dough hook attachment. Trust me; the sticky feel is what we’re aiming for!
Allowing the Dough to Rise
Once your dough is kneaded, it’s time to let it rise! Spray a large bowl with cooking spray. Place the dough inside, turning it to coat with oil. This prevents sticking.
Now, cover the bowl with plastic wrap or a clean kitchen towel, and let it rise in a warm nook for about 30-45 minutes. Look for it to double in size—it’s a fascinating transformation!
Shaping the Loaves
After the dough has risen, gently punch it down to release any built-up air. Divide it into two equal pieces for shaping. It’s like giving your dough a little love!
Shape each piece into a loaf and place them on a parchment-lined baking sheet. Cover them again and let them rise for another 20-30 minutes. This gives the loaves a chance to relax and expand even more.
Preparing for Baking
As your loaves rise, preheat the oven to 375ºF. While that heats up, whisk together the egg and warm water in a small bowl. This egg wash will give our bread a beautiful golden crust.
Brush the tops of the loaves with the egg wash and sprinkle the remaining Asiago cheese on top. More cheese is never a bad thing!
Baking and Cooling
It’s time for the big moment! Bake the loaves for 30-35 minutes until they are lightly golden brown and an internal temperature of 190ºF is reached. Your kitchen will smell like a cozy Italian café!
Once baked, allow the loaves to cool before slicing. Patience is key here; savor that warm aroma and get ready for the first taste of this cheesy delight!
Tips for Success
- Be patient with the rising times; this is crucial for fluffy bread.
- Use a kitchen thermometer to check your milk’s temperature; it ensures the yeast activates properly.
- Handle the dough gently to keep that airy texture intact.
- Feel free to adjust the quantity of Asiago cheese for extra cheesiness!
- Store any leftovers in an airtight container to maintain freshness.
Equipment Needed
- Stand Mixer: Ideal for kneading, but you can use your hands if you prefer a workout!
- Parchment Paper: Helps with easy clean-up. You can use a greased baking sheet if you don’t have it.
- Measuring Cups and Spoons: Essential for accuracy, but a kitchen scale is handy too!
- Kitchen Towel: To cover the dough while it rises, or use plastic wrap if that’s what you have on hand.
Variations
- Herbed Asiago Bread: Add dried herbs like oregano, rosemary, or thyme to the dough for an aromatic twist.
- Garlic Asiago Bread: Incorporate minced garlic or garlic powder for a savory, garlicky flavor to elevate your bread.
- Spicy Kick: Mix in a pinch of red pepper flakes for those who enjoy a bit of heat with their cheesy goodness!
- Gluten-Free Option: Use gluten-free bread flour blend for a wheat-free alternative that still delivers on flavor.
- Cheese Medley: Experiment with a mix of cheeses like mozzarella or cheddar alongside Asiago for different textures and flavors.
- Vegan Adaptation: Substitute the egg wash with a plant-based option or skip it for a softer crust. Use dairy-free cheese to suit a vegan diet.
Serving Suggestions
- Pair with Soup: This cheesy bread beautifully complements a warm bowl of tomato or minestrone soup.
- Salad Sidekick: Serve alongside a fresh garden salad for a delightful combination of textures.
- Cheese Platter: Slice it thin and add it to a cheese board; it’s a hit at gatherings!
- Dip Delight: Use it for dipping in olive oil or balsamic vinegar for an extra kick of flavor.
FAQs about Cheesy Asiago Bread
As you embark on your Cheesy Asiago Bread journey, you might have a few questions along the way. I’ve got you covered with answers to some of the most common inquiries to make your baking experience as smooth as butter!
Can I use a different type of cheese?
Absolutely! While Asiago is the star here, feel free to get creative. Try mozzarella or cheddar for a different flavor profile.
How do I store leftover bread?
Wrap any leftover Cheesy Asiago Bread in plastic wrap or store it in an airtight container. It will stay fresh for a couple of days. For longer storage, freeze it!
Can I make this bread ahead of time?
Yes! You can prepare the dough up to the first rise, then refrigerate it overnight. Just let it come to room temperature before shaping and baking.
What can I serve with Cheesy Asiago Bread?
This delicious bread pairs well with soups, salads, or simply served with olive oil for dipping. It’s a versatile addition to any meal!
Is this recipe suitable for beginners?
Definitely! The process is straightforward, and with a little patience, you’ll have a delightful bread that will impress everyone!
Final Thoughts
Every bite of this Cheesy Asiago Bread tells a story of warmth and love. As a passionate home cook, I find joy in creating recipes that bring people together. This bread is more than just a side dish; it’s a cozy aroma that fills your kitchen and invites everyone to gather around the table. It’s a simple pleasure, yet it creates cherished moments with family and friends. So, whether you’re grabbing a quick slice with your morning coffee or serving it at dinner, this recipe is bound to become a cherished favorite. Happy baking!
PrintCheesy Asiago Bread
Cheesy Asiago Bread is a delightful and cheesy treat perfect for cheese lovers, featuring a soft and slightly sticky texture with a rich Asiago flavor.
- Prep Time: 1 hour 15 minutes
- Cook Time: 35 minutes
- Total Time: 1 hour 50 minutes
- Yield: 2 loaves 1x
- Category: Baked Good
- Method: Baking
- Cuisine: Italian
- Diet: Vegetarian
Ingredients
- 3 1/4 cups bread flour, divided
- 1 package instant yeast (2 ¼ teaspoons)
- 1 1/2 teaspoons salt
- 1 teaspoon granulated sugar
- 1/4 teaspoon black pepper
- 1 1/4 cups 2% milk
- 2 tablespoons salted butter
- 1 1/2 cups shredded Asiago cheese, divided
- 1 large egg (for egg wash)
- 1 tablespoon warm water
Instructions
- In the bowl of a stand mixer, whisk together 1 ½ cups flour, yeast, sugar, salt, and pepper. Set aside.
- Heat the milk and butter in a microwave-safe bowl to 120-130ºF, ensuring it’s warm enough to activate the yeast without killing it. Stir the milk mixture into the flour mixture and mix on low speed with the paddle attachment until smooth.
- Add 1 ¼ cups shredded cheese and mix just until combined.
- Gradually add the remaining flour to make a soft dough. Knead in the stand mixer with the dough hook for 5 minutes. The dough should be slightly sticky.
- Spray a large bowl with cooking spray, add the bread dough, turn to coat, and cover with plastic wrap or a clean towel. Let it rise in a warm place until nearly doubled (30-45 minutes).
- After it has risen, punch down the dough and divide it in two. Shape each piece into a loaf and place on a parchment-lined baking sheet. Cover and let rise for another 20-30 minutes.
- Preheat the oven to 375ºF. Whisk together the egg and water in a small bowl. Brush the tops of the loaves with the egg wash and sprinkle remaining cheese on top.
- Bake for 30-35 minutes until lightly golden brown, with an internal temperature of 190ºF. Allow cooling before slicing. Enjoy!
Notes
- This bread is also delicious served the next day.
- Handle the dough gently to maintain its airy structure.
- Adjust the amount of cheese to your preference for extra cheesiness.
Nutrition
- Serving Size: 1 slice
- Calories: 180
- Sugar: 1g
- Sodium: 200mg
- Fat: 7g
- Saturated Fat: 4g
- Unsaturated Fat: 2g
- Trans Fat: 0g
- Carbohydrates: 24g
- Fiber: 1g
- Protein: 6g
- Cholesterol: 40mg