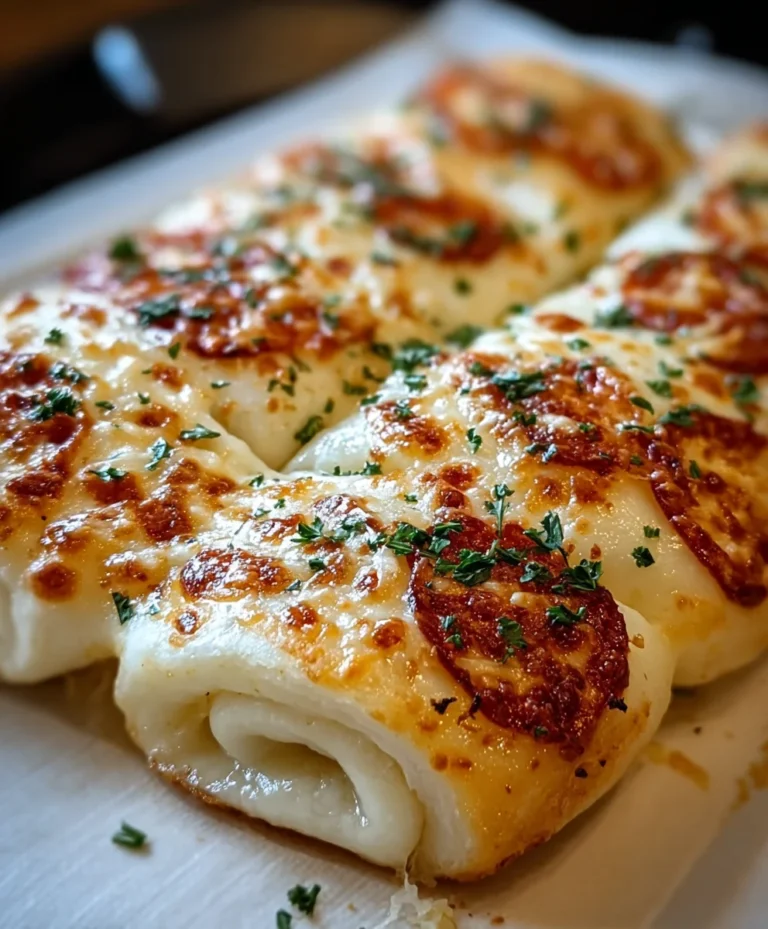
Introduction to Cheesy Garlic Butter Rollups
Life gets busy, doesn’t it? Between the kids’ activities, work projects, and daily chores, finding time to cook can feel overwhelming. That’s why I absolutely adore these Cheesy Garlic Butter Rollups. They’re not just delightful; they’re also a quick solution for those hectic evenings. Picture this: golden, cheesy bites that come together in under 30 minutes! Whether you’re trying to impress guests or simply enjoy a comforting snack on a chilly night, these rollups make any moment feel special. Grab your apron, and let’s dive into some cheesy goodness!
Why You’ll Love This Cheesy Garlic Butter Rollups
There’s something magical about the combination of warm, gooey cheese and buttery garlic that just makes your taste buds dance! These Cheesy Garlic Butter Rollups whip up in a flash, giving you more time to unwind with your family. Plus, they’re versatile enough to serve as appetizers or a scrumptious side dish. You’ll love how everyone eagerly devours them, leaving you with those cherished moments of joy and connection.
Ingredients for Cheesy Garlic Butter Rollups
Gather your ingredients and get ready for some cheesy magic! Here’s what you’ll need:
- Refrigerated crescent roll dough: This flaky dough is the star of the show. It makes everything easy and quick!
- Shredded mozzarella cheese: Gooey, melty goodness. Feel free to swap it for any cheese you love!
- Grated Parmesan cheese: Adds a sharp, nutty flavor that pairs perfectly with the buttery garlic.
- Unsalted butter: It keeps the rollups rich and provides a vehicle for all that garlicky goodness.
- Garlic cloves: Freshly minced garlic brings that vibrant flavor that’ll make your kitchen smell heavenly.
- Italian seasoning: This blend of herbs enhances the flavor profile, giving a hint of aromatic delight.
- Salt: Just a little sprinkle elevates all the flavors. Can’t skip it!
- Chopped fresh parsley: A beautiful garnish that adds a pop of color and freshness.
- Extra Parmesan cheese: Because you can never have too much cheese, right?
For those adventurous cooks, consider adding red pepper flakes to your garlic butter. It adds a delightful kick that might just surprise your family. Don’t forget that the ingredients with exact quantities are at the bottom of the article, ready for printing!
How to Make Cheesy Garlic Butter Rollups
Now that you’re all set with the ingredients, let’s roll into the fun part! Making these Cheesy Garlic Butter Rollups is like embarking on a little culinary adventure. I promise, with each step, you’ll be closer to savoring those golden bites of cheesy goodness!
Step 1: Preheat and Prepare
First things first, preheating the oven to 375°F (190°C) is crucial. This ensures your rollups bake evenly and turn that lovely golden brown. While the oven warms, line a baking sheet with parchment paper. This simple preparation helps prevent sticking and makes cleaning a cinch!
Step 2: Unroll the Dough
Next up, let’s get cozy with the crescent roll dough. Open the can and gently unroll the dough. Take your time, as tearing it can happen with enthusiasm! Separate the dough into 8 triangles, being careful not to stretch them too much. Each triangle will become a pocket of titillating flavor!
Step 3: Fill with Cheese
Now, the fun begins! Grab your shredded mozzarella and sprinkle it generously onto each triangle. Just 1-2 tablespoons should do. Then, add a sprinkle of Parmesan cheese on top. The key here is to keep the cheese in the center, allowing those rollups to wrap around it snugly and melt beautifully.
Step 4: Roll Them Up
Time to roll! Start from the wide end of each triangle and carefully roll toward the tip. Make sure to keep the roll tight, as loose rollups may unravel in the oven. Think of it like tucking in your kids at night – nice and snug for maximum comfort!
Step 5: Prepare Garlic Butter Mixture
In a small bowl, whisk together the melted butter, minced garlic, Italian seasoning, and a sprinkle of salt. This is where the magic truly happens! The aroma is heavenly, and it’s what will give your rollups a delightful flavor. Keep tasting—just don’t finish it all before you brush it on!
Step 6: Brush and Bake
With your garlic butter mixture ready, it’s time to brush those beauties! Generously slather the mixture over each rollup before they hit the oven. This glaze will help them turn golden brown and add that rich flavor we all crave. Bake for 10-12 minutes or until they’re bubbly and browned. Keep an eye on them, as you don’t want to miss that gorgeous color!
Step 7: Final Touches
Finally, when the rollups are out of the oven, brush on any remaining garlic butter for that extra indulgence. Sprinkle chopped parsley and a little more Parmesan for a touch of flair. Let them cool for a minute before serving. Trust me, the anticipation will be worth it as everyone gathers to enjoy these irresistible bites!
Tips for Success
- Make sure your butter is unsalted to control the seasoning.
- Don’t skip the parchment paper; it prevents sticking and cleanup is easier.
- Keep your cheese centered when filling to avoid spills.
- Experiment with herbs to match your family’s taste—dill and basil are great choices!
- For crispy edges, place rollups on a wire rack while baking.
Equipment Needed
- Baking sheet: A standard baking sheet works great, but a stone baking pan gives extra crispness.
- Parchment paper: You can use silicone baking mats if you don’t have parchment.
- Mixing bowl: Any bowl will do, just make sure it’s big enough for mixing.
- Whisk or fork: Use a whisk for fluffiness or a fork for simplicity.
Variations
- Spicy Cheesy Rollups: Add crushed red pepper flakes to the garlic butter for a kick that warms the soul.
- Herbed Delight: Sprinkle fresh herbs like basil or oregano inside the rollups for an aromatic twist.
- Mediterranean Style: Include feta cheese and sun-dried tomatoes for a zesty Mediterranean flavor profile.
- Gluten-Free Option: Substitute crescent roll dough with gluten-free dough for your gluten-sensitive friends.
- Veggie Packed: Incorporate finely chopped spinach or artichokes for added nutrition and flavor.
Serving Suggestions
- Pair your Cheesy Garlic Butter Rollups with a crisp garden salad for a light meal.
- Serve alongside marinara sauce for dipping to add an Italian flair.
- A glass of chilled white wine complements the richness beautifully.
- For a festive touch, arrange on a colorful platter with fresh parsley.
FAQs about Cheesy Garlic Butter Rollups
Are you curious about some common questions regarding these tempting Cheesy Garlic Butter Rollups? Let’s dive into a few FAQs that might just answer your queries and make your cooking experience even smoother!
Can I prepare Cheesy Garlic Butter Rollups in advance?
Absolutely! You can assemble the rollups, brush them with garlic butter, and refrigerate them. Just bake them fresh right before serving for that delightful warmth!
What’s a good dipping sauce for these rollups?
A classic marinara sauce pairs perfectly, but if you want something different, try a zesty ranch or even a spicy aioli. Your palate will thank you!
Can I make these rollups with whole wheat crescent dough?
Definitely! Whole wheat crescent dough is a fantastic alternative that offers added nutrition while still giving you that flaky texture we all love!
How do I store leftovers?
Place any leftover rollups in an airtight container in the refrigerator for up to three days. They’ll still be delicious, just reheat them in the oven to maintain that yummy crispness!
What if my kids don’t like garlic?
No worries! Simply reduce the garlic in the butter mixture or replace it with herb-infused olive oil for a milder flavor that still keeps the essence of these cheesy rolls.
Final Thoughts
Embracing these Cheesy Garlic Butter Rollups is like wrapping yourself in a cozy blanket on a chilly evening. They bring warmth, joy, and a little bit of magic to your table. Each rollup holds the promise of cheesy goodness, inviting laughter and connection among loved ones. I love how simple ingredients can create flavors that make everyone smile. Whether it’s family movie night or a fancy dinner, these rollups elevate any occasion. So roll up your sleeves, dive into this cheesy adventure, and savor those delicious moments that make life truly delightful!
PrintCheesy Garlic Butter Rollups

Cheesy Garlic Butter Rollups are delightful, cheesy bites made with crescent roll dough, mozzarella, and Parmesan, topped with a garlic butter glaze.
- Prep Time: 15 minutes
- Cook Time: 12 minutes
- Total Time: 27 minutes
- Yield: 8 rollups 1x
- Category: Appetizer
- Method: Baking
- Cuisine: American
- Diet: Vegetarian
Ingredients
- 1 can (8 oz) refrigerated crescent roll dough
- 1 cup shredded mozzarella cheese (or any melty cheese you adore)
- 1/2 cup grated Parmesan cheese
- 1/4 cup unsalted butter, melted
- 2 cloves garlic, minced
- 1 teaspoon Italian seasoning
- 1/4 teaspoon salt
- Chopped fresh parsley (for garnish)
- Extra Parmesan cheese for garnish
Instructions
- Preheat your oven to 375°F (190°C) and line a baking sheet with parchment paper.
- Unroll the crescent roll dough and separate it into 8 triangles.
- Sprinkle 1-2 tablespoons of shredded mozzarella and a sprinkle of Parmesan cheese onto each triangle.
- Roll each triangle from the wide end to the tip and place them seam side down on the baking sheet.
- In a bowl, mix the melted butter, minced garlic, Italian seasoning, and salt, then brush generously over each rollup.
- Bake for 10-12 minutes until golden brown and cheese is bubbling.
- Brush any remaining garlic butter over the baked rollups and sprinkle with chopped parsley and more Parmesan cheese.
- Allow to cool slightly before serving warm.
Notes
- For extra flavor, consider adding red pepper flakes to the garlic butter mixture.
- These rollups can be served as an appetizer or a side dish.
- Store leftovers in an airtight container in the refrigerator for up to 3 days.
Nutrition
- Serving Size: 1 rollup
- Calories: 150
- Sugar: 1g
- Sodium: 320mg
- Fat: 10g
- Saturated Fat: 5g
- Unsaturated Fat: 3g
- Trans Fat: 0g
- Carbohydrates: 12g
- Fiber: 0g
- Protein: 4g
- Cholesterol: 20mg