Introduction to Chocolate Covered Rice Krispy
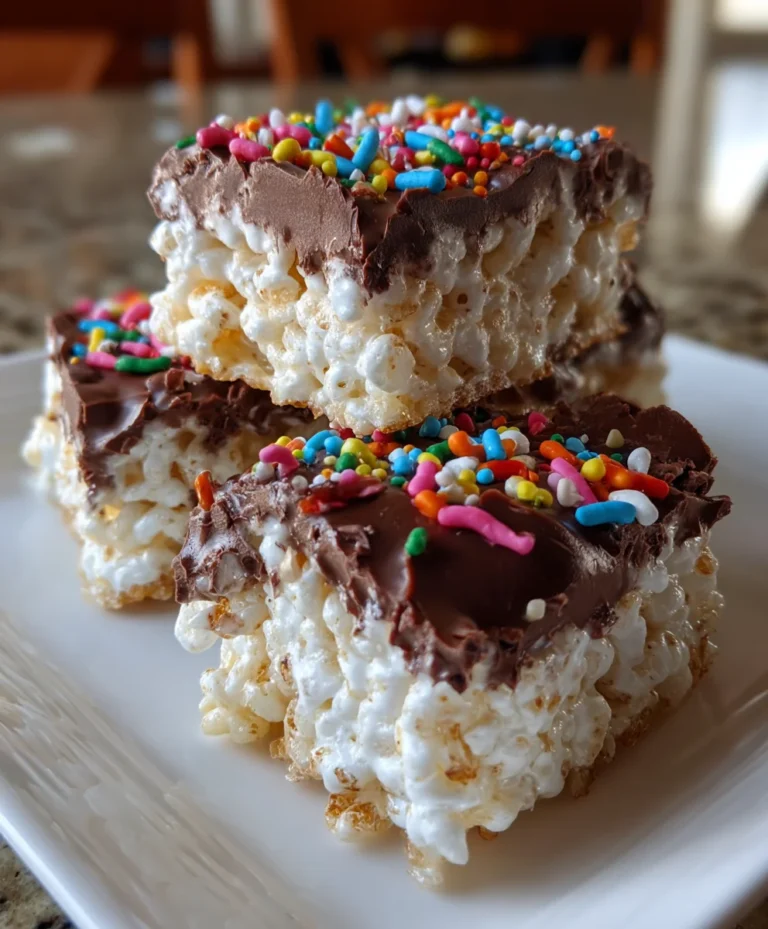
There’s something irresistibly nostalgic about a treat that combines gooey marshmallows, crunchy Rice Krispies, and rich chocolate.
Chocolate Covered Rice Krispy bars are not just perfect for those busy days when you need a quick, delicious delight.
They also bring back fond memories of childhood, making them a great way to impress your loved ones!
Whether you’re looking for a sweet snack, an easy dessert for a gathering, or simply a reason to indulge, this recipe is your answer.
With only a few ingredients and minimal fuss, you’ll feel like a culinary superstar in no time!
Why You’ll Love This Chocolate Covered Rice Krispy
You’ll adore these Chocolate Covered Rice Krispy bars for their simplicity.
In just 30 minutes, they go from ingredients to mouthwatering treats.
The combination of crunchy Rice Krispies with creamy chocolate gives you a taste explosion that kids and adults love alike.
Plus, they’re perfect for all occasions, from birthday parties to cozy family nights in.
Quick, easy, and scrumptious—what’s not to love?
Ingredients in Chocolate Covered Rice Krispy
Creating these delightful Chocolate Covered Rice Krispy bars requires just a handful of ingredients.
Here’s what you’ll need for your sweet adventure!
- Unsalted Butter: This adds rich creaminess to your bars. If you prefer a dairy-free option, you can substitute with coconut oil.
- Mini Marshmallows: The glue that holds everything together! They melt beautifully, creating that classic chewy texture.
- Rice Krispies Cereal: The iconic crunch is what sets these treats apart. For a fun twist, try using flavored or colored varieties.
- Fine Sea Salt: Just a pinch can enhance the sweetness, bringing out the best flavors in your treats. It’s optional but highly recommended!
- Semisweet or Dark Chocolate Chips: This is the star topping that adds a decadent layer. Go for dark chocolate if you want a richer taste or semisweet for a classic vibe.
- Vegetable or Coconut Oil: This helps your chocolate melt smoothly, ensuring it spreads like a dream over the bars.
- Rainbow Sprinkles or Chopped Nuts (optional): These fun toppings add color and texture! Use nuts for a crunchier bite, or sprinkles for a festive flair.
Detailed measurements for each ingredient can be found at the bottom of the article, along with a handy printable version.
Don’t hesitate to get creative with your choices—you’re sure to impress!
How to Make Chocolate Covered Rice Krispy
Making Chocolate Covered Rice Krispy bars is as simple as it is delightful!
Follow these clear steps to craft your own batch of magic.
I promise, you’ll feel like a kitchen whiz by the end!
Prepare the Pan
Start by getting your pan ready.
Lightly grease an 8×8-inch or 9×9-inch square baking pan with butter.
This step is essential! It helps the bars release easily once set.
If you’re worried about sticking, just line the bottom with parchment paper.
That extra layer is your secret weapon!
Melt the Butter
Place a large saucepan over low heat and add your unsalted butter.
Stir constantly to ensure it melts evenly without browning.
Browning can add a burnt taste, so keep a close eye!
You want it to be perfectly melted and smooth—just like that comforting hug from a loved one.
Add Marshmallows
Now, add in the mini marshmallows to the melted butter.
Stir them in until they’re completely melted and mixed.
This can take a few minutes, but hang in there!
You’ll know it’s ready when the mixture is smooth like a cloud.
Season the Mixture
Once the marshmallows are velvety, it’s time to elevate the flavor!
Remove the saucepan from the heat and stir in a pinch of fine sea salt.
The salt balances the sweetness perfectly.
Trust me, it’s a game changer for the overall taste!
Incorporate Cereal
Add the Rice Krispies cereal into the marshmallow mixture.
Gently fold with a spatula until all the cereal is evenly coated.
Don’t rush this step—take your time!
You want each crispy piece to get that delicious marshmallow love.
Press into Pan
Transfer the sticky mixture into your prepared pan.
To press it down evenly, use a buttered spatula or your hands.
Just be careful not to squish it too hard—gentle pressure is key!
You want a firm layer, but not a brick.
Cool the Base
Patience is crucial here!
Let your pan sit at room temperature for about 10 minutes.
This allows the base to firm up a bit before we go chocolate crazy.
Meanwhile, take a moment to enjoy that marshmallowy aroma filling your kitchen!
Melt Chocolate
In a microwave-safe bowl, combine chocolate chips and vegetable or coconut oil.
Microwave on medium power in 30-second intervals, stirring in between each.
Keep doing this until you achieve a glossy, smooth melted chocolate.
It should be as indulgent as a rainy day treat!
Spread Chocolate Layer
Once the chocolate is ready, pour it over the cooled Rice Krispy mixture.
Use an offset spatula or the back of a spoon to spread it evenly.
Make sure every corner gets a delicious layer of chocolate happiness!
Add Garnish
Here’s where you can get creative.
Immediately sprinkle on some rainbow sprinkles or chopped nuts for added texture and flair.
These optional toppings make your Chocolate Covered Rice Krispy bars as beautiful as they are tasty!
Set the Treats
Allow the bars to set at room temperature for at least 1 hour.
If you’re in a hurry, you can pop them in the fridge for 20-30 minutes until the chocolate firms up!
Either way, the anticipation makes them even more enjoyable!
Cut into Bars
Once the chocolate is firm, it’s time to slice it up!
Lift the block from the pan using the parchment overhang (if you used it) or simply invert it onto a cutting board.
Use a sharp knife to cut into 12-16 bars.
Admire your handiwork!
Each piece is a little square of joy ready to be devoured.
Tips for Success
- Always keep stirring the butter to prevent it from browning.
- Use a silicone spatula for easy mixing and scraping, leaving no marshmallow behind.
- Press the Rice Krispy mixture gently to maintain its light and crispy texture.
- For a smoother chocolate layer, make sure it’s fully melted before spreading.
- Letting the bars cool completely makes cutting easier and cleaner.
Equipment Needed for Chocolate Covered Rice Krispy
- Large Saucepan: Essential for melting butter and marshmallows; a non-stick pot works well too.
- Spatula: Use a silicone or rubber spatula for easy mixing; wooden spoons are an alternative.
- Baking Pan: An 8×8 or 9×9 square pan; an 11×7 rectangle works in a pinch!
- Microwave-Safe Bowl: Needed for melting chocolate; a heat-proof glass bowl will do.
- Sharp Knife: Perfect for cutting the bars neatly; a pizza cutter can also work.
Variations of Chocolate Covered Rice Krispy
- Peanut Butter Bliss: Stir in a half cup of creamy or crunchy peanut butter into the melted marshmallows for a nutty flavor.
- Cookie Butter Delight: Substitute some of the butter with cookie butter for a spiced twist everyone will love.
- Flavorful Infusions: Add a teaspoon of vanilla or almond extract to the melted marshmallows for an aromatic boost.
- Healthier Option: Use whole grain Rice Krispies or a gluten-free version to keep up with dietary needs.
- Chocolate Lovers: Replace the semisweet chocolate with white chocolate or drizzle both for a stunning finish.
- Fruit Fusion: Mix in dried fruits, like cranberries or apricots, before pressing the mixture into the pan for a fruity twist.
Serving Suggestions for Chocolate Covered Rice Krispy
- Pair your Chocolate Covered Rice Krispy bars with a cold glass of milk or a hot cup of cocoa for ultimate indulgence.
- For a festive touch, serve them on a colorful platter with additional sprinkles on the side.
- These bars make excellent lunch box treats or after-school snacks for the kids.
- Cut them into smaller pieces and set them out at parties for a delightful dessert table.
FAQs about Chocolate Covered Rice Krispy
You might have some questions about making these delightful Chocolate Covered Rice Krispy bars.
Don’t worry! I’ve got you covered with the answers to some of the most common queries.
Can I make Chocolate Covered Rice Krispy bars ahead of time?
Absolutely! These bars can be made a day in advance.
Just store them in an airtight container at room temperature.
They’ll stay fresh and delicious, ready for any occasion!
How do I store leftovers?
Keep your leftover Chocolate Covered Rice Krispy bars in an airtight container.
They can last up to a week at room temperature.
If you need to keep them longer, consider refrigerating, but they may lose some of that delightful crunch.
Can I use different types of chocolate?
Yes, you can! Swap semisweet chocolate for dark chocolate, white chocolate, or even milk chocolate, depending on your preference.
Each type brings its own unique flavor, so feel free to experiment!
What can I substitute for Rice Krispies?
If you’re looking for a different cereal option, try using Cheerios or puffed rice for a similar crunchy texture.
You can even use crushed graham crackers for a delightful twist!
Are Chocolate Covered Rice Krispy bars suitable for kids?
Definitely! These bars are perfect for kids.
They’re easy to make, and you can customize them with fun toppings like sprinkles or nuts.
Plus, they make great after-school snacks or lunch box treats!
Final Thoughts
Creating Chocolate Covered Rice Krispy bars brings a wave of joy and nostalgia that fills my kitchen with warmth.
The simplicity of this recipe means anyone can whip up a batch—even on the busiest of days.
Watching my family’s faces light up as they bite into that chocolatey, crunchy goodness never fails to melt my heart.
They are not just treats; they carry love and memories, perfect for sharing and celebrating.
With every bar you make, you’re crafting a little piece of happiness.
So, grab your ingredients and indulge in this delightful adventure!
Chocolate Covered Rice Krispy

A delightful treat made with Rice Krispies cereal, mini marshmallows, and chocolate, perfect for any occasion.
- Prep Time: 20 minutes
- Cook Time: 10 minutes
- Total Time: 30 minutes
- Yield: 12–16 bars 1x
- Category: Dessert
- Method: No-bake
- Cuisine: American
- Diet: Vegetarian
Ingredients
- 6 tablespoons unsalted butter, plus extra for greasing
- 1 package (10 ounces) mini marshmallows
- 6 cups Rice Krispies cereal
- 1/4 teaspoon fine sea salt (optional)
- 1 1/2 cups semisweet or dark chocolate chips
- 1 teaspoon vegetable oil or coconut oil
- 2 tablespoons rainbow sprinkles or chopped nuts (optional)
Instructions
- Prepare the Pan: Lightly grease an 8×8-inch or 9×9-inch square baking pan with butter.
- Melt the Butter: In a large saucepan over low heat, melt the butter, stirring constantly to prevent browning.
- Add Marshmallows: Add mini marshmallows and continue stirring until completely melted and smooth.
- Season the Mixture: Remove from heat and stir in sea salt if using.
- Incorporate Cereal: Add Rice Krispies cereal and gently fold with a spatula until evenly coated.
- Press into Pan: Transfer the mixture to the prepared pan. Using a buttered spatula or hands, press the mixture evenly and firmly into the pan.
- Cool the Base: Let sit at room temperature for about 10 minutes.
- Melt Chocolate: In a microwave-safe bowl, combine chocolate chips and oil. Microwave on medium power in 30-second intervals, stirring after each, until melted and glossy.
- Spread Chocolate Layer: Pour the melted chocolate over the cooled Rice Krispy layer. Spread evenly with an offset spatula or the back of a spoon.
- Add Garnish: Immediately sprinkle with rainbow sprinkles or chopped nuts if desired.
- Set the Treats: Allow the treats to set at room temperature for at least 1 hour, or refrigerate for 20-30 minutes until the chocolate is firm.
- Cut into Bars: Once set, lift the block from the pan using parchment overhang (if used) or invert onto a cutting board. Cut into 12-16 bars with a sharp knife.
Notes
- For a more colorful treat, use a variety of sprinkles.
- Store leftovers in an airtight container at room temperature.
Nutrition
- Serving Size: 1 bar
- Calories: 150
- Sugar: 10g
- Sodium: 60mg
- Fat: 6g
- Saturated Fat: 4g
- Unsaturated Fat: 2g
- Trans Fat: 0g
- Carbohydrates: 22g
- Fiber: 1g
- Protein: 1g
- Cholesterol: 10mg