Introduction to Chocolate Covered Strawberry Poke Cake
Welcome, fellow home cooks! If you’re on the lookout for a delightful dessert that feels like a warm hug, let me introduce you to my Chocolate Covered Strawberry Poke Cake. This cake isn’t just perfect for impressing your family and friends; it’s also a quick solution for those busy days when time slips through your fingers like sand. With layers of moist strawberry cake drenched in creamy goodness, this dessert evokes sweet memories and smiles around the table. Trust me; when you bring this showstopper to your next gathering, everyone will be eager for seconds!
Why You’ll Love This Chocolate Covered Strawberry Poke Cake
This Chocolate Covered Strawberry Poke Cake is a dream come true for busy moms and professionals alike. It effortlessly combines ease and indulgence, making it perfect for any occasion. You can whip it up quickly, thanks to the simple ingredients and straightforward instructions. Plus, the rich flavor of strawberry and chocolate delightfully meld together, bringing joy to both young and old. It’s the dessert that satisfies everyone’s sweet tooth without the fuss!
Ingredients for Chocolate Covered Strawberry Poke Cake
Before we dive into the baking magic, let’s gather our stars. This Chocolate Covered Strawberry Poke Cake shines bright with a few simple ingredients, each playing a crucial part in creating that luscious flavor profile:
- Strawberry Cake Mix – The foundation of our cake! Choose a quality mix for great taste and moistness.
- Milk – A creamy base for our pudding mix. Whole milk works wonders, but you can use any milk you love.
- Instant White Chocolate Pudding Mix – This will add that creamy richness, giving our poke cake a delightful texture.
- Cool Whip – A fluffy topping that brings lightness and adds a touch of sweetness. Feel free to substitute with homemade whipped cream if you’re feeling adventurous.
- Fresh Strawberries – The star of the show! Use juicy, ripe strawberries for maximum flavor. You can even try them dipped in chocolate if you wish!
- Melted Chocolate – This drizzled goodness gives your cake that signature chocolate-covered effect. Want a richer taste? Dark chocolate is a great alternative here.
Remember, the exact measurements of these ingredients can be found at the bottom of the article, ready for quick reference or printing. With this lineup, you’ll create a dessert that’s as delightful as it is delicious!
How to Make Chocolate Covered Strawberry Poke Cake
Now that we have our ingredients, it’s time for the fun part: making our Chocolate Covered Strawberry Poke Cake! The process is simple, and each step will bring us closer to that show-stopping dessert. Let’s dive in!
Step 1: Prepare and Bake the Cake
Start by preheating your oven to 350°F. Prepare your strawberry cake mix according to package instructions, and pour it into a greased 9×13-inch baking dish. Choosing the right baking dish is key! A 9×13 will ensure even cooking, giving you that perfect, moist cake.
Choosing the Right Baking Dish
A good-size baking dish like this one helps the cake rise beautifully and bake evenly. If you use a dish that’s too small, it may overflow. Too big and it could dry out. Aim for a snug fit!
Step 2: Poke the Holes
When your cake is golden brown and baked through, let it cool for about 10 minutes. This brief cooling time is essential! It prevents steam from escaping too quickly and keeps the cake from crumbling.
Importance of Cooling
Cooling the cake slightly helps it remain intact while you poke the holes. Poking holes while it’s still warm allows the pudding to soak right in, creating that irresistible creamy texture.
Step 3: Mix and Pour the Pudding
While the cake is cooling, mix together the instant white chocolate pudding with 4 cups of cold milk. Whisk it until smooth. As the pudding thickens, pour it generously over the cake. Timing is crucial here!
Timing Tips
Make sure you pour the pudding before it fully thickens. If you wait too long, it won’t seep deep into the holes. You want every bite to be luscious with that pudding goodness!
Step 4: Cool Whip Layer
Once the pudding is poured, allow it to set briefly for about five minutes. Then, grab your Cool Whip and spread it evenly over the cake. This fluffy topping adds an extra layer of deliciousness!
How to Spread Evenly
To spread the Cool Whip, use a spatula or the back of a spoon. Gently push it from the center outward to avoid disturbing the pudding layer below. Take your time; a smooth, even layer looks gorgeous!
Step 5: Melt the Chocolate
Next, it’s time to melt the chocolate. Place it in a microwave-safe bowl and microwave in 15-30 second increments, stirring in between until you have a smooth, silky texture.
Tips for Smooth Melting
Stirring is crucial! This helps avoid hot spots that could burn the chocolate. Remember, melted chocolate should be glossy and flow easily for the perfect drizzle!
Step 6: Add Strawberries and Drizzle
Now it’s time to adorn your cake! Place the quartered fresh strawberries on top of the Cool Whip. Once they’re arranged to your liking, use that melted chocolate to drizzle over everything. It’s the cherry on top!
Arranging Strawberries
For a beautiful presentation, try making a pattern with the strawberries. You could arrange them in rows or in a circle. The glisten of the chocolate adds a touch of elegance, elevating your dessert!
Step 7: Refrigerate and Serve
After all that deliciousness, pop your masterpiece into the refrigerator. Chilling it for at least two hours helps set the pudding and chocolate. It’s worth the wait!
Setting Time Importance
Refrigerating is essential! This time allows the flavors to meld beautifully and gives the pudding a chance to fully incorporate with the cake. Trust me, the patience will pay off!
Tips for Success
- Always use fresh, ripe strawberries for the best flavor.
- If you’re short on time, prepare the cake a day in advance.
- For a fun twist, try adding a layer of crushed graham crackers beneath the Cool Whip.
- Keep an eye on the chocolate while melting to avoid scorching.
- Opt for low-fat options for the pudding and Cool Whip if desired.
Equipment Needed
- 9×13-inch baking dish – A must for even baking.
- Mixing bowls – Use any sizes you have on hand.
- Whisk – A fork can work in a pinch!
- Spatula – Essential for spreading and serving.
- Microwave-safe bowl – Any heat-safe dish will do.
Variations
- Chocolate Cake Base: Swap the strawberry cake mix for chocolate cake mix to create a rich, chocolatey version.
- Fruit Alternates: Try using raspberries or blueberries instead of strawberries for a fresh twist on flavors.
- Nutty Add-ins: Sprinkle chopped nuts, like almonds or pecans, over the Cool Whip layer for an added crunch.
- Gluten-Free Option: Use a gluten-free cake mix to make this dessert suitable for those with dietary restrictions.
- Dairy-Free Version: Substitute almond milk and a dairy-free whipped topping to cater to lactose intolerant guests.
Serving Suggestions
- Pair it with a scoop of vanilla ice cream for an extra creamy experience.
- A dollop of whipped cream atop each slice adds a lovely touch.
- Serve with a side of fresh mint leaves for a burst of color.
- Pineapple or mango salsa can add a tropical twist to each bite.
- Consider a light sparkling drink to complement the sweetness of the cake.
FAQs about Chocolate Covered Strawberry Poke Cake
Can I make the Chocolate Covered Strawberry Poke Cake ahead of time?
Absolutely! This cake actually tastes better when made a day in advance. Just store it in the fridge, and it will be ready to impress your guests when you serve it!
How do I store leftovers?
If you have any leftovers, which is rare, cover the cake with plastic wrap or foil and store it in the refrigerator. It should stay fresh for up to three days.
Can I use different pudding flavors for this poke cake?
Of course! While the white chocolate pudding is delicious, feel free to experiment with flavors like vanilla or even chocolate for an extra twist.
What’s the best way to slice the cake?
To slice the cake without making a mess, use a sharp knife and clean it between cuts. This will help you maintain those beautiful layers!
Is it possible to make this cake gluten-free?
Yes! Just swap the standard strawberry cake mix with a gluten-free version, and you’ll have a delightful gluten-free Chocolate Covered Strawberry Poke Cake everyone can enjoy.
Final Thoughts
Creating this Chocolate Covered Strawberry Poke Cake is more than just baking—it’s about sharing joy and flavor with the people you love. Each bite transports you to a place of sweetness, where laughter fills the air and smiles abound. It’s a recipe that fits effortlessly into your busy life, making special moments just a little sweeter. So, whether it’s a birthday, a family dinner, or just because, this delightful cake will surely become a cherished favorite. Trust me, the love and warmth woven into each layer will make this dessert a true masterpiece in your kitchen!
PrintChocolate Covered Strawberry Poke Cake

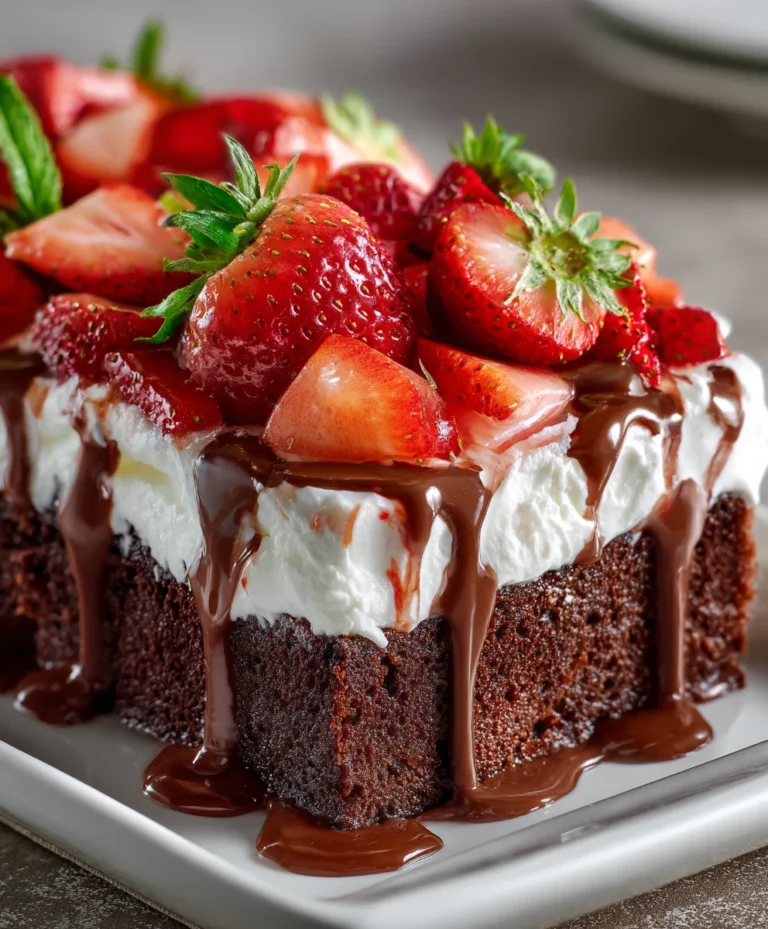
A delicious and delectable Chocolate Covered Strawberry Poke Cake that combines a moist strawberry cake with creamy pudding, topped with fresh strawberries and drizzled with melted chocolate.
- Prep Time: 20 minutes
- Cook Time: 30 minutes
- Total Time: 2 hours 50 minutes
- Yield: 12 servings 1x
- Category: Dessert
- Method: Baking
- Cuisine: American
- Diet: Vegetarian
Ingredients
- 1 box of strawberry cake mix (15.25 oz) plus required ingredients to prepare the cake
- 4 cups milk
- 2 boxes (3.3 oz each) instant white chocolate pudding mix
- 8 oz tub of cool whip
- 12 oz fresh strawberries, quartered
- 7 oz melted chocolate, suitable for dipping or drizzling
Instructions
- Prepare and bake the strawberry cake mix in a greased 9×13-inch baking dish following the package instructions.
- Allow the baked cake to cool for 10 minutes, then use the handle of a spoon to poke holes all over the surface.
- Combine the pudding mix with 4 cups of milk as per the package instructions. Pour the pudding mixture over the cake before it fully thickens, ensuring it fills the holes.
- Let the pudding set for 5 minutes at room temperature. Spread the cool whip evenly on top of the cake.
- Melt the chocolate in the microwave in 15-30 second increments, stirring in between until smooth.
- Place the quartered strawberries on the cake and drizzle with melted chocolate.
- Refrigerate the cake for at least 2 hours to set the chocolate and pudding before serving. Enjoy!
Notes
- Ensure the cake is completely cooled before poking holes.
- For best results, serve the cake chilled.
- You can substitute dark chocolate for the drizzle if desired.
Nutrition
- Serving Size: 1 slice
- Calories: 320
- Sugar: 22g
- Sodium: 230mg
- Fat: 12g
- Saturated Fat: 7g
- Unsaturated Fat: 3g
- Trans Fat: 0g
- Carbohydrates: 47g
- Fiber: 1g
- Protein: 3g
- Cholesterol: 30mg