
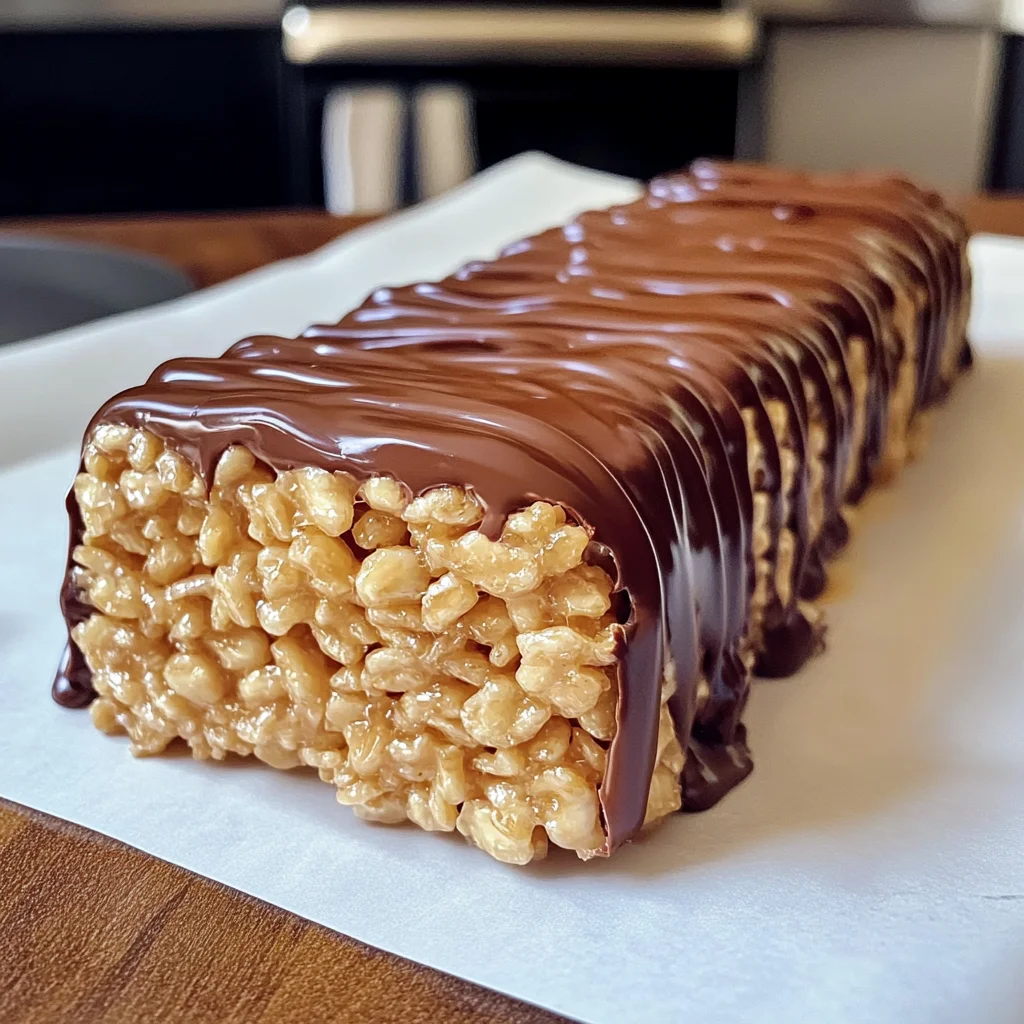
Introduction to Chocolate Peanut Butter Rice Krispies Roll
As a busy mom, I know how important it is to have easy, delicious treats on hand. The Chocolate Peanut Butter Rice Krispies Roll is one of my go-to recipes that never fails to delight my family. It combines the rich flavors of chocolate and peanut butter with the satisfying crunch of Rice Krispies. Whether it’s an after-school snack or a quick dessert for unexpected guests, this recipe is a lifesaver. Plus, it takes minimal effort, making it perfect for those hectic days when you still want to impress your loved ones with a homemade treat.
Why You’ll Love This Chocolate Peanut Butter Rice Krispies Roll
This Chocolate Peanut Butter Rice Krispies Roll is a dream for any busy kitchen. It’s a no-fuss recipe that comes together in no time, making it perfect for when you’re juggling a million things. The combination of creamy peanut butter and rich chocolate will have everyone coming back for seconds, and the crunch from the Rice Krispies adds a delightful texture. It’s a treat that always brings smiles, and you’ll love how easy it is to make!

Ingredients for Chocolate Peanut Butter Rice Krispies Roll
Gathering the right ingredients makes all the difference in creating a scrumptious Chocolate Peanut Butter Rice Krispies Roll. Here’s what you’ll need:
- Rice Krispies cereal: This crunchy base gives the roll its delightful texture. Plus, it’s a staple you probably already have in your pantry!
- Creamy peanut butter: The star of the show! It adds a rich, nutty flavor. Smooth peanut butter works best, but you could use crunchy for added texture.
- Unsalted butter: This brings richness and helps hold everything together. If you’re short on butter, coconut oil can be a great substitute.
- Granulated sugar: This sweetens the mixture and enhances the overall flavor. Brown sugar could be used for a deeper, caramel-like taste.
- Light corn syrup or honey: This acts as a binder to keep the roll intact. If you prefer a healthier option, maple syrup is a delicious alternative.
- Semi-sweet chocolate chips: Their melty goodness turns this roll into a decadent dessert. Dark chocolate can also be used if you’re feeling fancy!
- Additional unsalted butter: A little extra butter in the chocolate melt keeps it glossy and smooth.
Check the bottom of the article for exact quantities of each ingredient, so you can print the recipe easily. Get ready to whip up this tasty treat!
How to Make Chocolate Peanut Butter Rice Krispies Roll
Making the Chocolate Peanut Butter Rice Krispies Roll is a breeze, and I can’t wait to share the steps with you. From melting that creamy peanut butter to rolling it up into a delicious log, each step is simple and satisfying. Let’s get started!
Step 1: Prepare the Mixture
Begin by grabbing a medium saucepan. Over medium heat, combine the creamy peanut butter, unsalted butter, granulated sugar, and your choice of light corn syrup or honey. Stir this melty mixture until it’s smooth and bubbly, about 3-5 minutes. The kitchen will smell wonderful, and your patience will be rewarded!
Step 2: Combine the Rice Krispies
Once that mixture is nice and smooth, remove it from the heat. Now comes the fun part! Quickly stir in the Rice Krispies cereal, ensuring each piece is coated evenly. It should feel like a sweet, sticky hug for each crunchy bit. Acting fast helps keep everything fresh and crunchy!
Step 3: Forming the Rectangle
Time to shape your deliciousness! Place a sheet of parchment paper on a flat surface. Using your hands or a rolling pin, press the Rice Krispies mixture into a rectangle that’s about 12×8 inches. Don’t worry about it being perfect; it’s all about the taste, right? Make sure the edges are neat, allowing for a nice roll.
Step 4: Melt the Chocolate
Now, let’s turn our attention to the chocolate! In a microwave-safe bowl, combine the semi-sweet chocolate chips and that additional bit of unsalted butter. Microwave in 30-second intervals, stirring in between until melted and glossy. This will enhance the richness of our roll, making every bite delectable!
Step 5: Spread the Chocolate
With your chocolate mixture smooth, it’s time to get spreading! Carefully pour the melted chocolate over the Rice Krispies rectangle. Use a spatula to spread it evenly. Let it sit for 5 minutes. You want it cool enough to handle but still warm enough to keep flexibility for the roll.
Step 6: Rolling the Treat
Here’s where it all comes together! Starting at one of the shorter sides, use the parchment paper to help lift and roll the rectangle tightly into a log. Keep rolling until you reach the end, like wrapping a cozy blanket around a treat! Once rolled, place it seam-side down to keep everything tucked in.
Step 7: Chill and Slice
Wrap your rolled masterpiece in the parchment paper and pop it into the refrigerator. Let it chill for at least an hour or until firm. When you’re ready, pull it out, slice into 1/2-inch rounds, and enjoy! These treats are perfect for sharing, or hiding away for a well-deserved chocolate fix later.
Tips for Success
- Coat the Rice Krispies quickly to prevent them from getting soggy.
- Use parchment paper for easy rolling and cleanup.
- Let the chocolate cool slightly before spreading to avoid it melting into the Rice Krispies.
- For extra crunch, consider adding chopped nuts or sprinkles on top before chilling.
- Keep the roll tightly wrapped to maintain freshness!
Equipment Needed
- Medium saucepan: Essential for melting your peanut butter and butter together.
- Mixing spoon: A sturdy wooden or silicone spoon helps combine ingredients effortlessly.
- Parchment paper: Use for rolling and easy cleanup; aluminum foil works too if needed.
- Microwave-safe bowl: Perfect for melting chocolate; a double boiler can be used as an alternative.
Variations
- Nutty Delight: Add chopped nuts like almonds or walnuts to the Rice Krispies mix for an added crunch.
- Fluffy Mallow: Stir in mini marshmallows before pressing into a rectangle for a gooey twist!
- Flavorful Swirl: Incorporate a swirl of your favorite jam or fruit preserves for a fruity contrast.
- Dark Chocolate: Switch out semi-sweet for dark chocolate chips to enhance the richness.
- Vegan Option: Use almond or cashew butter, coconut oil, and dairy-free chocolate chips for a vegan treat.
Serving Suggestions
- Pair with a tall glass of cold milk for a classic, comforting treat.
- Serve alongside fresh fruit like strawberries or bananas for a refreshing contrast.
- Arrange slices on a colorful platter, garnished with a sprinkle of chopped nuts for added wow factor.
- Drizzle some extra melted chocolate on top before serving for visual appeal.
FAQs about Chocolate Peanut Butter Rice Krispies Roll
Got questions about the Chocolate Peanut Butter Rice Krispies Roll? You’re in the right place! Here are some common queries and answers to help you make the most of this delicious treat.
Can I use crunchy peanut butter instead of creamy?
Absolutely! Crunchy peanut butter adds a delightful texture to your roll. Go ahead and use it if you prefer that extra crunch!
How should I store the Chocolate Peanut Butter Rice Krispies Roll?
Wrap it tightly in parchment paper or plastic wrap and store it in the refrigerator. It should stay fresh for up to a week!
Can I make this roll ahead of time?
You sure can! Preparing it a day in advance can actually enhance the flavors as they meld together. Just remember to keep it chilled.
What can I substitute for the light corn syrup?
Honey or maple syrup works wonderfully as alternatives. They add unique flavors while maintaining that sticky sweetness.
Can I freeze the Chocolate Peanut Butter Rice Krispies Roll?
Yes, you can! Just slice it first, then wrap the pieces individually. When cravings hit, take one out for a quick treat!
Final Thoughts
The Chocolate Peanut Butter Rice Krispies Roll isn’t just a dessert; it’s a delightful experience wrapped up in sweet, crunchy goodness. I love how it brings my family together, whether we’re enjoying it after dinner or sneaking a slice during a busy afternoon. The perfect balance of flavors and textures creates smiles all around. Plus, it’s so easy to make that I feel like a kitchen superstar—even on my busiest days. Give this recipe a try, and you might just find it becomes a family favorite in your home too!
PrintChocolate Peanut Butter Rice Krispies Roll

A deliciously easy treat combining chocolate and peanut butter with crunchy Rice Krispies, perfect for a quick dessert or snack.
- Prep Time: 20 minutes
- Cook Time: 10 minutes
- Total Time: 1 hour 30 minutes
- Yield: 12 servings 1x
- Category: Dessert
- Method: No Bake
- Cuisine: American
- Diet: Vegetarian
Ingredients
- 3 cups (90 g) Rice Krispies cereal
- 1/2 cup (120 g) creamy peanut butter
- 1/4 cup (60 g) unsalted butter
- 1/2 cup (100 g) granulated sugar
- 1/4 cup (60 ml) light corn syrup or honey
- 1 cup (175 g) semi-sweet chocolate chips
- 2 tablespoons (30 g) unsalted butter
Instructions
- In a medium saucepan over medium heat, combine the peanut butter, butter, sugar, and corn syrup (or honey). Stir until melted and smooth.
- Remove from heat and stir in the Rice Krispies until evenly coated.
- Place a sheet of parchment paper or wax paper on a flat surface. Press the Rice Krispies mixture evenly into a rectangle, approximately 12×8 inches. Use a rolling pin or your hands to smooth it out.
- In a microwave-safe bowl, melt the chocolate chips and butter in 30-second intervals, stirring until smooth and glossy.
- Spread the melted chocolate evenly over the Rice Krispies rectangle. Let it sit for 5 minutes to cool slightly but still remain pliable.
- Starting from the shorter side, carefully roll the rectangle into a tight log using the parchment paper to help lift and guide the roll. Place the roll seam-side down on the parchment.
- Wrap the roll in the parchment paper and refrigerate for at least 1 hour, or until firm. Once chilled, slice into 1/2-inch rounds and serve.
Notes
- Ensure the Rice Krispies are coated evenly for the best texture.
- Can be stored in the refrigerator for up to a week.
- Feel free to add nuts or additional toppings for extra crunch.
Nutrition
- Serving Size: 1 slice
- Calories: 150
- Sugar: 10 g
- Sodium: 50 mg
- Fat: 8 g
- Saturated Fat: 3 g
- Unsaturated Fat: 5 g
- Trans Fat: 0 g
- Carbohydrates: 18 g
- Fiber: 1 g
- Protein: 3 g
- Cholesterol: 15 mg