Introduction to Chocolate Royale Mini Cakes
As a busy mom, finding time to bake something special can feel impossible, but that doesn’t mean we should miss out on delightful treats! Enter Chocolate Royale Mini Cakes—the perfect bite-sized indulgence to satisfy both your sweet tooth and your time constraints. With their rich chocolate flavor served in a charming petite form, these mini cakes are an effortless way to impress your loved ones or brighten up a hectic day. Whether for an afternoon snack or a special celebration, these little gems bring joy in every bite!
Why You’ll Love This Chocolate Royale Mini Cakes
There are countless reasons to adore Chocolate Royale Mini Cakes. For starters, they come together in just under 40 minutes, making them perfect for busy days when you need a quick dessert fix. The rich, decadent chocolate flavor is sure to satisfy any sweet craving. Plus, their elegant appearance means you can serve them for any occasion without the fuss. Trust me, these mini cakes will become your go-to treat!
Ingredients for Chocolate Royale Mini Cakes
Creating these Chocolate Royale Mini Cakes starts with gathering a handful of delightful ingredients that each contribute to their rich flavor and lovely texture:
- All-purpose flour: This is the backbone of your cakes, helping them rise and hold their shape.
- Unsweetened cocoa powder: For that rich chocolate flavor, cocoa powder provides deep tones while keeping the sweetness in check.
- Baking powder: This essential leavening agent ensures your cakes rise beautifully, giving them a light and fluffy texture.
- Salt: Just a pinch of salt enhances the sweetness and balances the flavors, making every bite pop!
- Unsalted butter: Softened butter adds moisture and richness, helping to create a smooth, velvety batter.
- Granulated sugar: This sweetener brings balance and helps with the cake’s overall structure, caramelizing to create a slight crust.
- Large eggs: Eggs contribute to moisture and stability, lending a tender crumb while enriching the flavor.
- Vanilla extract: A splash of vanilla enhances the overall taste, adding warmth and depth to the chocolate.
- Whole milk: This creamy addition keeps the batter smooth and contributes to a luscious cake.
- Semi-sweet chocolate chips: Melting chocolate chips into the batter ensures every bite bursts with gooey chocolate goodness.
- Heavy cream: Used for the ganache, it gives the chocolate a silky, smooth texture that drapes beautifully over the cakes.
- Whipped cream: A fluffy topping that adds a lightness and contrast to the rich chocolate flavor.
- Chocolate shavings or sprinkles (optional): These fun toppings add a decorative touch and a little extra chocolate crunch!
For precise measurements of all these ingredients, check at the bottom of the article where you can find a printable version of this recipe.

How to Make Chocolate Royale Mini Cakes
Now that you’ve gathered all your ingredients, let’s dive into the fun part—making your Chocolate Royale Mini Cakes! Follow these simple, clear steps, and you’ll have a batch of delightful mini cakes ready to wow your family and friends.
Step 1: Preheat Your Oven
First things first, preheat your oven to 350°F (175°C). Preheating is crucial, as it helps your cakes rise evenly right from the start. Nobody wants dense, sad little cakes! This little step sets the stage for success.
Step 2: Prepare Dry Ingredients
Next, grab a bowl and sift together the all-purpose flour, cocoa powder, baking powder, and salt. Sifting is more than just a fancy kitchen technique; it aerates the flour and cocoa, ensuring your cakes have a light and fluffy texture. Plus, it helps mix everything well, preventing lumps in your batter.
Step 3: Cream Butter and Sugar
Now, in a separate mixing bowl, cream the softened butter and granulated sugar together. Use a hand mixer or a wooden spoon to beat them until the mixture is light and fluffy. This step is essential because it incorporates air into the batter, which is key for fluffy cakes. You’ll know it’s ready when it looks pale and has a buttery cloud-like consistency!
Step 4: Incorporate Eggs and Vanilla
Beat in the eggs, one at a time, mixing well after each addition. Then add the splash of vanilla extract. Eggs not only add moisture but also act as a binder, giving your mini cakes structure and flavor. Trust me, the warm notes of vanilla will elevate your cake’s taste!
Step 5: Combine Dry Ingredients and Milk
Now, it’s time to alternate adding the flour mixture and whole milk to your butter and egg mixture. Start with about a third of the dry ingredients, followed by half of the milk, and continue this pattern, ending with the dry ingredients. Mix gently to avoid overmixing, which can result in tough cakes. You want just a few floury streaks in your batter before you stop mixing!
Step 6: Fill the Mini Cake Molds
Carefully fill your prepared mini cake pans about two-thirds full with the batter. Be sure not to overfill them, or they’ll spill over while baking! If you have any extra batter, a cupcake tin works great for a few additional treats.
Step 7: Bake the Cakes
Pop your filled molds into the oven and bake for about 15-18 minutes. To check for doneness, insert a toothpick into the center of a cake. If it comes out clean or with a few crumbs, you’re all set! Avoid opening the oven door too early, as it can affect the rising process.
Step 8: Cool the Cakes
Once baked, remove them from the oven and let them cool in the pan for about 5 minutes. Then, transfer each mini cake to a wire rack to cool completely. Cooling is vital, as it allows the structure to firm up and prevents sogginess when adding toppings.
Step 9: Make the Ganache
While your cakes are cooling, it’s time to whip up that luscious ganache! In a small saucepan, heat the heavy cream until it just begins to simmer. Remove it from the heat and pour it over the semi-sweet chocolate chips in a bowl. Let it sit for 2-3 minutes, then whisk until smooth and shiny. This creamy coating will take your mini cakes to the next level!
Step 10: Assemble and Decorate
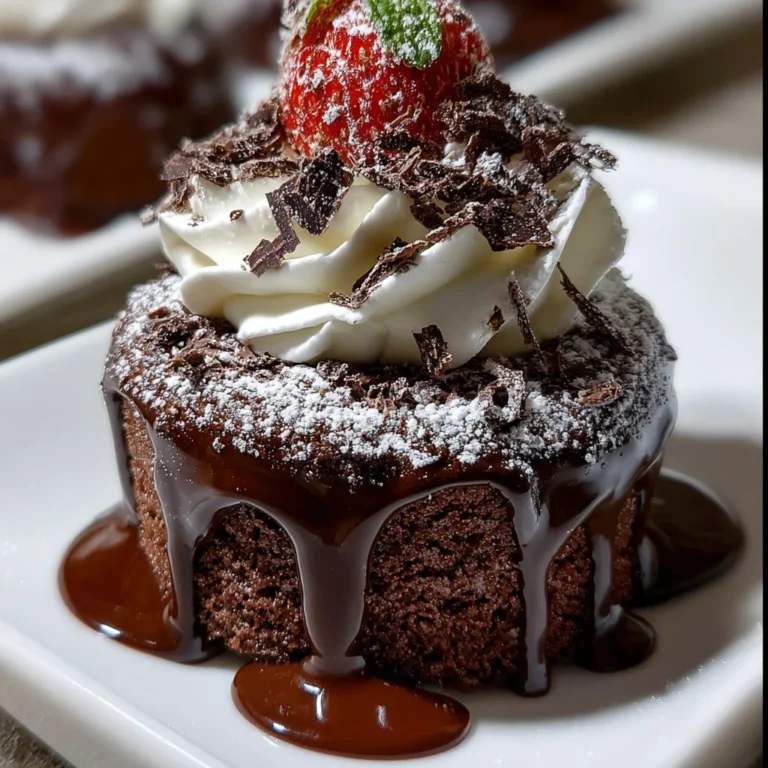
Finally, spoon the silky ganache over each cooled mini cake, letting it drip down the sides for a gorgeous presentation. Top each with a dollop of whipped cream and maybe some chocolate shavings or sprinkles for an extra touch. This finishing flourish will not only look beautiful but taste divine!
Tips for Success
- Ensure your butter is softened for easy creaming with sugar.
- Don’t skip sifting—it’s vital for a light texture!
- Use room temperature ingredients for better mixing.
- Be gentle when folding in the dry ingredients to maintain fluffiness.
- Keep an eye on baking time—ovens can vary, so check early!
- Let the ganache cool slightly before pouring for a perfect drizzle.
Equipment Needed
- Mini cake pan: A muffin tin works too if you don’t have one.
- Mixing bowls: Have a couple on hand for easy ingredient mixing.
- Whisk or hand mixer: You can use a sturdy spoon if you prefer a workout!
- Rubber spatula: Perfect for scraping the bowl clean.
- Wire rack: If you don’t have one, a cutting board does the trick!
Variations of Chocolate Royale Mini Cakes
- Gluten-Free: Substitute all-purpose flour with a gluten-free blend to cater to those with dietary restrictions.
- Vegan: Swap the eggs for flax eggs and use a non-dairy butter substitute along with almond or coconut milk for a dairy-free version.
- Mint Chocolate: Add a few drops of peppermint extract to the batter for a refreshing twist that pairs beautifully with chocolate.
- Peanut Butter Swirl: Mix in dollops of creamy peanut butter into the batter before baking for a delicious flavor contrast.
- Espresso Infusion: Add a tablespoon of instant espresso powder to the batter to enhance the chocolate flavor with a rich coffee undertone.
Serving Suggestions for Chocolate Royale Mini Cakes
- Pair with a hot cup of coffee or a rich espresso for a delightful afternoon treat.
- Serve alongside fresh berries like raspberries or strawberries for a burst of color and tartness.
- Present on a beautiful dessert platter for special occasions, garnished with mint leaves.
- Drizzle caramel sauce over the ganache for an extra layer of sweetness.
- Enjoy with a scoop of vanilla ice cream for a delectable dessert experience.
FAQs about Chocolate Royale Mini Cakes
Can I make Chocolate Royale Mini Cakes ahead of time?
Absolutely! These mini cakes can be baked a day or two in advance. Just store them in an airtight container to maintain their freshness.
How do I store leftover mini cakes?
Store any leftover Chocolate Royale Mini Cakes in an airtight container at room temperature for up to two days. If you want to keep them longer, freeze them for later enjoyment!
Can I use different types of chocolate?
Yes! Feel free to experiment with dark chocolate or milk chocolate chips for varied flavors. Each type adds a unique twist to the mini cakes.
How can I make the ganache shiny?
To achieve a shiny ganache, ensure your heavy cream is hot but not boiling before pouring it over the chocolate. Whisk well to combine until smooth and glossy.
What should I do if my cakes are dry?
If you find your Chocolate Royale Mini Cakes are dry, it could be due to overbaking. Be sure to check for doneness with a toothpick a minute or two early. Keeping a close eye during baking helps keep them moist!
Final Thoughts
Making Chocolate Royale Mini Cakes is more than just a baking project; it’s a small celebration of life’s sweet moments. Each bite brings warmth, joy, and the delightful taste of chocolate that we all adore. These mini delights are perfect for sharing with family or indulging in during a quiet evening at home. Whether you’re a seasoned baker or a novice, this recipe offers a chance to create something special without spending hours in the kitchen. So, roll up your sleeves, embrace the joy of baking, and treat yourself to something truly wonderful!
PrintChocolate Royale Mini Cakes: Delight in Every Bite!

Chocolate Royale Mini Cakes are delightful treats that offer a rich chocolate flavor in a small, elegant form.
- Prep Time: 20 minutes
- Cook Time: 18 minutes
- Total Time: 38 minutes
- Yield: 10 mini cakes 1x
- Category: Dessert
- Method: Baking
- Cuisine: American
- Diet: Vegetarian
Ingredients
- 1 cup all-purpose flour
- 1/2 cup unsweetened cocoa powder
- 1 teaspoon baking powder
- 1/4 teaspoon salt
- 1/2 cup unsalted butter, softened
- 3/4 cup granulated sugar
- 2 large eggs
- 1 teaspoon vanilla extract
- 1/2 cup whole milk
- 1 cup semi-sweet chocolate chips
- 1/2 cup heavy cream
- 1 cup whipped cream
- Chocolate shavings or sprinkles (optional)
Instructions
- Preheat your oven to 350°F (175°C). Grease a mini cake pan or use a cupcake tin.
- In a bowl, sift together flour, cocoa powder, baking powder, and salt. Set aside.
- In a mixing bowl, cream together the butter and sugar until light and fluffy.
- Beat in the eggs one at a time, then add vanilla.
- Alternately add dry ingredients and milk, starting and ending with dry ingredients. Mix until just combined.
- Fill the mini cake molds 2/3 full.
- Bake for 15–18 minutes, or until a toothpick inserted in the center comes out clean.
- Let cakes cool in the pan for 5 minutes, then transfer to a wire rack to cool completely.
- To make the ganache, heat the heavy cream until just simmering, then pour over chocolate chips. Let sit for 2–3 minutes, then whisk until smooth.
- Spoon ganache over cooled cakes and let it drip down the sides. Top each with whipped cream and chocolate shavings if desired.
Notes
- Make sure not to overmix the batter to ensure the cakes remain fluffy.
- Store the cakes in an airtight container for up to 2 days.
- These mini cakes can be frozen for later enjoyment.
Nutrition
- Serving Size: 1 mini cake
- Calories: 310