Introduction to Christmas Magic Layer Brownie Bars
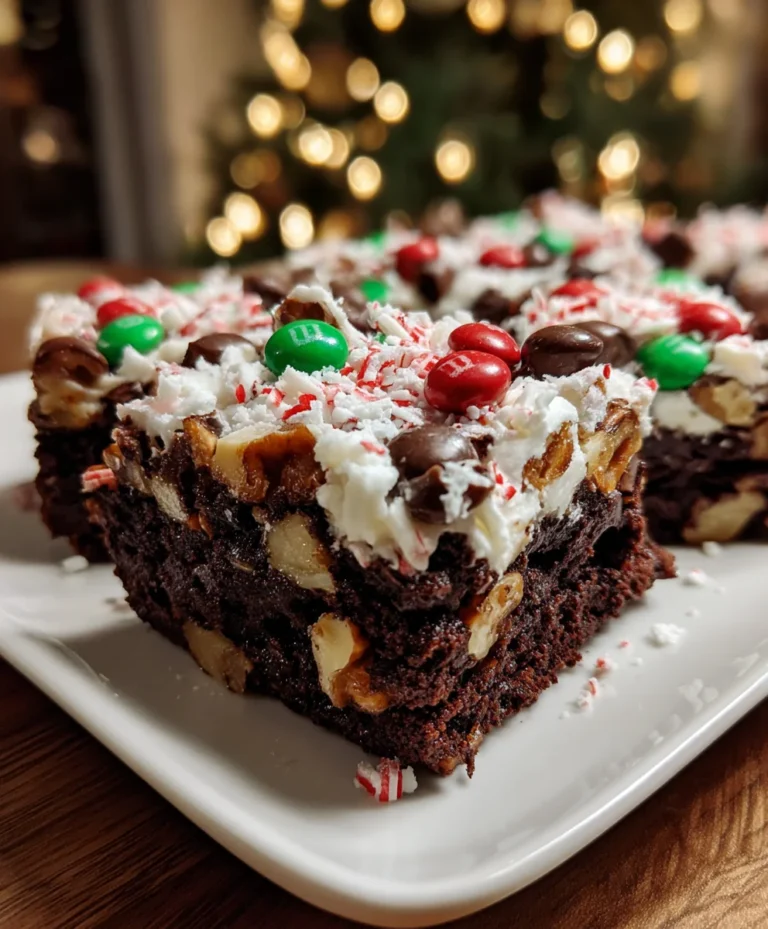
As the holiday season approaches, I’m reminded of the little joys that bring warmth to our busy lives, especially when it comes to baking. Christmas Magic Layer Brownie Bars are not just another dessert; they’re a delightful treat that combines rich, fudgy brownies with layers of festive toppings. Imagine the smiles on your loved ones’ faces when you pull these vibrant bars out of the oven! With little prep time and a flavor explosion, this recipe is a perfect solution for those hectic days full of holiday cheer.
Why You’ll Love This Christmas Magic Layer Brownie Bars
These Christmas Magic Layer Brownie Bars are the ultimate festive indulgence, showcasing a harmony of flavors that dances on your taste buds. They’re easy and quick to prepare, perfect for busy moms needing a last-minute treat. The layers of chocolate, nuts, and M&Ms create a delightful contrast that will impress everyone at your holiday gatherings. Plus, their vibrant appearance brings that extra sprinkle of joy to any dessert table!
Ingredients for Christmas Magic Layer Brownie Bars
Gathering the right ingredients makes the magic happen! Here’s what you’ll need for these festive brownie bars:
- Semi-sweet chocolate chips: These create that luscious, fudgy brownie base. You can swap them for dark chocolate chips for a richer flavor.
- Salted butter: Butter adds richness and moisture. Unsalted butter can be used if you prefer adjusting the salt levels.
- Granulated sugar: Sweetness is essential! Using brown sugar instead will give a deeper, caramel-like flavor.
- Large eggs and an additional yolk: Eggs bind the ingredients, while the extra yolk helps achieve that fudgy texture.
- All-purpose flour: This serves as the main structure of the brownies. For gluten-free alternatives, consider using a 1:1 gluten-free flour blend.
- Vanilla extract: A splash adds warmth and depth to the flavor profile, enhancing the overall deliciousness.
- Nuts (optional): Chopped nuts like walnuts or pecans can give crunch and richness. If you have nut allergies, feel free to leave them out.
- Mini holiday M&Ms: These not only add sweetness but also bring color to your treat. You can use regular candy-coated chocolates for a non-holiday version.
- Regular holiday M&Ms: Choose festive colors that match your theme, or swap them for chocolate chips.
- Sweetened flaked coconut: Coconut introduces a lovely texture and tropical flavor. If you don’t like coconut, you can omit this.
- Sweetened condensed milk: This ingredient is the secret to creating a creamy topping that holds everything together.
- Holiday sprinkles: A finishing touch that makes these bars extra festive! Feel free to choose any sprinkles that match your celebration.
All the exact measurements you need are at the bottom of the article, ready for you to print!
How to Make Christmas Magic Layer Brownie Bars
Now that you’ve gathered your ingredients, it’s time for the fun part—creating your Christmas Magic Layer Brownie Bars! Follow these simple steps to make your holiday baking a breeze.
Preheat the Oven
First things first, preheat your oven to 350°F. This ensures your brownies bake evenly and come out perfectly fudgy. While the oven heats, line a 9-inch baking pan with foil or parchment paper. Don’t forget to spray it lightly with nonstick cooking spray, so your delicious creation slides out easily later!
Melt the Chocolate and Butter
Next, in a large microwave-safe bowl, combine the salted butter and semi-sweet chocolate chips. Microwave them together on high for 30 seconds, then stir. Continue this process in 30-second intervals, stirring after each, until you achieve a smooth mixture. Be cautious—chocolate can burn quickly! If you notice any small lumps after stirring, it’s okay; residual heat will help melt them.
Mix the Ingredients
Once your chocolate mixture is smooth, it’s time to mix in the sugar. Beat granulated sugar into the melted chocolate, creating a glossy batter. Next, crack in the two large eggs and one egg yolk. Add a splash of vanilla extract for that lovely aroma. Whip it all together until well-blended. The batter should look thick and shiny. You want that perfect consistency that makes every bite an indulgent experience!
Prepare the Brownie Base
Now, gently fold in the all-purpose flour. Mix until just combined—don’t over-stir! This will help your brownies stay soft and fudgy. Pour the batter into your prepared baking pan, spreading it evenly with a spatula. Make sure every corner is filled, as this will create that decadent, uniform base.
Bake the Brownie Base
Pop the pan in the oven and bake for 20 minutes. Don’t worry if the brownies jiggle a little in the center; that’s normal! You’ll know they’re ready when the top looks set and feels slightly firm to the touch. The smell wafting through your kitchen will be heavenly!
Layer the Toppings
Remove the pan from the oven, and it’s time for the fun part: layering! Evenly sprinkle half of the chopped nuts, mini holiday M&Ms, regular holiday M&Ms, and all the sweetened flaked coconut over the baked brownie base. Next, pour the sweetened condensed milk over the toppings, making sure everything is just covered. This creamy layer adds a fantastic richness!
Final Baking Phase
Now for the crown jewel! Sprinkle the remaining chocolate chips, M&Ms, nuts, and a cheerful shower of holiday sprinkles on top. Return the pan to the oven and bake for an additional 25 minutes. You’ll want to watch for golden edges and a set center. Once you see those telltale signs, you’re almost there!
Cooling Down
Finally, it’s critical to let your brownie bars cool completely in the pan before cutting. Patience is key here! If you cut them too soon, they might fall apart. Once they’re cool, lift the bars out using the edges of the foil or parchment. Cut them into squares and watch them disappear at your holiday gathering!
Tips for Success
- Use room temperature ingredients for easier mixing and a smoother batter.
- Consider chilling the brownie base for a bit before adding toppings; this helps prevent them from sinking.
- Feel free to swap the nuts for any mix-ins your family loves—chocolate chips or even dried fruit work wonders!
- Try to use festive toppings to bring that holiday cheer to your dessert table.
- These bars store best in an airtight container to keep them fresh!
Equipment Needed for Christmas Magic Layer Brownie Bars
- 9-inch baking pan: You can use a glass or metal pan, but remember that baking times may vary.
- Parchment paper or foil: Either will work to line your pan; choose what you have on hand!
- Mixing bowls: A large microwave-safe bowl is perfect for melting chocolate and mixing the batter.
- Spatula: Use it for spreading the batter evenly. A rubber one works best!
- Measuring cups and spoons: For accuracy in your ingredients, although you can eyeball some if you’re adventurous!
Variations on Christmas Magic Layer Brownie Bars
- Nut-Free Version: Omit the nuts entirely or replace them with seeds like sunflower or pumpkin seeds for crunch.
- Gluten-Free Option: Use a gluten-free all-purpose flour blend to make these brownie bars suitable for those with gluten intolerance.
- Dark Chocolate Delight: Substitute semi-sweet chocolate chips with dark chocolate chips for a richer flavor profile.
- Minty Fresh: Add peppermint extract or crushed peppermint candies to the batter for a refreshing twist!
- Fruit Fusion: Mix in dried fruits like cranberries or cherries with the toppings for a pop of color and texture.
Serving Suggestions for Christmas Magic Layer Brownie Bars
- Pair these delightful brownie bars with a scoop of vanilla ice cream for a warm and cold contrast.
- Serve with a dollop of whipped cream for a festive touch.
- Present on a colorful platter, topped with extra holiday sprinkles for visual appeal.
- Accompany with a warm cup of cocoa or spiced cider for a cozy dessert experience.
FAQs about Christmas Magic Layer Brownie Bars
How do I store Christmas Magic Layer Brownie Bars?
To keep your brownie bars fresh, store them in an airtight container at room temperature. They can last up to a week—if they last that long!
Can I make these Christmas Magic Layer Brownie Bars in advance?
Absolutely! You can bake them a day or two ahead of your holiday gathering. Just make sure to cool completely before storing.
What chocolate can I use in these brownie bars?
I recommend using semi-sweet chocolate chips for that perfect balance of sweetness. However, feel free to use dark chocolate chips for a richer taste!
Can I customize the toppings on my brownie bars?
Yes! These bars are incredibly versatile. Swap in your favorite nuts, chocolates, or even fruits. The sky’s the limit!
What if I don’t like coconut?
No problem! You can simply omit the sweetened flaked coconut. The bars will still be delicious without it!
Final Thoughts
Making Christmas Magic Layer Brownie Bars is like wrapping up the holiday spirit in a deliciously festive package. Each bite is a slice of joy that evokes memories of family gatherings and warm, cozy evenings. This recipe embraces the chaos of our busy lives while adding a sprinkle of cheer. Whether you’re indulging solo or sharing with loved ones, the delightful layers bring people together. Plus, the smiles you’ll get when serving these bars are the icing on top! So don your favorite apron, and let the magic of these bars brighten your holiday season.
PrintChristmas Magic Layer Brownie Bars
Christmas Magic Layer Brownie Bars are a festive delight that combine a rich brownie base with layers of toppings, creating a perfect holiday treat.
- Prep Time: 20 minutes
- Cook Time: 45 minutes
- Total Time: 1 hour 5 minutes
- Yield: 9 squares 1x
- Category: Dessert
- Method: Baking
- Cuisine: American
- Diet: Vegetarian
Ingredients
- 1½ cups semi-sweet chocolate chips
- ½ cup salted butter (1 stick)
- 1 cup granulated sugar
- 2 large eggs
- 1 large egg yolk
- 1 cup all-purpose flour
- ½ teaspoon vanilla extract
- ¾ cup nuts (optional, divided)
- ¼ cup mini holiday M&Ms (divided)
- ¾ cup regular holiday M&Ms (divided)
- ½ cup semi-sweet chocolate chips (divided)
- 1 cup sweetened flaked coconut
- ¾ cup sweetened condensed milk (from a 14-ounce can)
- ¼ cup holiday sprinkles
Instructions
- Preheat your oven to 350 degrees F. Line a 9-inch baking pan with foil or parchment paper, then spray with nonstick cooking spray.
- Place the butter and semi-sweet chocolate chips in a large microwave-safe bowl. Microwave on high for 30 seconds, then stir. Continue microwaving in 30-second intervals until melted and smooth.
- Beat granulated sugar into the chocolate mixture. Add vanilla and eggs (two whole eggs plus one yolk) and beat until smooth.
- Stir in the all-purpose flour just until combined; pour the batter into the prepared baking pan and spread evenly.
- Bake in the preheated oven for 20 minutes; the brownies will still jiggle but will be set on top.
- Remove from the oven, layer half of the nuts, chocolate chips, mini and regular holiday M&Ms, and all the sweetened shredded coconut over the brownie base. Pour sweetened condensed milk evenly over the toppings.
- Sprinkle remaining chocolate chips, M&Ms, nuts, and holiday sprinkles on top.
- Return pan to the oven and bake for an additional 25 minutes, or until edges are golden and center is set.
- Remove from oven and allow to cool completely in the pan before cutting into 9 squares.
- Store in a tightly sealed container at room temperature for up to one week.
Notes
- For a festive touch, use colored M&Ms and sprinkles according to the holiday theme.
- Ensure to cool the bars completely before cutting to maintain their shape.
Nutrition
- Serving Size: 1 square
- Calories: 250
- Sugar: 20g
- Sodium: 150mg
- Fat: 12g
- Saturated Fat: 7g
- Unsaturated Fat: 3g
- Trans Fat: 0g
- Carbohydrates: 34g
- Fiber: 1g
- Protein: 3g
- Cholesterol: 40mg