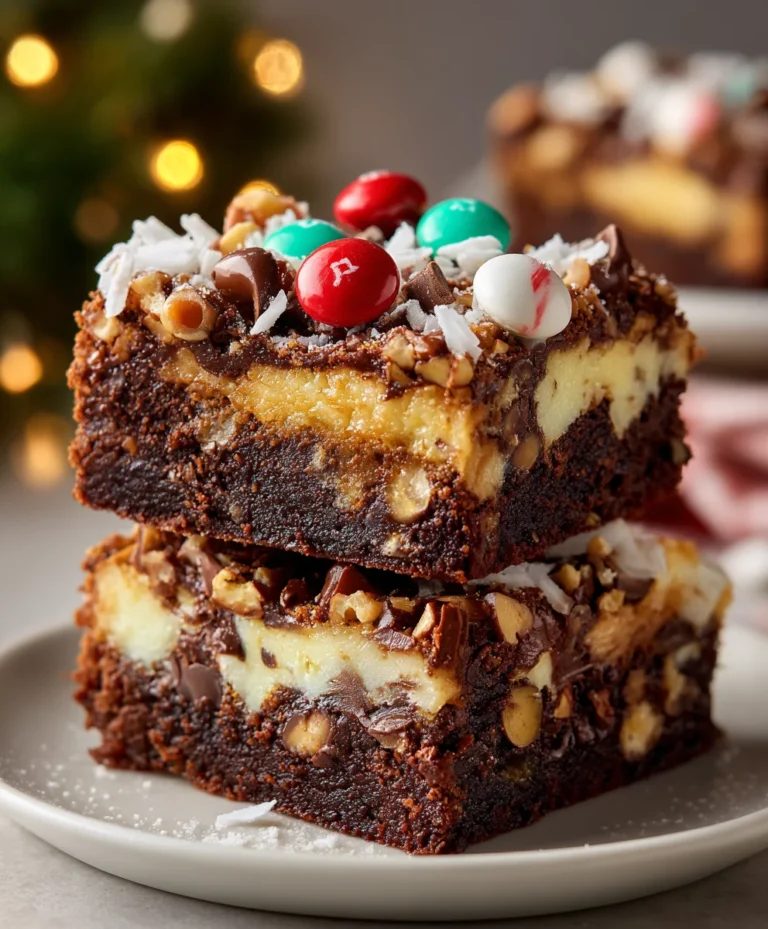
Introduction to Christmas Magic Layer Brownie Bars
Ah, the holiday season! It brings warmth, laughter, and delightful treats that make our hearts happy. Among my favorites are these Christmas Magic Layer Brownie Bars. They’re like a hug in dessert form! Perfect for busy moms and professionals, these bars are a quick solution for satisfying sweet cravings.
Whether you’re having friends over or need a festive treat for the family, these brownie bars will impress everyone. Get ready to indulge in layers of chocolate goodness, topped with a sprinkle of joy and holiday spirit!
Why You’ll Love This Christmas Magic Layer Brownie Bars
These Christmas Magic Layer Brownie Bars are a true gem for any holiday gathering! They’re incredibly easy to whip up, perfect for those jam-packed schedules. In just an hour, you’ll have a gorgeous dessert that combines rich chocolate and fun holiday flavors. Plus, everyone loves a good brownie, so expect happy faces when you serve them. Celebrate the season without the stress, and let these bars spread joy!
Ingredients for Christmas Magic Layer Brownie Bars
Let’s gather the magic! Here’s what you’ll need to bring these Christmas Magic Layer Brownie Bars to life:
- Semi-sweet chocolate chips: These provide the rich, chocolatey base. Make sure to choose good-quality chips for the best taste.
- Salted butter: This adds moisture and a hint of saltiness, enhancing the chocolate flavor. If you’re out, unsalted butter works too—just add a pinch of salt.
- Granulated sugar: Sweetness is key! The sugar brings balance to the chocolate and adds a perfect texture.
- Large eggs: They help bind everything together while adding richness. Use room-temperature eggs for an even mix.
- All-purpose flour: This gives structure to your brownies. For a gluten-free option, you can substitute a gluten-free blend.
- Vanilla: A splash of vanilla extract enhances the depth of flavors. Don’t skip this—it’s magic in a bottle!
- Nuts (optional): Chopped nuts like walnuts or pecans add a delightful crunch and flavor. Skip them if nut allergies are a concern.
- Mini holiday M&Ms: These add color and fun. You can use standard M&Ms if you can’t find the holiday ones.
- Regular Holiday M&Ms: More festive bites to make these bars even more special!
- Flaked coconut: Sweetened coconut adds a tropical twist and chewy texture. Not a fan? You can leave this out.
- Sweetened condensed milk: This liquid gold binds the layers together with creamy sweetness. It’s essential for that gooey texture!
- Holiday sprinkles: They’re the finishing touch, adding cheer and festivity. Use any sprinkles you have on hand!
All the specific measurements for these ingredients are available at the bottom of the article for printing ease. Now, let’s get cooking!
How to Make Christmas Magic Layer Brownie Bars
Now, let’s dive into the fun part—making these luscious Christmas Magic Layer Brownie Bars! With each step, you’ll feel the excitement build as you create something truly special. Follow along, and let’s make some magic happen!
Step 1: Preheat and Prepare
First things first, preheat your oven to 350 degrees F. This ensures even baking and that delicious aroma fills your kitchen. While it’s warming up, grab a 9-inch baking pan. Line it with foil or parchment paper and give it a quick spray with nonstick cooking spray. This will make it super easy to lift out the brownie bars later. Trust me; you’ll be grateful!
Step 2: Melt Butter and Chocolate
Next, it’s time for the chocolate magic! In a large, microwave-safe bowl, toss in the salted butter and semi-sweet chocolate chips. Microwave on high for 30 seconds. Then, stir the mixture and keep heating in 30-second intervals, stirring after each round, until it’s melted and smooth. Be careful not to overheat, as chocolate can burn quickly. You want it silky, not dry!
Step 3: Mix All Ingredients
Once you have that heavenly melted chocolate, it’s time to mix! Start by beating in the granulated sugar until combined. Next, add the eggs and vanilla extract. Mix until smooth and creamy—this is where the magic starts to happen! Finally, stir in the all-purpose flour until just combined. Don’t overmix, or those brownies might get tough!
Step 4: Bake the Base
Pour the luscious brownie batter into your prepared pan and pop it into the preheated oven. Bake for about 20 minutes. The top should look set while the middle remains a tiny bit jiggly. This ensures your bars will be chewy and fudgy—just the way we want them!
Step 5: Create the Layers
Now comes the fun layering! Carefully take the pan out of the oven and sprinkle on your desired amount of chopped nuts, followed by half of the mini M&Ms and regular Holiday M&Ms. Next, spread the sweetened flaked coconut evenly over everything. Finally, pour the sweetened condensed milk over the top, making sure it covers all the ingredients. Finish this layer with the remaining chocolate chips and M&Ms, and don’t forget those festive sprinkles!
Step 6: Bake Again
Time for Round Two in the oven! Bake for another 25 minutes. Keep an eye on it—if the edges brown too quickly, tent the pan loosely with foil. When the edges are golden and the center is set (it will look slightly brown), it’s all done. Your kitchen will smell like a holiday wonderland!
Step 7: Cool Before Cutting
Once out of the oven, let your bars cool completely in the pan before cutting into squares with a sharp knife. Cooling is crucial for cleaner cuts. Trust me; you want those perfect squares to show off to friends and family. After they cool, store any leftovers in an airtight container—if there are any!
Tips for Success
- Ensure your butter and chocolate are fully melted and combined for a smooth batter.
- Don’t overmix the batter; this keeps your brownies fudgy and tender.
- Use room-temperature eggs for better incorporation.
- Let the bars cool completely before cutting for neat squares.
- Store in an airtight container to maintain freshness and flavor.
Equipment Needed
- 9-inch baking pan: A regular square pan works, but a glass pan adds a nice touch.
- Mixing bowls: Grab a large bowl for melting and another for mixing.
- Microwave: Alternatively, use a double boiler for melting chocolate.
- Spatula: A silicone spatula ensures smooth mixing and scraping.
- Sharp knife: For cutting those beautiful brownie squares with precision.
Variations of Christmas Magic Layer Brownie Bars
- Nut-Free Option: Omit the nuts or replace them with extra chocolate chips for added sweetness without the crunch.
- Gluten-Free: Use a gluten-free all-purpose flour blend to create a delicious gluten-free version without sacrificing taste!
- Vegan Version: Substitute the eggs with flax eggs (1 tablespoon of flaxseed meal mixed with 2.5 tablespoons of water per egg) and use dairy-free chocolate chips.
- Minty Delight: Add a few drops of peppermint extract to the batter for a festive mint chocolate flavor that will delight your taste buds.
- Fruit Infusion: Try folding in some dried cranberries or cherries for a fruity twist that pairs wonderfully with the chocolate.
Serving Suggestions for Christmas Magic Layer Brownie Bars
- Serve warm with a scoop of vanilla ice cream for a delicious contrasting temperature.
- Pair with a steaming cup of hot cocoa or coffee to complement the rich chocolate flavor.
- Top with whipped cream and fresh berries for an elegant touch.
- Present on a festive platter with holiday-themed napkins for a cheerful display!
- Dust with powdered sugar for a snowy effect, adding to the holiday magic!
FAQs about Christmas Magic Layer Brownie Bars
Can I make these brownie bars ahead of time?
Absolutely! You can prepare Christmas Magic Layer Brownie Bars a day in advance. Just make sure to store them in an airtight container to maintain freshness. The flavors often deepen, making them even tastier!
How do I know when the bars are done baking?
When the edges are golden and set, and the center is just starting to brown, that’s your cue! The middle may jiggle slightly. Trust me; it will firm up as it cools!
What can I use instead of sweetened condensed milk?
If you need a substitute, you can make a homemade version by combining milk and sugar. Alternatively, try coconut milk mixed with a sweetener for a dairy-free option in these Christmas brownies.
Can I freeze these brownie bars?
Yes, you can! Simply wrap individual bars in plastic wrap and then place them in a freezer bag. They’ll stay delicious for up to three months. Just thaw at room temperature before enjoying!
What’s the best way to store leftovers?
Store your Magic Layer Brownie Bars in an airtight container at room temperature for up to a week. If you want extra freshness, refrigerate them.
Final Thoughts
The joy these Christmas Magic Layer Brownie Bars bring to the holiday season is simply unmatched. Each bite is a celebration of flavors, reminding us that dessert is not just about taste; it’s about togetherness. Whether you’re baking with the kids or surprising a friend, the smiles and laughter they inspire are the true magic of the holidays. So, as you create and share these delectable bars, relish the memories you’re making. These brownie bars aren’t just dessert; they’re a delicious way to spread festive cheer and create sweet traditions!
PrintChristmas Magic Layer Brownie Bars
Delicious Christmas Magic Layer Brownie Bars layered with chocolate goodness and festive toppings.
- Prep Time: 15 minutes
- Cook Time: 45 minutes
- Total Time: 1 hour
- Yield: 16 bars 1x
- Category: Dessert
- Method: Baking
- Cuisine: American
- Diet: Vegetarian
Ingredients
- 1½ cups semi-sweet chocolate chips
- ½ cup salted butter (1 stick)
- 1 cup granulated sugar
- 2 large eggs
- 1 large egg yolk
- 1 cup all-purpose flour
- ½ teaspoon vanilla
- ¾ cup nuts (optional, divided)
- ¼ cup mini holiday M&Ms (divided)
- ¾ cup regular Holiday M&Ms (divided)
- ½ cup semi-sweet chocolate chips (divided)
- 1 cup sweetened flaked coconut
- ¾ cup sweetened condensed milk (from a 14 ounce can)
- ¼ cup holiday sprinkles
Instructions
- Preheat oven to 350 degrees F. Line a 9-inch baking pan with foil or parchment paper and spray with nonstick cooking spray.
- Place butter and chocolate chips in a large, microwaveable mixing bowl. Microwave on high for 30 seconds. Stir, and continue microwaving and stirring in 30 second intervals until chocolate is melted and smooth.
- Beat in sugar, then vanilla and eggs, until well combined.
- Stir in flour until just combined. Pour into the prepared baking dish.
- Bake in the preheated oven for 20 minutes.
- Remove from the oven (brownies will jiggle a little but be done on top). Layer as follows: nuts, half of the chocolate chips, half of the M&Ms, and finally all of the shredded coconut. Pour sweetened condensed milk evenly over the top and spread gently to make sure it is evenly distributed. Sprinkle on remaining chocolate chips, M&Ms, and finally the sprinkles.
- Bake for an additional 25 minutes, or until the edges are golden and the middle is set and just starting to brown. If the top is browning too quickly, tent loosely with foil.
- Cool completely before cutting into squares with a sharp knife.
- Store in a tightly sealed container for up to one week.
Notes
- Ensure the brownies cool completely for easier cutting.
- Use a sharp knife to cut the brownies into squares.
- Store any leftovers in an airtight container to maintain freshness.
Nutrition
- Serving Size: 1 bar
- Calories: 250
- Sugar: 22g
- Sodium: 100mg
- Fat: 12g
- Saturated Fat: 7g
- Unsaturated Fat: 4g
- Trans Fat: 0g
- Carbohydrates: 35g
- Fiber: 1g
- Protein: 3g
- Cholesterol: 30mg