Introduction to Christmas Red Velvet Poke Cake
The holiday season is upon us, and there’s nothing quite like a festive dessert to spread joy and cheer. That’s where my Christmas Red Velvet Poke Cake comes in. This cake isn’t just a treat; it’s a delightful quick solution for busy days filled with family gatherings and festive celebrations.
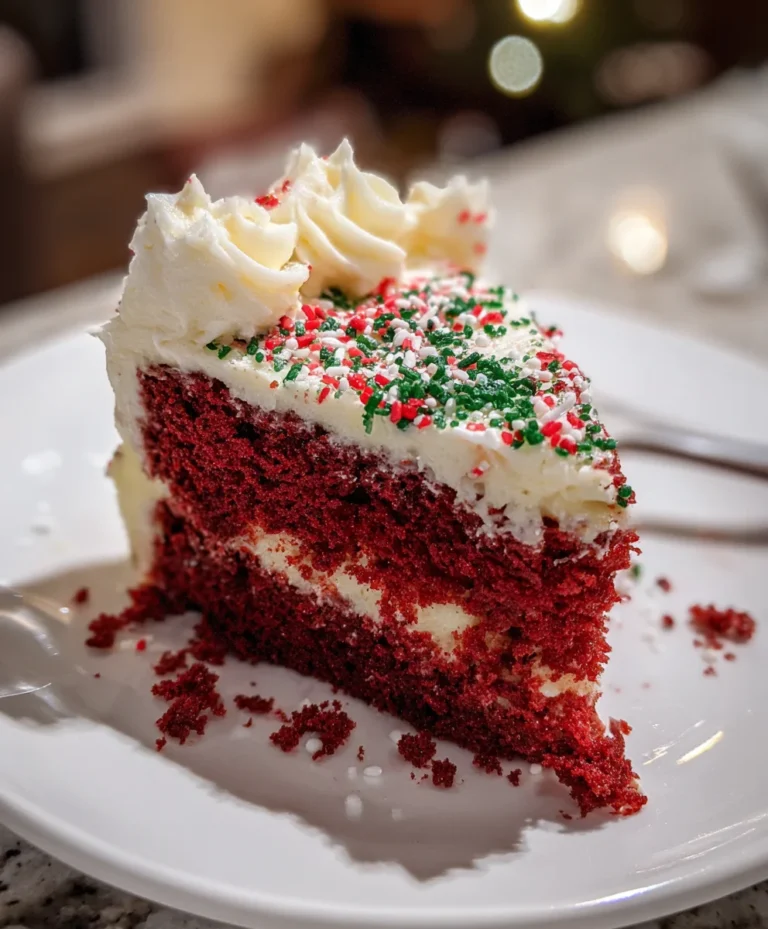
Imagine serving up a slice and watching the faces light up with joy. It’s simple, delicious, and best of all, it combines the rich flavors of red velvet with a fun twist. You’ll find that it’s the perfect dish to impress your loved ones during this magical time of year!
Why You’ll Love This Christmas Red Velvet Poke Cake
This Christmas Red Velvet Poke Cake is a dream come true for busy cooks.
It’s quick to prepare, making it perfect for last-minute holiday gatherings.
Each slice is a burst of flavor, combining the rich chocolatey taste of red velvet with creamy pudding.
Plus, it’s a showstopper on any dessert table, instantly elevating your holiday feast.
Your family and friends will be asking for seconds, and that’s a holiday win in my book!
Ingredients for Christmas Red Velvet Poke Cake
Gathering the right ingredients is the joyful beginning of creating your Christmas Red Velvet Poke Cake. Here’s what you’ll need:
- Red velvet cake mix: This is the star of the show, providing that signature color and rich taste.
- Eggs, oil, and water: Essential ingredients to prepare the cake mix. They help bind everything together and keep the cake moist.
- Instant vanilla pudding mix: This adds a creamy filling that elevates the cake and creates those delicious holes you’re going to poke into your cake!
- Milk: Used to whisk the pudding mix into a smooth texture, it’s a classic base that complements the pudding mix perfectly.
- Whipped topping: This fluffy layer makes the cake feel indulgent and adds a light touch on top. It’s a fantastic canvas for your decorations.
- Green gel food coloring: Just a few drops give your whipped topping that festive flair, making your cake even more holiday-ready.
- Red and white Christmas sprinkles: These delightful little bits of cheer are the finishing touch that make your poke cake a visual treat!
For a printable version with exact quantities and detailed instructions, just scroll down to the bottom of the article. Trust me, this festive creation will be a hit at your holiday gatherings!
How to Make Christmas Red Velvet Poke Cake
Now, let me guide you through the steps to create this delightful Christmas Red Velvet Poke Cake. It’s an adventure of flavors and holiday cheer that you can easily conquer in your own kitchen!
Step 1: Prepare the Cake
First, preheat your oven to 350°F.
While that’s warming up, it’s time to get your cake mix ready.
Follow the instructions on the back of the box.
Eggs, oil, and water are your trusty companions in this stage.
Combine them well to create a rich batter, then pour it into a greased baking pan.
Step 2: Poke Holes in the Cake
Once your cake is baked to perfection, pull it out of the oven and let it cool for a few minutes.
Then, grab the handle of a wooden spoon or a similar utensil.
Gently poke holes all over the cake, spaced about an inch apart.
These little holes will be the secret pathways for the creamy pudding that follows, essentially making this a poke cake!
Step 3: Make the Pudding
In a large bowl, whisk together those instant vanilla pudding mixes with four cups of cold milk.
It’s essential to blend them until smooth—it should feel velvety on your whisk!
This pudding will not only fill the holes but also add an incredible flavor burst to your cake.
Step 4: Pour Pudding Over Cake
Now comes the fun part!
Carefully pour the pudding over the cake.
Make sure to aim for the holes, allowing the pudding to soak in.
If any needs a gentle nudge, you can use the back of a spoon to help it down into those delicious gaps.
Step 5: Chill the Cake
Afterward, cover your cake with plastic wrap and pop it in the fridge for at least two hours.
This step is crucial—chilling allows the pudding to set and gives the cake a delightful texture.
Trust me, the wait will be worth it!
Step 6: Prepare the Whipped Topping
With the cake chilling, grab a medium bowl for your whipped topping.
Stir in a few drops of green gel food coloring until you achieve your desired festive shade.
This colorful touch will not only look great but also taste fabulous when paired with the red velvet!
Step 7: Frost the Cake
Once your cake has chilled long enough, it’s time to spread that beautifully colored whipped topping on top.
Use a spatula to create a smooth, even layer.
After it’s frosted to your liking, pop the cake back into the fridge to set again for another hour or so.
Step 8: Add Final Touches
Now that the cake is fully set, it’s time for a sprinkle of holiday magic!
Generously add your red and white Christmas sprinkles on top for that festive flair.
Now, it’s ready to slice and serve.
Watch your friends and family marvel at this incredible Christmas Red Velvet Poke Cake!
Tips for Success
- Use room temperature ingredients for a smoother cake batter.
- Don’t rush the cooling time; a well-cooled cake is easier to poke.
- Be generous with the pudding; fill those holes well for maximum flavor.
- Experiment with food coloring to match your holiday theme.
- Chill your cake longer if time allows; it enhances the texture!
Equipment Needed
- 9×13 inch baking pan: A must-have for baking your cake; you can use any rectangular pan if necessary.
- Mixing bowls: Use at least two—one for the cake batter and one for the pudding.
- Whisk: A handy tool to ensure a smooth pudding consistency; a fork works in a pinch.
- Wooden spoon: Essential for poking holes in the cake; any sturdy utensil can do the trick.
- Spatula: Perfect for spreading the whipped topping evenly over your cake.
Variations of Christmas Red Velvet Poke Cake
- Chocolate Pudding Switch: For a richer flavor, try using chocolate pudding instead of vanilla. The combination with red velvet is simply divine!
- Gluten-Free Option: Substitute the red velvet cake mix with a gluten-free version to cater to gluten-sensitive guests without compromising on taste.
- Nutty Goodness: Add chopped walnuts or pecans into the pudding layer for an extra crunch and delightful texture.
- Fruity Twist: Top your cake with fresh strawberries or raspberries before adding the whipped topping for a burst of freshness and color.
- Vegan Delight: Use a vegan cake mix, plant-based milk, and substitute the whipped topping with coconut whipped cream for a plant-friendly treat.
Serving Suggestions for Christmas Red Velvet Poke Cake
- Pair with a scoop of creamy vanilla ice cream for a delightful contrast.
- Serve alongside a warm cup of spiced apple cider for a cozy touch.
- Presentation matters: place the cake on a festive platter adorned with seasonal décor.
- Consider adding fresh mint leaves as a garnish for vibrant color.
FAQs about Christmas Red Velvet Poke Cake
Can I make the Christmas Red Velvet Poke Cake ahead of time?
Absolutely! This cake can be made a day in advance. Just be sure to keep it well-covered in the refrigerator. The flavors will meld beautifully overnight, making it even more scrumptious when you’re ready to serve.
Is it possible to freeze the Christmas Red Velvet Poke Cake?
Yes, you can freeze the cake! I recommend slicing it first and wrapping each piece in plastic wrap. Then, place them in an airtight container. Just thaw it in the fridge before serving for the best texture.
Can I use different flavored pudding mixes for the poke cake?
Definitely! Experimenting with different flavored puddings, like chocolate or cheesecake, can add a unique twist to your Christmas Red Velvet Poke Cake. Each variation brings its own delicious charm to the dessert.
How do I store leftovers of the Christmas Red Velvet Poke Cake?
Store any leftovers in an airtight container in the refrigerator. It’s best enjoyed within three days, though I doubt it will last that long once your family gets a taste!
What if my cake doesn’t rise properly?
If your cake doesn’t rise, check the expiration date on your baking powder or cake mix. Also, ensure that you’re using the correct amounts of eggs, oil, and water as directed on the box. It’s an easy fix for a delightful cake!
Final Thoughts
Creating this Christmas Red Velvet Poke Cake is more than just baking; it’s about nurturing joy and connection during the holiday season. The delightful melding of flavors and textures brings smiles to faces young and old alike. I love how it transforms any gathering into a festive celebration, filling hearts with warmth and cheer.
Whether it’s a cozy family night or a bustling holiday party, this cake is a delicious way to spread holiday spirit. Trust me, once you try it, it’ll become a cherished tradition in your home for years to come!
PrintChristmas Red Velvet Poke Cake

A festive and delightful Christmas Red Velvet Poke Cake that is perfect for holiday gatherings.
- Prep Time: 30 minutes
- Cook Time: 30 minutes
- Total Time: 3 hours
- Yield: 12 servings 1x
- Category: Dessert
- Method: Baking
- Cuisine: American
- Diet: Vegetarian
Ingredients
- 1 box red velvet cake mix
- Ingredients needed to make the cake: eggs, oil and water
- 2 (3.4 ounce) boxes instant vanilla pudding mix
- 4 cups milk
- 8 ounce tub whipped topping
- Green gel food coloring
- Red and white Christmas sprinkles
Instructions
- Preheat the oven to 350°F. Prepare the cake mix and bake per the directions on the back of the box.
- When the cake comes out of the oven, take a wooden utensil handle or something similar and poke holes all over the cake, about 1 inch apart.
- In a large bowl, whisk together the pudding mix and milk until smooth.
- Pour pudding over the cake. Take care to pour it right into the holes as much as possible. Spread it all out, and using the back of the spoon, gently push the pudding down into the holes.
- Cover with plastic wrap and place in the refrigerator for 2 hours to set. Once the cake is cooled, work on the topping.
- In a medium bowl, stir together the whipped topping and food coloring until you reach your desired shade.
- Spread the whipped topping on top of the cake and place it in the fridge again for 2 hours or longer to set.
- When ready to serve, add the sprinkles.
- Slice and serve.
Notes
- Ensure the pudding is poured evenly and fills all the holes for maximum flavor.
- Chilling the cake is essential for the best texture.
- You can adjust the amount of food coloring based on personal preference.
Nutrition
- Serving Size: 1 slice
- Calories: 300
- Sugar: 20g
- Sodium: 200mg
- Fat: 15g
- Saturated Fat: 8g
- Unsaturated Fat: 4g
- Trans Fat: 0g
- Carbohydrates: 35g
- Fiber: 1g
- Protein: 3g
- Cholesterol: 50mg