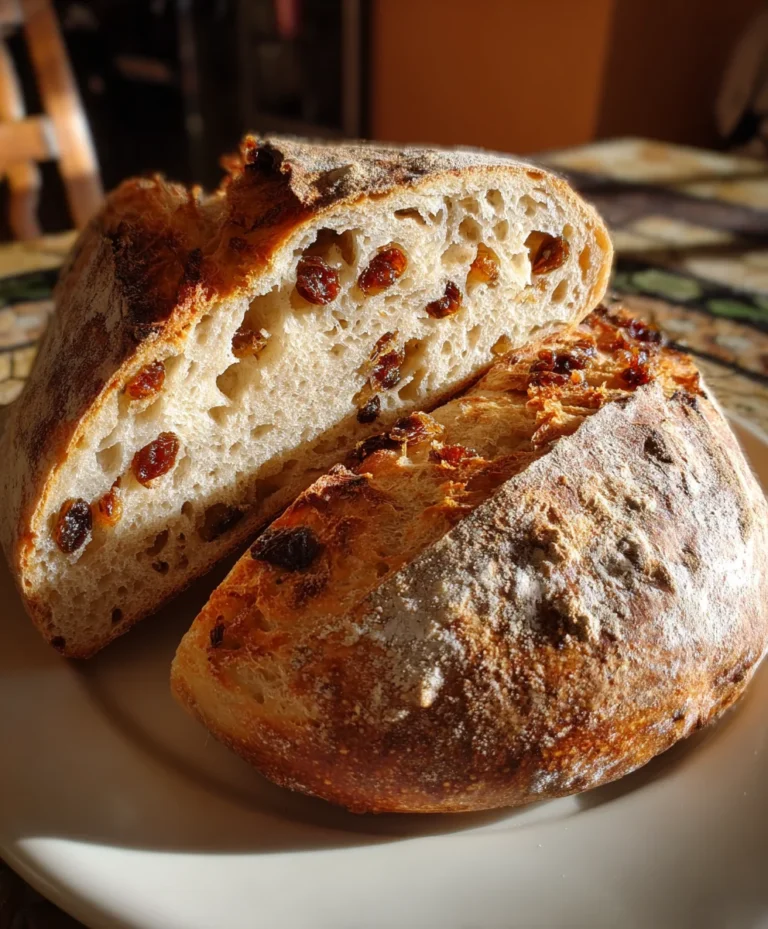
Introduction to Cinnamon Raisin Artisan Bread
Welcome to the cozy world of baking! If you’re looking for a delicious way to brighten up your mornings or treat your family, this Cinnamon Raisin Artisan Bread is your answer. Picture the warm aroma of cinnamon wafting through your home, inviting everyone to the kitchen for a slice of comfort. Whether you’re a busy mom juggling home and work or a professional seeking a little joy in your day, this recipe is your perfect companion. It’s simple enough to whip up without stress and impressive enough to leave your loved ones asking for more!
Why You’ll Love This Cinnamon Raisin Artisan Bread
This Cinnamon Raisin Artisan Bread is not just a treat; it’s a solution for your busy life! It comes together easily with minimal hands-on time. The long rise gives it incredible flavor while you go about your day. Plus, the combination of fluffy bread, sweet raisins, and warm cinnamon creates a taste that’s both nostalgic and comforting. You can savor it at breakfast or snack time—anytime you need a little pick-me-up!
Ingredients for Cinnamon Raisin Artisan Bread
Creating your Cinnamon Raisin Artisan Bread starts with gathering a few staple ingredients that you may already have in your pantry. Here’s what you’ll need:
- Water: The foundation of your dough. Ensure it’s room temperature for activating the yeast effectively.
- Active Dry Yeast: This magic ingredient helps the bread rise. Fresh yeast is key; it should be bubbly when activated.
- Bread or All-Purpose Flour: Flour provides structure. Bread flour yields a chewier texture, while all-purpose flour works just as well!
- Kosher or Fine Sea Salt: Salt enhances flavor and strengthens gluten. Don’t skip it—your dough will thank you!
- Raisins: These sweet morsels add a delightful chew. You can use golden or dark raisins based on your preference.
- Dark Brown Sugar: This sweetener adds richness and color. For a lighter flavor, feel free to use light brown sugar instead.
- Ground Cinnamon: The star of the show! This fragrant spice gives the bread its warm flavor. You can also experiment with a dash of nutmeg for a twist.
For precise quantities, check the end of the article where I’ve listed them for your convenience!
How to Make Cinnamon Raisin Artisan Bread
Now that we have all our ingredients ready, let’s dive into the wonderful process of making Cinnamon Raisin Artisan Bread. Follow these steps, and I promise you’ll end up with a delightful loaf that fills your home with warmth and love!
Step 1: Prepare the Yeast
Start by adding the active dry yeast to the warm water. Make sure the water is at room temperature, around 70°F (21°C). This temperature is crucial for activating the yeast. Let it sit for about 10 to 15 minutes until it becomes frothy. This bubbling magic means it’s alive and ready for action!
Step 2: Mix Dry Ingredients
While the yeast awakens, grab a large mixing bowl. Here, whisk together the flour, salt, dark brown sugar, cinnamon, and raisins. This mixing helps coat the raisins in flour, preventing them from sinking to the bottom of your bread. It’s a simple trick that keeps them beautifully distributed in each slice!
Step 3: Combine and Knead
Once your yeast is frothy, pour the water mixture into your dry ingredients. Stir gently until everything is just combined. The dough will look a bit sticky. Use floured hands to knead the dough in the bowl for a minute. Don’t worry about perfection—it should be a loose, stringy mass!
Step 4: First Rise
Now, cover the bowl with a clean kitchen towel and let your dough rise in a warm spot. Ideally, this could be near a heater or in a sunny kitchen corner. Allow it to rise for about 8 to 10 hours, or until it has doubled in size. You’ll know it’s ready when you can poke it and it springs back gently.
Step 5: Shape the Dough
When the dough has risen, it’s time to shape it. Dust your countertop with flour and gently pull the dough out of the bowl. Using floured hands, fold the dough into itself a few times to form a round ball. This action builds strength, ensuring a lovely loaf!
Step 6: Refrigerate Overnight
After shaping, place the dough seam-side up in a floured bowl. Dust it with a little more flour, cover it with plastic wrap, and pop it in the fridge overnight. This step not only allows the dough to develop more flavor but also makes it easier to handle when you’re ready to bake.
Step 7: Preheat and Prepare
Before baking, preheat your oven to 450°F (232°C) with a Dutch oven inside. Heating the Dutch oven ensures your bread gets that crispy crust. When the oven is ready, carefully remove the Dutch oven—don’t burn yourself!
Step 8: Score and Bake
Uncover your dough and turn it out onto a floured piece of parchment paper, seam side down. If desired, gently shape it into a loaf. Use a razor blade or a sharp knife to score the top, creating beautiful slashes. This scoring allows steam to escape while baking, giving your bread personality!
Step 9: Cool Before Slicing
After baking for about 30 minutes covered, remove the lid and allow it to brown for an additional 15 to 20 minutes. The bread is done when it sounds hollow when tapped on top. Let it cool on a wire rack for up to an hour before the urge to slice into it takes over. This crucial cooling time helps set your loaf!
Tips for Success
- Always check your yeast’s expiration date. Fresh yeast is essential for proper rising.
- Shape your dough gently to prevent deflating. Treat it with care!
- Let the dough rise in a warm spot. A warm kitchen is your secret weapon.
- Use a sharp knife for scoring—it makes a difference in the final appearance.
- Be patient while cooling. Slicing too soon can lead to a gummy texture!
Equipment Needed
- Large Mixing Bowl: Essential for combining your ingredients. A sturdy glass bowl works great!
- Dutch Oven: Perfect for baking. If you don’t have one, a heavy oven-safe pot with a lid will do.
- Parchment Paper: Great for easy transfer of your dough. You can also use wax paper if needed.
- Kitchen Towel: Useful for covering the dough during rising. A clean dish towel works just fine.
- Razor Blade or Sharp Knife: Ideal for scoring the dough. A serrated knife will work too!
Variations of Cinnamon Raisin Artisan Bread
- Add Nuts: Toss in some chopped walnuts or pecans for a delightful crunch alongside the sweetness of the raisins.
- Use Whole Wheat Flour: For a heartier loaf, substitute half of the bread flour with whole wheat flour. This addition enhances the nutrition and flavor.
- Make It Gluten-Free: Swap the bread flour for a gluten-free blend. Ensure you include a binding agent like xanthan gum for the best texture.
- Spice It Up: Along with cinnamon, add a pinch of nutmeg or cardamom for a spicy twist that will warm your senses!
- Sweeten It More: Feel free to increase the amount of brown sugar or add a touch of maple syrup for extra sweetness!
Serving Suggestions
- Spread It: Serve warm with butter or cream cheese for a creamy, indulgent treat.
- Pair It: Enjoy it alongside a hot cup of coffee or herbal tea for a cozy afternoon snack.
- Toast It: Lightly toast slices for an added crunch, perfect for breakfast or brunch.
- Add Toppings: Try fresh fruit or a drizzle of honey to elevate the flavors even more!
FAQs about Cinnamon Raisin Artisan Bread
As I’ve baked this Cinnamon Raisin Artisan Bread many times, I’ve come across a few common questions. Here are the answers to help you navigate your baking journey!
How do I store cinnamon raisin bread?
This delightful bread can be stored at room temperature for up to three days. Just keep it in a paper bag or wrapped in a clean kitchen towel to keep it fresh.
Can I freeze this bread?
Absolutely! Once your loaf is cool, slice it and store it in an airtight freezer bag. It can freeze nicely for up to three months. When you’re ready, just toast the slices for a quick and easy treat!
Why is my bread dense?
A dense loaf can occur if the dough hasn’t risen enough or if the flour was packed down during measuring. Always make sure your yeast is fresh and active for the best results!
Can I substitute raisins with other fruits?
Yes! You can swap raisins with dried cranberries, cherries, or even chopped dates. Just remember, each fruit adds its unique flair to the overall flavor!
What makes this bread “artisan”?
Artisan bread is often characterized by its beautiful crust, chewy texture, and complex flavors—achieved here through long fermentation and a simple, hands-off method. That’s true artistry in a loaf!
Final Thoughts
Baking this Cinnamon Raisin Artisan Bread is more than just about creating a delicious loaf; it’s about embracing the simple joys of cooking. As you mix, knead, and watch your dough transform, you’ll find a moment of calm amid your busy life. The warm aroma emanating from your oven will fill your home with comfort and nostalgia, inviting everyone to gather around. Each slice brings a sense of achievement and satisfaction, making it the perfect centerpiece for a family meal or a quiet morning alone. So get ready to enjoy your warm, sweet creation—your taste buds will dance with delight!
PrintCinnamon Raisin Artisan Bread
This Cinnamon Raisin Artisan Bread is a deliciously fluffy, sweet bread that combines the warmth of cinnamon with the chewiness of raisins. Perfect for breakfast or a snack!
- Prep Time: 10 minutes
- Cook Time: 45-50 minutes
- Total Time: 8-10 hours (including rising time)
- Yield: 1 loaf 1x
- Category: Bread
- Method: Baking
- Cuisine: American
- Diet: Vegetarian
Ingredients
- 1½ cups water, room temperature (at or near 70°F/21°C)
- 1 teaspoon active dry yeast
- 3 cups bread or all-purpose flour, plus more for dusting
- 1 teaspoon kosher or fine sea salt
- ¾ cup raisins, stems removed and separated
- 3 tablespoons dark brown sugar
- 2 teaspoons ground cinnamon
Instructions
- Add the yeast to the water and let it sit for 10-15 minutes. In a large bowl, whisk together flour, salt, brown sugar, cinnamon and raisins until the raisins are well-covered in flour. Let sit for 10 minutes.
- Add water and yeast to the bowl and mix just until combined. The dough should look a little sticky and stringy and there should still be a little flour around the edges of the bowl.
- Cover and let rise somewhere warm until it has doubled in size, about 8-10 hours.
- Once the dough has doubled in volume, use your hands to pull the dough out onto a floured surface. With floured hands, gently fold the dough into itself several times until a soft, flour-covered ball is formed. Seam side up, lift and place it into a flour dusted bowl. Dust with flour, cover and refrigerate overnight.
- When you’re ready to bake your bread, preheat oven to 450ºF (232ºC) with your Dutch oven inside the oven.
- Uncover then invert the bowl to turn the dough out onto a lightly floured surface seam side down. If needed, gently turn it with your hands and nudge it into the shape of a loaf. Place it on a sheet of parchment and score the top with a razor blade or the tip of a sharp knife with a design of your choosing.
- Once the oven is preheated, remove the Dutch oven from the oven and transfer the dough, still on the parchment, into the Dutch oven. Cover and bake for 30 minutes, then remove the cover and bake for 15-20 minutes more.
- Your bread will be done once the top is browned, and it sounds hollow when you tap the top.
- Using parchment edges, lift bread from Dutch oven and transfer it to a wire cooling rack to let cool for up to an hour before slicing.
Notes
- Ensure the yeast is fresh for best results.
- Allow the dough to rest sufficiently for optimal flavor development.
- This bread can be stored at room temperature for up to 3 days.
Nutrition
- Serving Size: 1 slice
- Calories: 150
- Sugar: 5g
- Sodium: 150mg
- Fat: 1g
- Saturated Fat: 0g
- Unsaturated Fat: 0g
- Trans Fat: 0g
- Carbohydrates: 33g
- Fiber: 2g
- Protein: 4g
- Cholesterol: 0mg