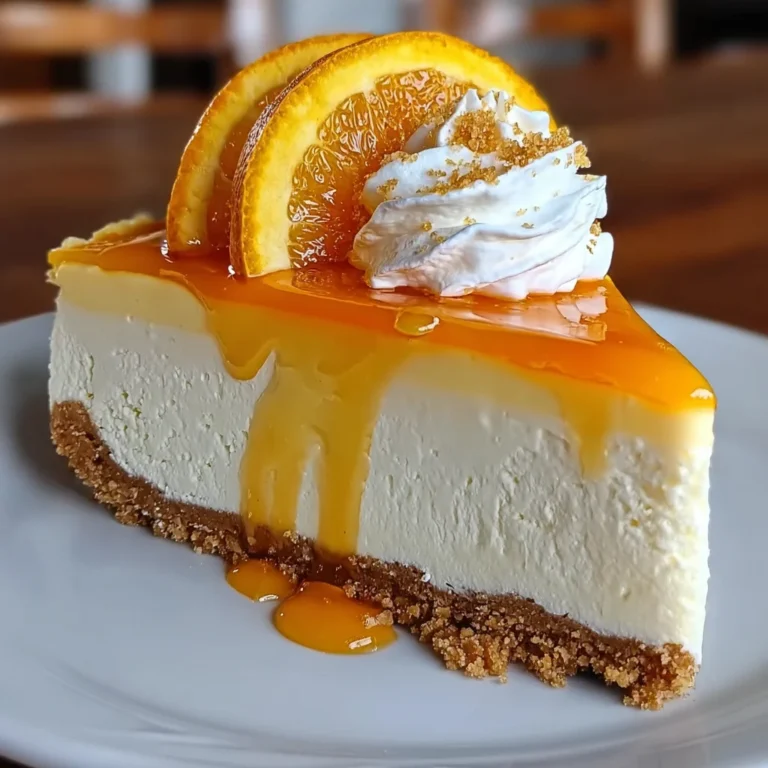
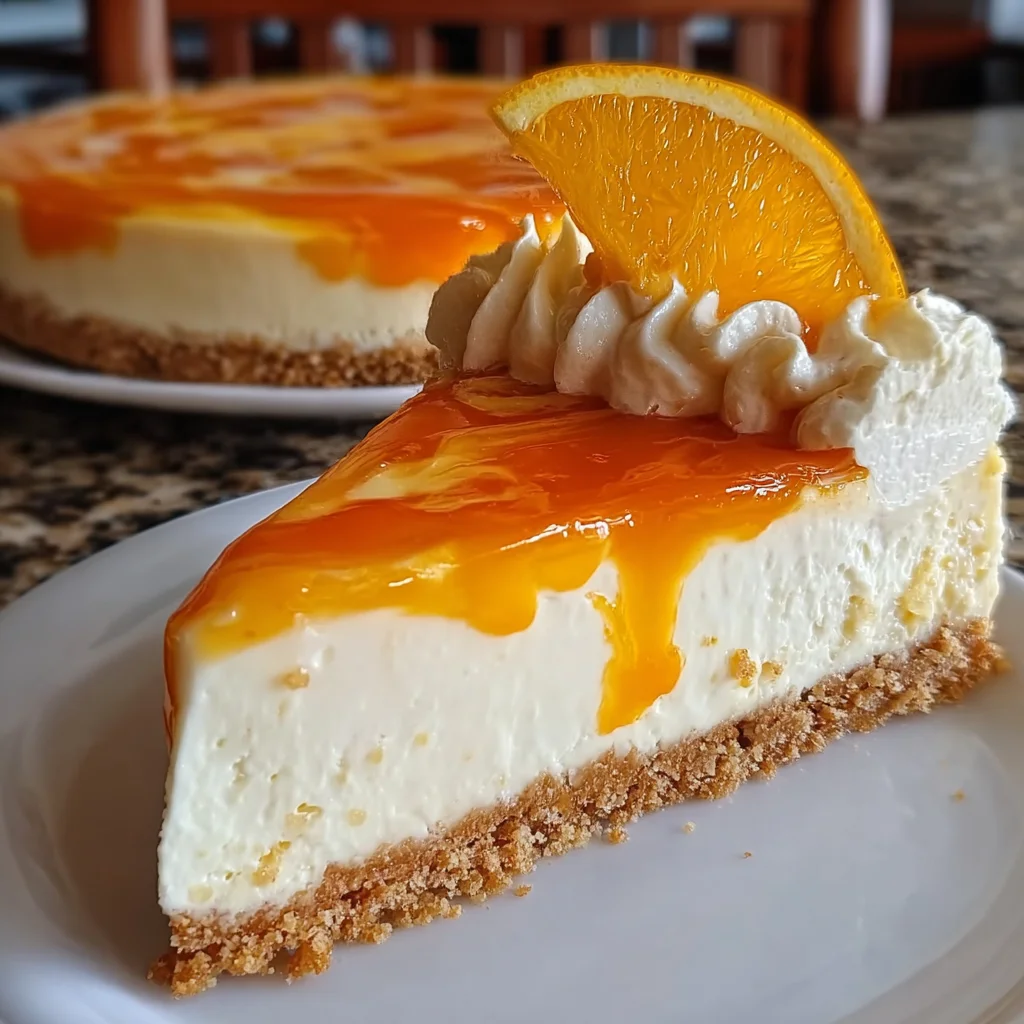
Introduction to Citrus Marbled Creamy Cheesecake
Let’s face it—life can be a whirlwind, and sometimes we need that perfect recipe to save the day. Enter the Citrus Marbled Creamy Cheesecake! This delightful treat isn’t just a feast for the eyes; it’s a creamy, dreamy indulgence that can brighten any occasion. Whether you’re hosting a get-together or simply looking for a quick way to impress your family, this cheesecake is your go-to solution. With its vibrant marbled effect and zesty citrus kick, it’s sure to bring smiles all around. Trust me; you won’t want to miss out on this culinary adventure!
Why You’ll Love This Citrus Marbled Creamy Cheesecake
This Citrus Marbled Creamy Cheesecake is the kind of dessert that effortlessly combines elegance and ease. It’s perfect for busy moms like us who want to whip up something delicious without spending hours in the kitchen. The refreshing citrus flavor adds a delightful brightness, while the creamy texture is absolutely heavenly. Plus, it’s a fantastic way to showcase your creativity and impress your loved ones all at once!
Ingredients for Citrus Marbled Creamy Cheesecake
Gathering the right ingredients is a crucial step to making this beautiful Citrus Marbled Creamy Cheesecake! Let’s break it down, shall we?
- Graham crumbs: These crumbs form the delicious, crunchy crust that perfectly contrasts the smooth filling. You can use store-bought or crush plain graham crackers yourself.
- Melted butter: This is the magic glue that holds the crust together. It adds flavor and richness. I always opt for unsalted butter for better control over salt levels.
- Cream cheese: The star of the show! It gives that creamy texture and rich flavor. Make sure it’s softened for easy blending.
- Granulated sugar: This sweetens the cheesecake and balances the citrus tang. You can substitute with a sugar alternative if you’re cutting down.
- Large eggs: Eggs provide structure and help the cheesecake set. Choose organic or free-range for a richer taste.
- Vanilla extract: A splash adds a lovely warmth and depth to the flavor. Pure vanilla extract is a must for the best taste.
- Sour cream: It contributes to the cheesecake’s smoothness and adds a slight tang. You can replace it with Greek yogurt for a healthier twist.
- All-purpose flour: A bit of flour helps stabilize the cheesecake, giving it the right texture. You can use gluten-free flour if needed.
- Orange juice: This gives the cheesecake its vibrant citrus flavor. Fresh juice always tastes better than bottled!
- Orange zest: The zest packs a fragrant punch that enhances the orange flavor throughout the cheesecake. It’s a delightful surprise!
- Orange food coloring: While optional, this can amplify the vibrant orange color, making the cheesecake even more visually appealing.
- Orange slice: This is perfect for garnish and adds a charming touch when serving your masterpiece.
For exact measurements, check the bottom of the article. Let’s get cooking!
How to Make Citrus Marbled Creamy Cheesecake
Step 1: Preheat and Prepare the Pan
The first step in creating your Citrus Marbled Creamy Cheesecake is to preheat your oven to 325°F (160°C). This temperature is perfect for baking a creamy cheesecake without cracking. While the oven warms up, grab a springform pan and generously grease it to prevent the cheesecake from sticking. It’s like preparing a cozy bed for your dessert! If you have parchment paper, placing it at the bottom of the pan can make removal a breeze. Trust me, you’ll want to show off that gorgeous marbled top!
Step 2: Make the Crust
Now, let’s dive into making the crust! In a mixing bowl, combine your graham crumbs with the melted butter. This mixture should resemble damp sand—perfect for creating a sturdy base. Using your hands or a measuring cup, firmly press the mixture into the bottom of the springform pan, spreading it evenly. I love making sure the crust goes up just slightly along the sides for added flair! Once you’re happy with your crust, it’s time to set it aside while we tackle the filling—all part of the creamy cheesecake experience!
Step 3: Prepare the Creamy Filling
Pull out your electric mixer and a large bowl; it’s time for the creamy filling! Start by beating the softened cream cheese and granulated sugar together until the mixture is silky smooth. This step is crucial; you want to eliminate any lumps. Then, add one egg at a time, mixing thoroughly after each addition—take your time, it’s worth it! Finally, stir in the vanilla extract, sour cream, and flour so everything blends seamlessly. That smooth, creamy texture will have you dreaming of the final product already!
Step 4: Add Citrus Flavor
It’s time to bring the sunshine into our dessert! Carefully divide your creamy filling into two equal portions. In one bowl, mix in the freshly squeezed orange juice and zest. This is where the citrus magic happens! As you blend, imagine those vibrant flavors infusing every bite of your cheesecake. If you fancy a pop of color, add a few drops of orange food coloring here. Remember, this is your creation—let your personality shine through the flavors!
Step 5: Create the Marbled Effect
We’re now ready to create that stunning marbled effect! Start by pouring half of the plain cream cheese batter into the prepared crust, spreading it evenly. Then, dollop the orange mixture on top, alternating with the remaining plain batter. Don’t worry about being too precise; the art comes in swirling! Use a knife or a skewer to gently swirl the two batters together. This step is like painting a masterpiece, and with each swirl, you’re building anticipation for the taste sensation that awaits!
Step 6: Bake the Cheesecake
With your masterpiece assembled, pop it into the preheated oven. Bake your Citrus Marbled Creamy Cheesecake for about 50 to 60 minutes. Keep an eye on it; the center should look mostly set but still have a slight jiggle. Once it’s done, the real magic happens when you turn off the oven but leave the cheesecake inside with the door cracked. This gradual cooling method helps prevent cracks from forming, giving you that perfect presentation!
Step 7: Cooling Process
After the baking is complete, let your cheesecake cool for about an hour in the oven. Then, transfer it to the fridge to chill for at least four hours or ideally overnight. Chilling lets all those luscious flavors meld and develop even further. Plus, waiting is half the fun! When you finally slice into it, the creamy cheesecake will be smooth, and the marbling will look oh-so-inviting. Trust me, the wait will be worth it!
Tips for Success
- Make sure your cream cheese is fully softened for a lump-free filling.
- Use a springform pan for easy removal and a beautiful presentation.
- Experiment with different citrus juices like lemon or lime for a unique twist.
- Don’t rush the cooling process to avoid cracking.
- Chill the cheesecake overnight for the best flavor and texture.
Equipment Needed
- Springform pan: Essential for easy release. A regular cake pan works, but you’ll need to line it well.
- Electric mixer: This makes blending quick and easy. A whisk will do, but it’ll take more effort!
- Mixing bowls: Use a few for separating batters. Any bowls you have on hand work perfectly.
- Rubber spatula: Great for scraping down sides. A spoon is a good alternative!
Variations on Citrus Marbled Creamy Cheesecake
- Lemon Twist: Swap the orange juice and zest for fresh lemon juice and zest for a zesty lemon cheesecake experience.
- Ginger Snap Crust: Replace graham crumbs with crushed ginger snap cookies for a spiced kick in the crust.
- Berry Marble: Add a layer of pureed strawberries or blueberries instead of orange for a colorful berry marbled effect.
- Gluten-Free Version: Use gluten-free graham crackers and a gluten-free flour blend in the filling for a gluten-friendly dessert.
- Dairy-Free Option: Substitute cream cheese with a dairy-free cream cheese alternative and use coconut yogurt instead of sour cream for a dairy-free delight.
Serving Suggestions for Citrus Marbled Creamy Cheesecake
- Serve with a dollop of whipped cream on top for added creaminess.
- Pair with a refreshing glass of iced tea or lemonade to balance the sweetness.
- Garnish with fresh mint leaves for a pop of color and minty freshness.
- Consider a side of fresh berries to add a vibrant touch to your plate.
FAQs about Citrus Marbled Creamy Cheesecake
As a fellow cheesecake lover, I know you might have a few questions about this delightful Citrus Marbled Creamy Cheesecake. Here are some of the most common inquiries I’ve come across:
Can I use low-fat cream cheese?
Absolutely! Low-fat cream cheese works well, although the texture might be slightly different. The cheesecake will still be creamy and delicious, just a tad lighter.
How do I store leftovers?
To keep your cheesecake fresh, cover it tightly with plastic wrap or aluminum foil. It can be stored in the refrigerator for up to a week. Just make sure to keep it protected from any strong odors!
Can I freeze the cheesecake?
Yes! If you find yourself with extra slices, simply wrap them well and freeze for up to three months. Just remember to thaw it in the refrigerator overnight before serving.
What if I don’t have a springform pan?
No worries! You can use a regular cake pan, just be sure to line it with parchment paper. It may be a bit tricky to remove, but it will still taste fantastic!
Can I make this cheesecake ahead of time?
Definitely! This cheesecake is perfect for making in advance. In fact, chilling it overnight allows the flavors to meld beautifully, making it even more delicious!
Final Thoughts on Citrus Marbled Creamy Cheesecake
Making this Citrus Marbled Creamy Cheesecake has been such a delightful journey! There’s something incredibly satisfying about creating a dessert that’s not only beautiful but super tasty too. Each slice offers a creamy texture that’s complemented by the refreshing citrus flavor, dancing on your taste buds like a sunny day. Whether serving it at a family gathering or simply indulging after a long week, this cheesecake is bound to bring smiles and joy. Trust me, every bite is a celebration of flavor, and you’ll find yourself reaching for another piece before you even realize it!
PrintCitrus Marbled Creamy Cheesecake
A deliciously creamy cheesecake with a vibrant citrus marbled effect, perfect for any occasion.
- Prep Time: 30 minutes
- Cook Time: 60 minutes
- Total Time: 5 hours 30 minutes
- Yield: 12 servings 1x
- Category: Dessert
- Method: Baking
- Cuisine: American
- Diet: Vegetarian
Ingredients
- For the Crust: 2 cups graham crumbs
- ½ cup melted butter
- For the Filling: 3 packs (8 oz each) cream cheese, softened
- 1 cup granulated sugar
- 3 large eggs
- 1 tsp vanilla extract
- 1 cup sour cream
- ¼ cup all-purpose flour
- For the Orange Swirl: ½ cup orange juice
- 2 tbsp orange zest
- Orange food coloring (optional)
- For Garnish: Orange slice
Instructions
- Preheat the oven to 325°F (160°C) and grease a springform pan.
- Mix graham cracker crumbs and melted butter. Press the mixture into the pan to form the crust. Set aside.
- Beat cream cheese and sugar until smooth. Add eggs one at a time, beating well after each. Stir in vanilla extract, sour cream, and flour until just combined.
- Divide batter in half. Add orange juice, zest, and food coloring to one portion, mixing well.
- Alternately pour plain and orange batters into prepared crust. Use a knife to swirl layers for marbled effect.
- Bake 50-60 minutes until center is nearly set but slightly jiggly. Turn off oven, crack door, let cool 1 hour. Then chill 4 hours or overnight.
- Garnish with orange slice before serving.
Notes
- Food coloring optional for enhanced orange color
- Gradual cooling prevents cheesecake from cracking
- Best if chilled overnight before serving
Nutrition
- Serving Size: 1 slice
- Calories: 350
- Sugar: 20g
- Sodium: 350mg
- Fat: 25g
- Saturated Fat: 15g
- Unsaturated Fat: 5g
- Trans Fat: 0g
- Carbohydrates: 30g
- Fiber: 1g
- Protein: 5g
- Cholesterol: 100mg


