Introduction to Coffee Brownies Recipe
Coffee Brownies. Ever get those sugar cravings but feel like you do not have time? Well, here is my beloved Coffee Brownies Recipe! These little goodies not only take no time to make, but also carry that great coffee taste to perk up what might be the most hectic of days.
Whether you are short of time or want to show off in front of your mates at the upcoming party, these brownies are a lifesaver. Believe me, once you taste them, you can’t even help yourself from going for more and more!
Why You’ll Love This Coffee Brownies Recipe
Pure happiness in every bite with this Coffee Brownies Recipe. Quick to prep and ready in just 15 minutes, so perfect for that busy afternoon. Rich chocolate and robust coffee taste make for a really divine dessert that most surely everyone will love. Yeah, and fudgy and moist, no one’s gonna doubt your baking skills!
Ingredients for Coffee Brownies Recipe
Let’s gather everything we need for this scrumptious Coffee Brownies Recipe! Here’s a list of ingredients you’ll want to have on hand:
- Unsalted butter: This will be melted to create that rich, moist base. Always a must in brownie recipes!
- Dark cocoa powder: For that deep chocolate flavor, dark cocoa is the star here. It gives our brownies a rich color and taste.
- Granulated sugar: This ingredient adds sweetness and helps achieve that lovely chewy texture.
- Instant espresso powder: If you’re a coffee lover, this ingredient is what elevates the flavor. It provides a nice robust kick.
- Large eggs: Eggs play an essential role in binding everything together while adding moisture.
- Vanilla extract: A splash of vanilla adds a delightful warmth that complements the chocolate and coffee flavors beautifully.
- Table salt: Just a pinch enhances the overall flavor, making sure the sweetness isn’t overwhelming.
- Baking powder: This is crucial for uplifting our brownies, giving them that perfect rise.
- All-purpose flour: The cornerstone of any baking recipe, it helps create the structure we need.
- Heavy whipping cream: Used in the frosting, it adds creaminess and helps achieve a smooth texture.
- Instant coffee granules: A little extra coffee flavor, sprinkled into the frosting for that added richness.
- Powdered sugar: Necessary for our frosting, it provides sweetness and that smooth finish we love.
- Dark chocolate chips: Who can resist chocolate chips on top? They’ll melt just perfectly to finish off our brownies!
- Optional ingredients: Consider adding nuts or swapping regular chocolate chips for white chocolate if you want to mix it up!
You can find the exact measurements for all these ingredients at the bottom of the article, ready for printing.

How to Make Coffee Brownies Recipe
Now comes the fun part! Let’s dive into the step-by-step process of creating these irresistible Coffee Brownies. Follow along, and I promise you’ll be savoring these delectable squares in no time!
Step 1: Preheat the Oven
First things first! Preheat your oven to 350 degrees Fahrenheit. This step is essential for optimal baking. An evenly heated oven gives the brownies the perfect fudgy texture we all crave.
Step 2: Prepare the Cocoa Mixture
In a mixing bowl, whisk together the melted butter and dark cocoa powder until smooth. This is where the magic begins, as you create a rich and indulgent base. The mixture should be glossy and free of lumps, inviting you to take a taste!
Step 3: Beat the Sugar and Eggs
Next, in a separate bowl, beat together the granulated sugar, eggs, instant espresso powder, and vanilla extract. Whip this until it’s light and fluffy. This step is crucial—it adds air and texture to your brownies, ensuring they rise beautifully while maintaining that classic fudgy feel.
Step 4: Incorporate the Cocoa Mixture
Now, fold the shiny cocoa mixture into the sugar and egg blend. Gently mix until just combined—be careful not to overwork the batter! This keeps the brownies tender and moist, allowing that coffee flavor to shine through beautifully.
Step 5: Combine Dry Ingredients
In another bowl, whisk together the flour, baking powder, and a pinch of salt. Gradually stir this dry mix into your wet ingredients. Don’t rush this step; combining slowly allows the flour to incorporate without clumping, ensuring a smooth batter.
Step 6: Bake the Brownies
Spread the brownie batter in your prepared pan and bake for 25 to 28 minutes. Here’s my favorite trick: check for doneness by inserting a toothpick. It should come out with a few moist crumbs, but not wet batter—it’s all about the right balance!
Step 7: Prepare the Coffee Frosting
While your brownies cool, let’s whip up that luscious coffee frosting! Combine heavy whipping cream with instant coffee granules in a bowl. Beat the softened butter and a pinch of salt until creamy, then add the powdered sugar and your coffee cream. Keep beating until the frosting is light and fluffy, and oh-so-dreamy!
Step 8: Frost the Brownies
Once the brownies are completely cool, it’s time to frost them! Spread the creamy coffee frosting evenly over the brownies, using a spatula for that professional touch. Don’t be shy; a generous layer only enhances the enjoyment!
Step 9: Melt the Chocolate Topping
Finally, let’s melt some chocolate for that decadent finish! Combine dark chocolate chips and heavy cream in a microwave-safe bowl. Heat for about 30 seconds, stir, and if needed, heat again in 15-second bursts until everything is smooth. Drizzle this heavenly chocolate on top of the frosted brownies. Let it set—it’ll be worth the wait!
Tips for Success
- For that extra fudginess, don’t overbake the brownies. They should feel soft when you remove them from the oven.
- Use quality cocoa powder for a deeper chocolate flavor—a little goes a long way!
- Let the brownies cool completely before frosting for the best texture.
- Store leftovers in an airtight container to keep them fresh for days.
- Don’t hesitate to experiment with add-ins like nuts or chocolate chunks!
Equipment Needed
- 8×8 baking pan: This is your go-to pan for brownies. An alternative would be a similar-sized glass dish.
- Mixing bowls: A set of different sizes will help you manage your ingredients. Any bowl will do!
- Whisk and spatula: Essential for mixing! A fork can work if you’re in a pinch.
- Measuring cups and spoons: Accurate measurements matter. You can use any standard measuring tools you have.
- Microwave-safe bowl: Perfect for melting chocolate; any heat-safe bowl is a good substitute.
Variations on Coffee Brownies Recipe
- Nutty Delight: Add chopped walnuts or pecans to the batter for a crunchy texture that pairs beautifully with the soft brownies.
- Minty Fresh: Incorporate a few drops of peppermint extract into the batter for a refreshing mint twist that’s sure to impress!
- Gluten-Free Version: Swap regular all-purpose flour with a gluten-free blend. It works just as wonderfully for those with dietary restrictions.
- Caffeine-Free: For a decaf option, use decaffeinated instant coffee or espresso powder to achieve that lovely coffee flavor without the jitters.
- Caramel Swirl: Drizzle caramel sauce on top of the brownie batter before baking for a gooey, sweet surprise in every bite!
Serving Suggestions
- With Ice Cream: Serve warm brownies alongside a scoop of vanilla or coffee ice cream for a delightful contrast.
- Coffee Pairing: Enjoy these brownies with a cup of freshly brewed coffee or espresso to enhance the flavors.
- Presentation: Dust with powdered sugar or cocoa powder for an elegant touch before serving.
- Fruit Garnish: Add fresh berries or sliced bananas on the side for a burst of freshness.
FAQs about Coffee Brownies Recipe
As you embark on your delicious journey with this Coffee Brownies Recipe, you might have a few questions. Here are some common queries that many bakers ask:
Can I use regular coffee instead of instant espresso powder?
Absolutely! If you prefer, you can substitute instant espresso with brewed coffee, but be mindful of the quantity. You’ll want to maintain the rich coffee flavor in your brownies.
How can I make these brownies less sweet?
Reducing the amount of granulated sugar or using a sugar substitute can help you achieve a less sweet brownie. Just keep in mind that it might slightly alter the texture!
Can I freeze the Coffee Brownies?
Yes! You can freeze these brownies for up to three months. Just ensure they’re well-wrapped in plastic and stored in an airtight container. Thaw them at room temperature before serving!
What’s the best way to cut the brownies into squares?
To cut your brownies cleanly, use a sharp knife and wipe it with a damp cloth between cuts. This trick helps prevent sticking and gives you those perfect edges!
How can I enhance the coffee flavor in my brownies?
If you’re looking for a stronger coffee punch, feel free to increase the amount of instant espresso powder. It’ll boost that delightful coffee flavor without compromising the brownies’ texture.
Final Thoughts
Baking these coffee brownies is not just limited to the activity of baking but generally brings happiness to the baker and their people. Your simple day can turn into a special one with delicious chocolate with the fragrance of coffee emerging from the kitchen. And, there is nothing as satisfactory as cutting through a fudgy base layered with icing. Whether you have a warm family get-together or enjoy treats after a long day these brownies will steal the show. Take in every bite, and remember the finest moments in life often come from sharing homemade goodies!
PrintCoffee Brownies Recipe: Irresistibly Delicious Treats!

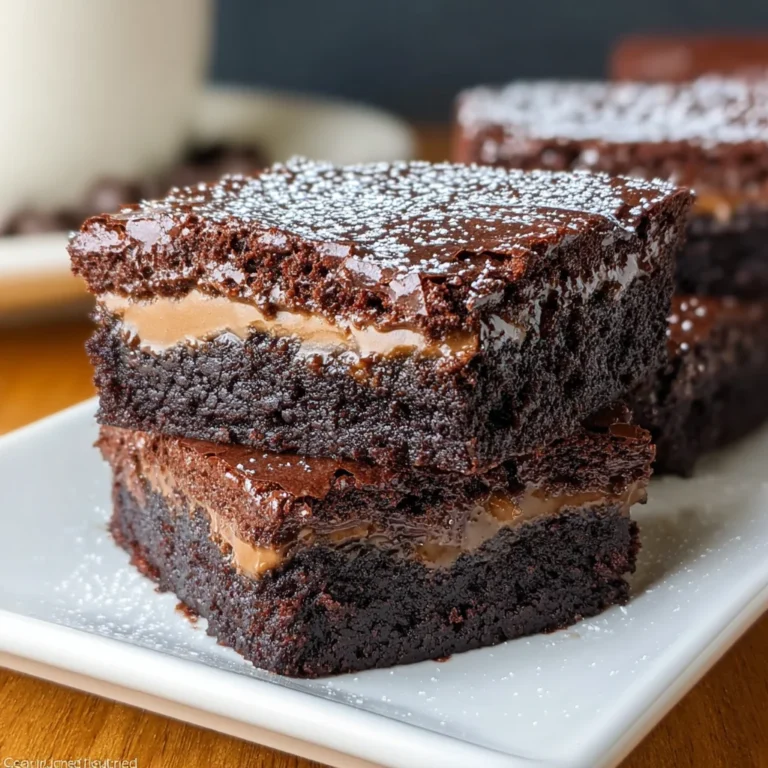
Delicious coffee-flavored brownies topped with a creamy coffee frosting and rich chocolate.
- Prep Time: 15 minutes
- Cook Time: 28 minutes
- Total Time: 43 minutes
- Yield: 16 squares 1x
- Category: Dessert
- Method: Baking
- Cuisine: American
- Diet: Vegetarian
Ingredients
- ½ cup unsalted butter, melted
- ¼ cup dark cocoa powder
- 1 cup granulated sugar
- 2 tablespoons instant espresso powder
- 2 large eggs
- 1 teaspoon vanilla extract
- ½ teaspoon table salt
- ¼ teaspoon baking powder
- ¾ cup all purpose flour
- 3 tablespoons heavy whipping cream (for frosting)
- 1 ½ teaspoons instant coffee granules
- ¼ cup unsalted butter, softened (for frosting)
- ⅛ teaspoon salt (for frosting)
- 1 ¾ cup powdered sugar (for frosting)
- ½ cup dark chocolate chips (for topping)
- 2 tablespoons heavy whipping cream (for topping)
Instructions
- Preheat the oven to 350 degrees. Line an 8×8 pan with foil. Spray with nonstick baking spray.
- Whisk together the melted butter and cocoa powder.
- Beat the sugar, eggs, espresso powder, and vanilla until light and fluffy. Add the chocolate butter mixture and mix again.
- Stir together the salt, baking powder, and flour. Slowly stir that into the butter mixture.
- Spread in the prepared pan and bake for 25-28 minutes, or until a toothpick inserted in the center comes out a little sticky. Remove and cool completely.
- Stir together the cream and instant coffee.
- Beat the butter and salt until creamy. Slowly add the powdered sugar and coffee cream while beating.
- Once everything is mixed in, beat it on high for 1 minute or until light and fluffy. Spread on top of the cooled brownies.
- Place the chocolate chips and heavy cream in a microwave safe bowl. Heat for 30 seconds. Stir until melted and creamy. Heat an additional 15 seconds, if needed.
- Spread on top of the frosting. Let the chocolate set before cutting into 16 squares.
Notes
- For a stronger coffee flavor, increase the amount of instant espresso powder.
- Be careful not to overbake the brownies to keep them fudgy.
- Store in an airtight container at room temperature for up to 3 days.
Nutrition
- Serving Size: 1 square
- Calories: 250
- Sugar: 22g
- Sodium: 150mg
- Fat: 12g
- Saturated Fat: 7g
- Unsaturated Fat: 4g
- Trans Fat: 0g
- Carbohydrates: 34g
- Fiber: 1g
- Protein: 3g
- Cholesterol: 40mg