Introduction to Creepy Halloween Rice Krispies Brains
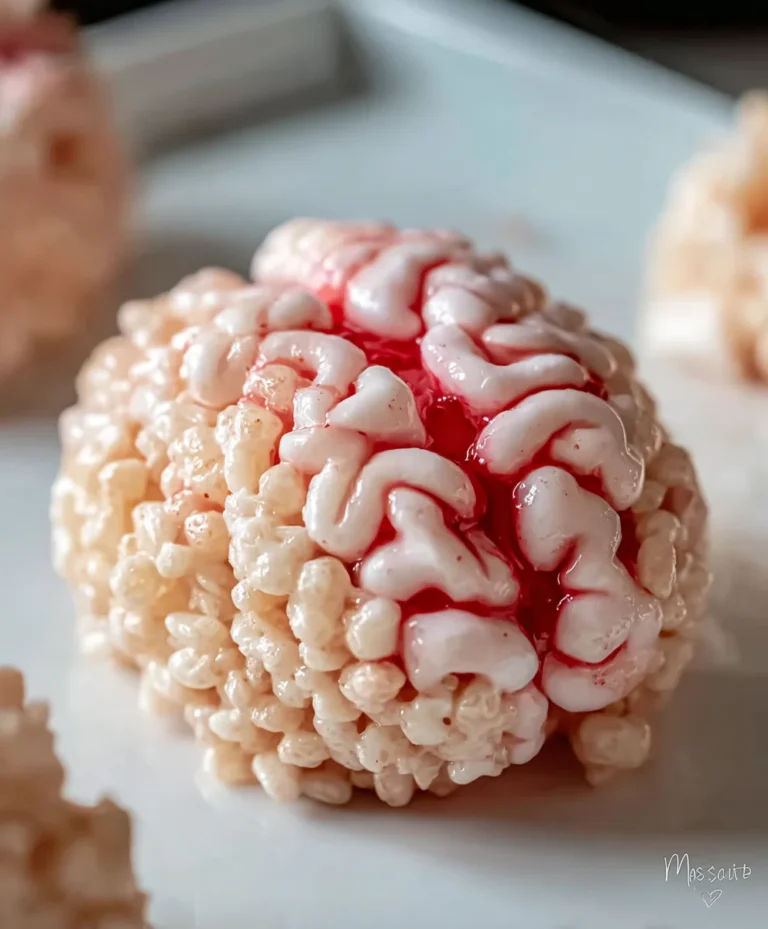
As Halloween approaches, I find myself drawn to spooky, fun treats. That’s where my Creepy Halloween Rice Krispies Brains come in! These delightful little morsels are not only a scream to look at, but they’re quick and easy to whip up. Perfect for busy moms like us, they can be made in just 25 minutes. Picture these treats as conversation starters at your Halloween party, captivating both kids and adults alike. So if you’re short on time yet want to impress your loved ones, let’s dive into this deceptively simple and wildly fun recipe!
Why You’ll Love This Creepy Halloween Rice Krispies Brains
You’re going to love these Creepy Halloween Rice Krispies Brains for so many reasons! First off, they’re incredibly easy to make. Even with a busy schedule, you can whip them up in under half an hour. Plus, they’re a sweet treat that everyone adores. Who wouldn’t want to sink their teeth into a spooky brain-shaped dessert? They’re perfect for Halloween gatherings and guaranteed to create a buzz at any party!
Ingredients for Creepy Halloween Rice Krispies Brains
To create these spooky treats, you’ll need a few simple ingredients that you may already have in your pantry. Here’s what you’ll gather:
- Rice Krispies cereal: The crispy base that gives these brains their delightful crunch.
- Butter: Essential for the melting process, it adds a rich flavor that binds everything together.
- Miniature marshmallows: The star of the show! These help create that gooey, sweet texture everyone loves.
- Red food coloring: To bring that eerie hue to your brain treats. Adjust the amount based on how spooky you want them!
Feel free to get creative! You can play with the food coloring to achieve different shades of ‘blood’ or even add in a splash of flavor extracts like vanilla for added yumminess. Don’t worry if you can’t find miniature marshmallows; you can cut regular ones into smaller pieces. The exact measurements for these ingredients are at the bottom of the article for easy printing if you’d like to keep things organized!
How to Make Creepy Halloween Rice Krispies Brains
Now, let’s get to the fun part—making your Creepy Halloween Rice Krispies Brains! Follow these simple steps, and soon you’ll have a spooky treat that will impress everyone.
Step 1: Prepare Your Workspace
First things first, set up your kitchen! Grab a large pot, an ice cream scoop, a baking sheet, and some parchment paper. Lining your baking sheet with parchment will make it easier to remove the treats later. Trust me; it’s a small step that saves you a bigger mess later!
Step 2: Melt the Butter
In your large pot, melt the butter over low heat. Patience is key here! You want the butter to melt gently without browning. It will create a rich base for your Halloween treats.
Step 3: Add Marshmallows
Once the butter has melted, it’s time to add the miniature marshmallows. Stir them occasionally until they’re completely melted and smooth. Watching that fluffy goodness melt is almost magical! It’s at this moment you’ll start dreaming about the sweetness that’s coming your way.
Step 4: Color the Mixture
Now for the fun part—adding color! Stir in a few drops of red food coloring. I usually start with about five drops, mixing until I reach my desired spooky shade. Remember, you can always add more but can’t take away, so start slow. This adds that hauntingly perfect touch to your concoction.
Step 5: Combine with Cereal
Next, it’s time to bring in the main ingredient! Pour the Rice Krispies cereal into your melted marshmallow mix. Gently fold the cereal until every piece is coated. Be careful not to crush the cereal; you want to retain that crunch that gives your brains their delightful texture!
Step 6: Shape the Brains
Using your ice cream scoop, drop generous scoops of the mixture onto your prepared tray. Gently form each scoop into a sort of oval shape. With the fat end of a butter knife, create a slight separation in the middle to mimic the grooves of a brain. It’s all about the details!
Step 7: Create the Veins
To give your brains an extra spooky flair, mix some more red food coloring in a small bowl. Using a paintbrush, lightly paint “veins” onto your brain-shaped treats. Just a touch adds that creepy, delicious touch that will make them a hit!
Tips for Success
- Use fresh marshmallows for a gooier texture in your Creepy Halloween Rice Krispies Brains.
- Don’t rush the melting process; low heat is your friend here!
- Wet your hands slightly when shaping the brains to keep the mix from sticking.
- For extra spookiness, experiment with green food coloring for a ghoulish twist!
- Make sure the treats cool completely before serving to maintain their shape.
Equipment Needed
- Large pot: A medium-sized pot works too, just make sure it’s big enough for melting and mixing.
- Ice cream scoop: A regular spoon will do in a pinch for shaping treats.
- Baking sheet: Any flat surface works, but parchment makes cleanup a breeze.
- Butter knife: Use any blunt knife for creating those brain grooves.
Variations
- Cocoa Krispies: Swap out Rice Krispies for Cocoa Krispies for a chocolatey twist that kids will love!
- Vegan Option: Use vegan butter and large fluff marshmallows to make this treat cruelty-free.
- Flavor extracts: Add a splash of vanilla, almond, or even a hint of orange extract to jazz up the flavor profiles.
- Nut-free version: Ensure that all ingredients are nut-free to accommodate allergies—check labels for safety!
- Decorating ideas: Get creative by adding edible glitter or gummy worms for extra creepy touches!
Serving Suggestions
- Pair your Creepy Halloween Rice Krispies Brains with spooky-themed drinks like blood orange lemonade or a fizzy haunted punch.
- Serve on a decorative platter or cake stand to create a festive display that catches the eye.
- Add a sprinkle of edible glitter for an extra touch of magic!
FAQs about Creepy Halloween Rice Krispies Brains
Can I make these Creepy Halloween Rice Krispies Brains ahead of time?
Absolutely! You can prepare them a day in advance. Just make sure to store them in an airtight container to keep them fresh. They actually taste just as good the next day, making them a great option for party prep!
What if I don’t have red food coloring?
No worries! You can experiment with other colors, like green or purple, to achieve a different spooky effect. Just remember, the more vibrant the color, the creepier the illusion!
Can I use regular marshmallows instead of miniature ones?
Definitely! You can cut regular marshmallows into smaller pieces to achieve the same gooey texture. Just ensure they melt thoroughly to combine well with the other ingredients.
How do I store leftovers?
Keep your leftovers in an airtight container at room temperature. They should stay fresh for up to three days. However, I doubt they’ll last that long—they’re just too irresistible!
Are there any allergy concerns I should be aware of?
Yes, always double-check ingredient labels for potential allergens like gluten or dairy. For a nut-free option, make sure all your ingredients are free from cross-contamination. Safety first!
Final Thoughts
Making Creepy Halloween Rice Krispies Brains adds a delightful thrill to any Halloween gathering. The joy of creating these spooky treats is contagious, turning any ordinary kitchen into a lively hub of creativity and laughter. Watching loved ones bite into them is such a fun experience, as they anticipate both the sweetness and the creepiness! Plus, their quick prep time makes them a perfect solution for busy nights. With this recipe, you’re not just serving a dessert; you’re crafting spooky memories that will delight both kids and adults alike. So, let the Halloween spirit guide you—it’s treat time!
PrintCreepy Halloween Rice Krispies Brains
Delicious and spooky Rice Krispies treats shaped like brains, perfect for Halloween fun!
- Prep Time: 15 minutes
- Cook Time: 10 minutes
- Total Time: 25 minutes
- Yield: 12 servings 1x
- Category: Dessert
- Method: Stovetop
- Cuisine: American
- Diet: Vegetarian
Ingredients
- 6 cups rice Krispies cereal
- 3 tablespoons butter
- 10 oz bag miniature marshmallows
- Red food coloring
Instructions
- Line a baking sheet with parchment paper.
- Melt the butter over low heat in a large pot, then add marshmallows, stirring until marshmallows are melted.
- Stir in a few drops of food coloring – we used 5, but you could use less for a lighter color.
- Stir in the cereal.
- Use the ice cream scoop to gather the mixture and drop it onto your prepared tray. Form the mixture into an oval, then separate slightly in the middle with the fat end of a butterknife to form the “brain”.
- Add some food coloring to a bowl and use the paintbrush to paint “veins” onto the brains.
Notes
- This recipe is great for Halloween parties and gatherings.
Nutrition
- Serving Size: 1 brain
- Calories: 150
- Sugar: 10g
- Sodium: 50mg
- Fat: 4g
- Saturated Fat: 2g
- Unsaturated Fat: 0g
- Trans Fat: 0g
- Carbohydrates: 27g
- Fiber: 0g
- Protein: 1g
- Cholesterol: 0mg