Introduction to Crispy Parmesan Garlic Chicken Burritos
As a busy mom, I know how challenging it can be to juggle family, work, and cooking. That’s why these Crispy Parmesan Garlic Chicken Burritos have become a staple in my kitchen. They’re not just delicious; they’re quick to whip up and keep everyone, even the picky eaters, coming back for more! Imagine the perfect crunch followed by savory garlic chicken and gooey cheese wrapped in a warm tortilla. Whether it’s a hectic weeknight or a casual get-together, these burritos are sure to impress your loved ones and make mealtime a breeze.
Why You’ll Love This Crispy Parmesan Garlic Chicken Burritos
Imagine biting into a warm burrito where each flavor dances on your palate. These Crispy Parmesan Garlic Chicken Burritos are not only tasty but also incredibly easy to make. In just 30 minutes, you can whip up a meal that feels gourmet. Plus, the kids will love the crunch and cheesy goodness. It’s the perfect quick solution for busy days when you still want to serve something special!
Ingredients for Crispy Parmesan Garlic Chicken Burritos
Getting your hands on the right ingredients is key for building those perfectly crispy burritos. For these Crispy Parmesan Garlic Chicken Burritos, you’ll need some core components as well as a bit of seasoning magic!
- Boneless, skinless chicken breasts – The star of the show! Cut into strips for a quick cook and juicy bites.
- Plain breadcrumbs – They provide that essential crumbly texture that makes those burritos crispy.
- Grated parmesan cheese – Adds a kick of flavor to the breadcrumbs, elevating your burritos to delicious heights.
- Garlic powder – The best part of this recipe! It brings out the savory goodness you want in every bite.
- Paprika – Just a hint of smokiness to enhance the overall flavor profile.
- Salt and pepper – Essential seasonings for bringing all the flavors together!
- Olive oil – Used for pan-frying your chicken to perfection; it adds richness too.
- Shredded mozzarella or Monterey Jack cheese – For that wonderful melty texture inside the burritos.
- Red pepper flakes (optional) – If you like a kick, toss these in for a spicy touch!
- Large flour tortillas – The cozy wrap for all these delectable fillings; feel free to use whole wheat for a twist!
- Butter – Used for toasting the burritos, ensuring they’re crispy on the outside.
- Fresh chopped parsley – A lovely garnish to brighten up your plate. It’s about that visual appeal as well!
Don’t forget that exact quantities are available at the bottom for easy printing. Happy cooking!

How to Make Crispy Parmesan Garlic Chicken Burritos
Prepare the Chicken
Let’s start with our star player: the chicken! I love to cut the boneless, skinless breasts into strips. This makes them easier to coat and cook. In a shallow bowl, combine your plain breadcrumbs, grated parmesan, garlic powder, paprika, salt, and pepper. Mixing these together creates a flavor-packed coating that clings beautifully to each chicken strip. The key is to ensure every piece is well-coated, giving that crispy texture we crave. Trust me, this foundational step is crucial for a tasty burrito!
Cooking the Chicken
Next, it’s time to get cooking! Heat olive oil in a large skillet over medium heat. Ensure it’s hot, but not smoking, as this helps retain the chicken’s juiciness. Add the coated chicken strips in a single layer; if your skillet is small, consider cooking in batches to avoid overcrowding. Cook for 3-4 minutes on each side until they’re golden brown and cooked through. Remember, juicy chicken is key to a satisfying burrito, so don’t rush this step and enjoy the sizzle!
Assembling the Burritos
Now for the fun part—assembling our burritos! Lay out the large flour tortillas on a clean surface. Start by placing shredded cheese in the center of each tortilla, followed by a generous amount of crispy chicken. I like to add red pepper flakes for an extra kick, but feel free to skip those if you’re serving kids. Fold the sides in, then roll from the bottom to form a tight burrito. This technique keeps your filling securely tucked in, ensuring a delightful bite every time.
Toasting the Burritos
Let’s get those burritos to a glorious finish! Melt butter in a clean skillet over medium heat. Place the assembled burritos seam-side down and toast them for about 2-3 minutes on each side. This step is essential; it adds flavor and extra crispiness, which makes them irresistible. Keep an eye on them until they reach a golden brown color. Once toasted, slice each burrito in half and garnish with fresh chopped parsley for that appetizing touch. Serve hot and enjoy every crispy bite!
Tips for Success
- For extra crunch, double coat the chicken by dipping in egg before the breadcrumb mixture.
- Experiment with different cheeses like pepper jack for added flavor.
- Let the chicken rest after cooking to maintain juiciness before assembling.
- Use a non-stick skillet to prevent sticking during toasting.
- Make a batch ahead and freeze for quick meals on busy nights!
Equipment Needed
- Large skillet – any heavy-bottomed pan will do, for even cooking.
- Shallow bowl – a plate works too for mixing breadcrumbs and seasonings.
- Tongs – use them for easy handling of chicken strips and burritos.
- Sharp knife and cutting board – essentials for slicing the chicken and burritos.
- Spatula – perfect for flipping and transferring the burritos while toasting.
Variations
- For a vegetarian version, swap the chicken for black beans and add sautéed veggies for a hearty filling.
- Try adding fresh spinach or kale for a nutrient boost and a pop of color!
- For a Mexican twist, include some diced jalapeños or corn for extra flavor.
- Go low-carb by using lettuce wraps instead of tortillas.
- Switch up the spices with taco seasoning for a zesty take on these burritos!
Serving Suggestions
- Pair your Crispy Parmesan Garlic Chicken Burritos with a fresh side salad dressed in a light vinaigrette.
- Serve with tortilla chips and guacamole for a fun, shared appetizer.
- Complement with a refreshing drink like iced tea or lemonade.
- Add a dollop of sour cream or salsa on the side for dipping.
- Present the burritos on a colorful platter to amp up the visual appeal!
FAQs about Crispy Parmesan Garlic Chicken Burritos
As a passionate home cook, I understand that you might have some burning questions about these Crispy Parmesan Garlic Chicken Burritos. Let’s dive into some FAQs to help make your cooking experience as smooth as possible!
Can I make these burritos ahead of time? Absolutely! You can prepare the chicken and assemble the burritos a day in advance. Just wrap them tightly in foil or plastic wrap and store them in the fridge. When you’re ready to enjoy them, toast in the skillet until crispy!
What’s the best way to freeze leftovers? If you have extra burritos, freeze them flat in a single layer on a baking sheet. Once frozen solid, wrap each burrito in foil and store them in a freezer bag. This helps retain their crunch when reheating.
Are there any substitute options for the chicken? Definitely! You can switch the chicken for shredded rotisserie chicken for speed, or use lean turkey for a healthier twist. For a vegetarian option, black beans or quinoa work beautifully!
Can I customize the spices in the recipe? Yes! If you crave a bit more heat, add cayenne pepper or chili powder to the breadcrumb mixture. You could also use Italian seasoning for an unexpected flavor twist.
How can I make these burritos gluten-free? Simply replace regular flour tortillas with gluten-free ones. Ensure that the breadcrumbs are also gluten-free, which is widely available in stores these days. Enjoy your meal without worry!
Final Thoughts
There’s something truly special about sharing a meal that you’ve poured love into, like these Crispy Parmesan Garlic Chicken Burritos. The joy of watching your family’s eyes light up with the first crunchy bite is priceless. They’re not just food; they’re a way to gather, connect, and create lasting memories. With every crispy layer and burst of flavor, you invite comfort into your home. So, whether you whip them up for a busy weeknight or a fun weekend gathering, these burritos will surely become a beloved part of your culinary repertoire. Happy cooking!
PrintCrispy Parmesan Garlic Chicken Burritos: A Tasty Treat!

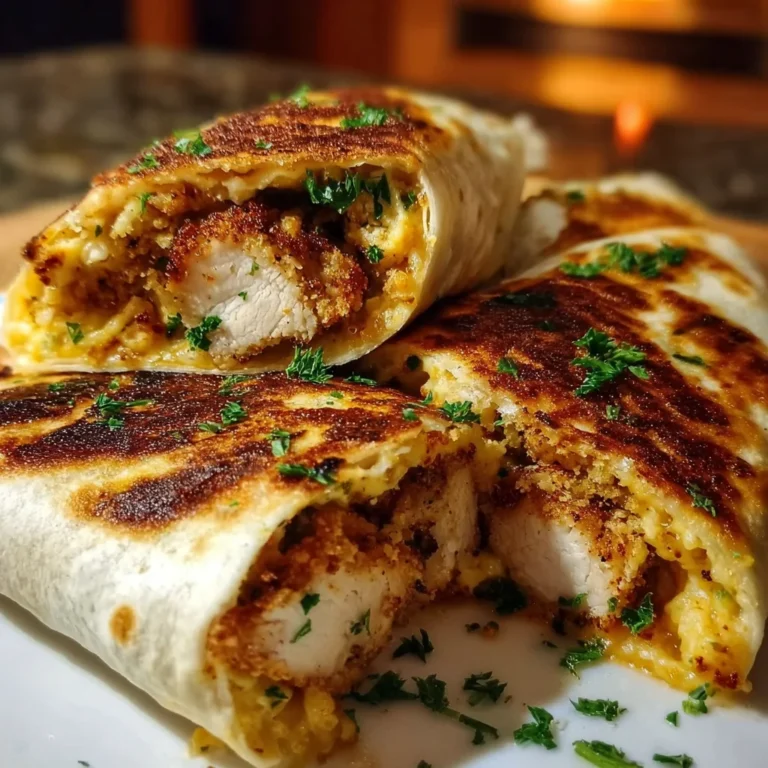
A delicious and crispy burrito filled with savory garlic chicken and topped with melted cheese.
- Prep Time: 15 minutes
- Cook Time: 15 minutes
- Total Time: 30 minutes
- Yield: 2–3 burritos 1x
- Category: Main Dish
- Method: Pan-frying
- Cuisine: Mexican
- Diet: Gluten Free
Ingredients
- 2 pieces boneless, skinless chicken breasts, cut into strips
- 1/2 cup plain breadcrumbs
- 1/4 cup grated parmesan cheese
- 1 teaspoon garlic powder
- 1/2 teaspoon paprika
- 1 teaspoon salt
- 1/8 teaspoon pepper
- 2 tablespoons olive oil (for pan-frying)
- 1 cup shredded mozzarella or Monterey Jack cheese
- 1/2 teaspoon red pepper flakes (optional)
- 2–3 large flour tortillas
- 1 tablespoon butter (for toasting the burritos)
- Fresh chopped parsley for garnish
Instructions
- In a shallow bowl, combine the breadcrumbs, grated parmesan, garlic powder, paprika, salt, and pepper. Stir to mix.
- Dredge each chicken strip in the seasoned breadcrumb mixture, making sure each piece is coated thoroughly.
- Heat olive oil in a large skillet over medium heat. Once hot, add the chicken strips in a single layer, working in batches if needed. Cook for about 3-4 minutes per side, until each strip is golden brown and cooked through.
- Transfer the cooked chicken to a plate and let it rest for a couple of minutes. Then, chop into bite-sized pieces.
- Lay out each flour tortilla on a clean surface. Place a layer of shredded cheese in the center of each tortilla, then add a generous portion of crispy chicken. Sprinkle with red pepper flakes, if using.
- Fold in the sides of the tortilla, then roll up from the bottom to form a tight burrito.
- Melt the butter in a clean skillet over medium heat. Place the burritos seam-side down and toast for 2-3 minutes per side, or until golden brown and crisp.
- Slice each burrito in half and garnish with fresh chopped parsley. Serve hot and enjoy!
Notes
- Feel free to customize the filling with other ingredients such as vegetables or different types of cheese.
- These burritos can be made ahead and frozen, then reheated in the oven.
- Add additional spices for more heat if desired.
Nutrition
- Serving Size: 1 burrito
- Calories: 350
- Sugar: 2g
- Sodium: 800mg
- Fat: 15g
- Saturated Fat: 5g
- Unsaturated Fat: 7g
- Trans Fat: 0g
- Carbohydrates: 40g
- Fiber: 2g
- Protein: 22g
- Cholesterol: 70mg