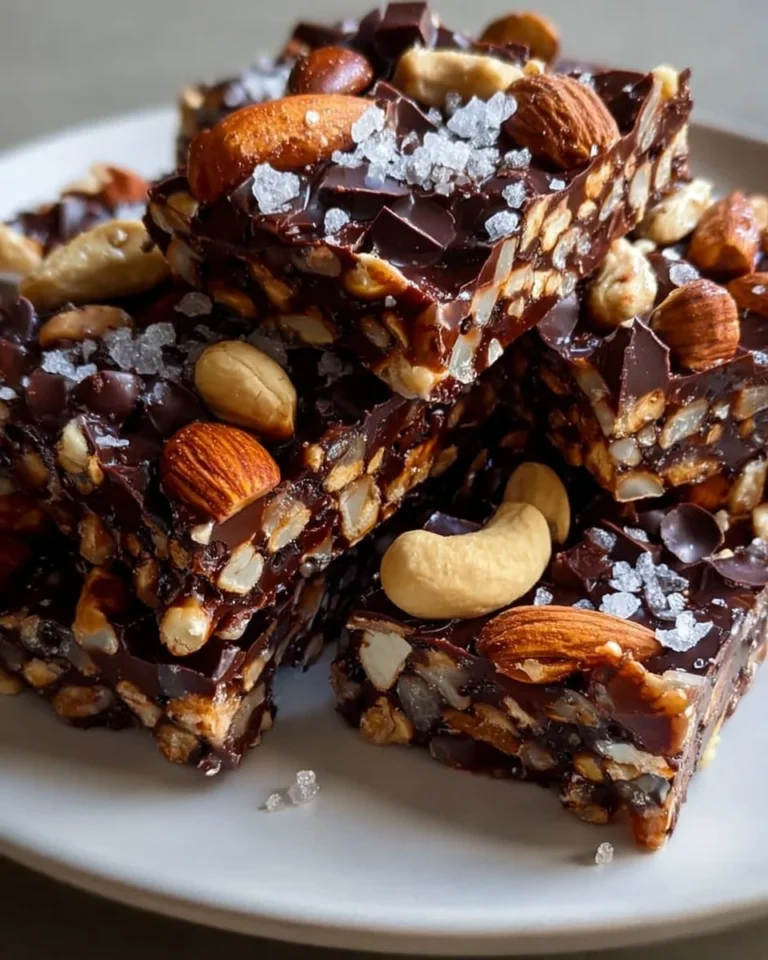
Indulging in a sweet treat can often feel like a little slice of heaven, and if you’re anything like me, nothing hits the spot quite like a delectable bar of rich, dark chocolate studded with crunchy nuts. Picture this: a perfectly balanced combination of semi-sweet chocolate that melts in your mouth, surrounded by a medley of toasted nuts that adds not only a satisfying crunch but also an earthy depth of flavor. As you bite into one of these Dark Chocolate Nut Bars, the harmonious interplay between the smooth chocolate and the robust, nutty undertones dances across your palate.
Fresh from the fridge, these bars glisten like dark gemstones, tempting you with their luxurious look. The aroma greets you warmly, an enticing reminder of cozy afternoons spent pampering your sweet tooth. Breaking off a piece, you feel that satisfying snap of the chocolate, which gives way to a chewy, slightly sticky yet perfectly balanced base made from puffed rice. Topped with a sprinkle of flaky sea salt, each bar offers a sublime experience that captivates both the eyes and the taste buds. You can’t help but be enchanted.
Why You’ll Love This Dark Chocolate Nut Bars
These Dark Chocolate Nut Bars are not just another go-to snack; they’re a celebration of flavor that brings joy to every occasion. Whether you need a midday pick-me-up, a crunchy on-the-go snack, or a sweet addition to your dessert spread at a gathering, these bars deliver. The combination of protein-rich nuts, the delightful crunch of puffed rice, and the rich dark chocolate creates not only a satisfying treat but also a nourishing one.
The appeal lies in their versatility. You can mix and match nuts according to your preferences—feel free to toss in some almonds, pecans, or even walnuts. You’ll enjoy the delightful contrast in textures, along with the unique flavors that each nut brings. Plus, the sweetness of the brown rice syrup gently binds it all together, ensuring every bite is a harmonious blend of sweet and nutty goodness.
Preparation Phase & Tools to Use
Before diving into this mouthwatering recipe, it’s essential to have the right tools at hand.
-
Mixing Bowls: Use large mixing bowls for combining your ingredients. A sturdy bowl helps you mix thoroughly without making a mess.
-
Saucepan: A small saucepan for heating the brown rice syrup. It’s crucial to ensure even heating so you achieve that smooth consistency.
-
Baking Dish: A lined baking dish allows easy removal of the bars once set. Opt for a size around 8×8 inches for the perfect thickness.
-
Spatula: A silicone spatula works wonders for spreading the chocolate evenly over the nut mixture. It’s gentle on your pan and easy to clean.
-
Refrigerator: Ensure you have space in your fridge for chilling the mixture, allowing it to set perfectly into bars.
Preparation Tip: Measure out all your ingredients beforehand to make the process seamless and your cooking experience enjoyable.
Ingredients for Dark Chocolate Nut Bars
- 1 cup mixed nuts (toasted): Choose your favorites—almonds, cashews, and hazelnuts all work beautifully for varied textures.
- 2 cups puffed rice: This grain gives the bars a delightful crunch and lightness.
- 1/2 cup brown rice syrup: The perfect glue that holds everything together while providing a hint of sweetness. Maple syrup can also be used for a different flavor profile.
- 1 cup dark chocolate (chopped or chips): Choose high-quality dark chocolate for the richest flavor. You can also adjust the cocoa content to suit your preference.
- Flaky salt (for sprinkling): This sprinkle enhances the sweetness and balances the flavors wonderfully.
How to Make Dark Chocolate Nut Bars
-
Combine the Base: In a large mixing bowl, combine your toasted mixed nuts and puffed rice. Ensure they are evenly distributed for a balanced texture in every bite.
-
Heat the Syrup: Pour the brown rice syrup into a small saucepan. Heat over medium, stirring until it becomes smooth and liquid-like.
-
Mix It Up: As it heats, carefully pour the warm syrup over the nut and rice mixture. Use a spatula to stir gently but thoroughly until everything is well coated and combined.
-
Form the Base: Transfer the mixture into your lined baking dish. Press it down firmly to create an even layer, helping the bars to hold their shape.
-
Melt the Chocolate: In the microwave or using a double boiler, melt the dark chocolate. Stir until it’s completely smooth, free of lumps.
-
Top with Chocolate: Pour the melted chocolate over the pressed nut mixture. Use your spatula to spread it evenly across the surface.
-
Finish with Flair: Drizzle any excess melted chocolate on top for a decorative touch. Finish with a sprinkle of flaky salt, enhancing the overall flavor with a touch of savory.
-
Refrigerate: Place the baking dish in the refrigerator and allow it to set for at least one hour. Once firm, lift the mixture out using the parchment paper and cut it into bars.
Chef’s Notes & Helpful Tips
-
Make-ahead Tips: Prepare these bars in advance for gatherings or meal prep. They store well in the fridge and even freeze beautifully.
-
Cooking Alternatives: You can experiment with different cooking methods. An air fryer can achieve a lovely crunch for the nuts while roasting; just be cautious with timing.
-
Customization Ideas: Go wild! Consider adding dried fruits like cherries or apricots, or swap out the nuts for seeds if you have allergies to cater to. Adjust the chocolate type if you prefer milk chocolate for a sweeter taste.
Common Mistakes to Avoid
-
Not Toasting Nuts: Skip this, and you miss out on depth of flavor. Always toast your nuts to enhance their natural oils—this simple step makes a world of difference.
-
Overcrowding the Baking Dish: If you crowd the dish, bars won’t hold together well. Make sure to spread your mixture evenly.
-
Skipping the Refrigeration: Skipping this critical step means soft bars that crumble instead of slice cleanly. Be patient!
What to Serve With Dark Chocolate Nut Bars
-
Coffee or Espresso: Pair with a rich dark roast to balance sweetness.
-
Vanilla Ice Cream: The creaminess complements the chocolate beautifully for dessert lovers.
-
Fruit Smoothies: Bright, fruity flavors contrast beautifully against the rich chocolate.
-
Cheese Platter: Serve alongside a selection of hard cheeses for a sophisticated touch.
-
Trail Mix: Add them to your trail mix for a snack that fits perfectly with active lifestyles.
-
Nut Butter: Spread some almond or peanut butter on top for an indulgent twist.
-
Hot Cocoa: Pair with a cup of homemade cocoa for a cozy treat on chilly days.
-
Tea: A warm chai or herbal tea enhances the nutty and chocolatey flavors.
Storage & Reheating Instructions
Store these bars in an airtight container in the fridge for up to two weeks. For longer storage, freeze individual bars wrapped in parchment paper and sealed in a freezer-safe bag. To enjoy, simply thaw them overnight in the refrigerator and serve.
Estimated Nutrition Information
Each bar generally contains around:
- Calories: 200
- Protein: 4g
- Fat: 12g
- Carbohydrates: 23g
- Sugar: 8g
These values can vary based on your specific ingredients, so consider them as a guideline.
FAQs
1. Can I use different nuts?
Yes! Feel free to swap in any nuts you prefer or those you have on hand. Just ensure they’re toasted for the best flavor.
2. What if I can’t find brown rice syrup?
You can substitute it with maple syrup or honey, but the texture and sweetness might vary slightly.
3. Do I need to use a specific type of dark chocolate?
Using high-quality dark chocolate with a cocoa content of at least 70% gives the best flavor. However, choose whatever suits your sweet tooth!
4. Can children enjoy these bars?
Absolutely! They make a great energy snack for the little ones but keep an eye on the chocolate content based on their sugar intake.
5. How can I make these vegan?
Choose dairy-free chocolate and ensure that your brown rice syrup is processed in a vegan-friendly manner—it’s typically already vegan!
Conclusion
These Dark Chocolate Nut Bars offer a wholesome and decadent treat to satisfy both your sweet cravings and your snack time need. With their crunchy texture, rich flavor, and flexible ingredient options, they stand out not only as a fantastic recipe but also as a delightful experience. I encourage you to gather your ingredients, channel your inner chef, and create these enchanting bars. Share them with friends or keep them all to yourself; either way, they promise to evoke smiles and satisfaction in every bite. Enjoy every delicious moment!
PrintDark Chocolate Nut Bars
Rich and decadent dark chocolate bars studded with crunchy nuts and puffed rice, perfect for a sweet snack or dessert.
- Prep Time: 15 minutes
- Cook Time: 10 minutes
- Total Time: 70 minutes
- Yield: 12 servings 1x
- Category: Snack
- Method: No-Bake
- Cuisine: American
- Diet: Vegetarian
Ingredients
- 1 cup mixed nuts (toasted)
- 2 cups puffed rice
- 1/2 cup brown rice syrup
- 1 cup dark chocolate (chopped or chips)
- Flaky salt (for sprinkling)
Instructions
- Combine the toasted mixed nuts and puffed rice in a large mixing bowl.
- Pour the brown rice syrup into a small saucepan and heat over medium, stirring until smooth.
- Carefully pour the warm syrup over the nut and rice mixture, stirring gently to coat.
- Transfer the mixture into a lined baking dish and press down firmly.
- Melt the dark chocolate in the microwave or double boiler until smooth.
- Pour the melted chocolate over the pressed nut mixture and spread it evenly.
- Drizzle excess melted chocolate on top and finish with a sprinkle of flaky salt.
- Refrigerate for at least one hour, then lift out and cut into bars.
Notes
Store in an airtight container in the fridge for up to two weeks or freeze for longer storage.
Nutrition
- Serving Size: 1 bar
- Calories: 200
- Sugar: 8g
- Sodium: 50mg
- Fat: 12g
- Saturated Fat: 4g
- Unsaturated Fat: 7g
- Trans Fat: 0g
- Carbohydrates: 23g
- Fiber: 3g
- Protein: 4g
- Cholesterol: 0mg