Introduction to Easy No-Bake Peanut Butter Cookies
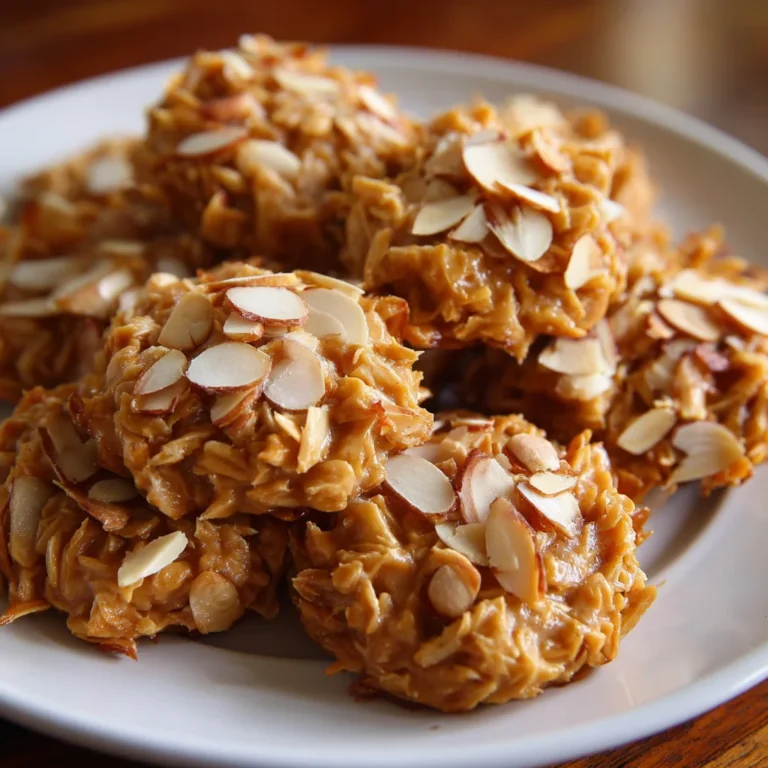
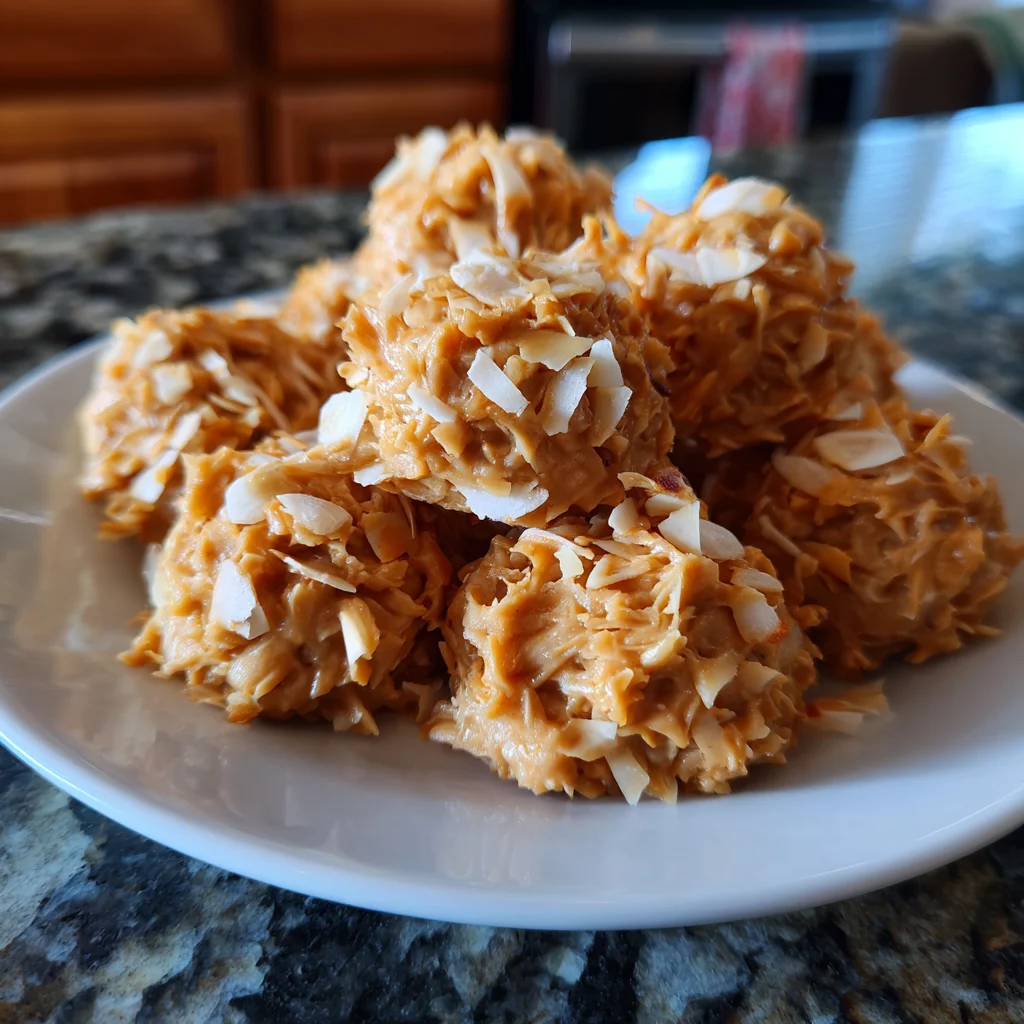
Life gets busy, doesn’t it? Between juggling work, family, and everything else, making time for baking can feel like a luxury. That’s where these Easy No-Bake Peanut Butter Cookies come in! This delightful recipe offers a quick solution for those hectic days when you crave something sweet without turning on the oven. With just a few simple ingredients and zero baking time, you’ll have a delicious snack ready in no time. Trust me, these cookies are a treat both you and your loved ones will enjoy, making them perfect for any occasion!
Why You’ll Love This Easy No-Bake Peanut Butter Cookies
These Easy No-Bake Peanut Butter Cookies are a lifesaver for busy moms and professionals like us. They come together in mere minutes, meaning you can whip them up during a quick break. Plus, they’re packed with hearty ingredients that deliver both flavor and satisfaction. The best part? There’s no baking involved, so you save time and energy while still treating your family to something truly delicious!
Ingredients for Easy No-Bake Peanut Butter Cookies
When it comes to whipping up these Easy No-Bake Peanut Butter Cookies, you’ll need a handful of simple ingredients that pack a flavorful punch. Here’s what you’ll gather:
- Flaked almonds or chopped nuts: These add a delightful crunch and nutty flavor. If you prefer a nut-free option, sunflower seeds work well too!
- Shredded coconut: This gives a sweet, tropical touch and a chewy texture that makes every bite memorable.
- Peanut butter: The star of the show! Its rich, creamy goodness binds the ingredients together and adds a satisfying taste.
- Stevia: A natural sweetener that keeps the cookies on the healthier side, ensuring you can indulge guilt-free.
- Unsalted butter or coconut oil: For extra creaminess. If you’re lactose intolerant, coconut oil is a perfect dairy-free substitute.
For exact measurements, check the bottom of the article, where you’ll also find a printable version of the recipe. The simplicity of these ingredients is what makes these cookies not only easy to prepare but also a joy to eat!
How to Make Easy No-Bake Peanut Butter Cookies
Step 1: Prepare the Baking Tray
To start, line a baking tray with greased parchment paper. This step helps prevent your cookies from sticking and makes cleanup a breeze. Plus, the cookies will release easily, ensuring that they keep their delightful shape. Trust me, this small step pays off big time!
Step 2: Combine the Dry Ingredients
In a large bowl, mix the flaked almonds and shredded coconut. The combination adds a wonderful crunch and chewy texture to each cookie. You’ll love how the coconut brings a hint of tropical sweetness while the almonds offer a nutty flair. It’s a match made in snack heaven!
Step 3: Prepare the Peanut Butter Mixture
Next, in a small saucepan, combine the peanut butter, stevia, and your choice of unsalted butter or coconut oil. Heat over medium until everything melts together into a creamy delight. It’s crucial to keep the heat consistent; too high and it could burn. You want that smooth, velvety consistency to coat your dry ingredients just right!
Step 4: Combine Ingredients
Pour that luscious peanut butter mixture over your dry blend. Grab a sturdy spoon and stir until everything is thoroughly combined. Each ingredient should be coated in peanut buttery goodness. This is where the flavors meld together, creating a delightful base for your cookies!
Step 5: Shape the Cookies
Now, drop tablespoons of dough onto your prepared tray. Space them apart to allow for any spreading. You’re aiming for even-sized cookies, so they look adorable and bake uniformly! They’ll have a charming rustic appearance that perfectly complements their homemade vibe.
Step 6: Refrigerate to Set
Once you’ve shaped your cookie dough, place the tray in the refrigerator for a few hours. This step is necessary for firming up the cookies. Keep an eye on them; you want them to be firm enough to hold their shape but not rock hard. A quick poke will tell you they’re ready!
Step 7: Enjoy Your Cookies
Finally, it’s time to enjoy those cookies straight from the fridge! Each bite will be a mix of creamy, crunchy, and sweet goodness. If you have leftovers, store them in an airtight container to keep them fresh. These cookies are perfect for a quick snack or after-school treat!
Tips for Success
- Make sure to measure your ingredients accurately for consistent results.
- If you prefer softer cookies, reduce the refrigeration time to about an hour.
- Feel free to mix in your favorite add-ins like chocolate chips or dried fruits!
- Store the cookies in an airtight container to maintain freshness and crunch.
- Experiment with different nut butters for unique flavors.
Equipment Needed
- Baking tray: A standard cookie sheet works perfectly. If you don’t have one, a large plate can do in a pinch.
- Parchment paper: Use greased foil if you’re out of parchment.
- Mixing bowls: One large bowl for the dry ingredients and a small saucepan for the peanut butter mixture.
- Sturdy spoon: A spatula is great for mixing and scraping down the sides!
Variations on Easy No-Bake Peanut Butter Cookies
- Chocolate Lovers: Add a handful of dark chocolate chips or cacao nibs to the mixture for a rich, indulgent twist.
- Flavorful Swaps: Replace peanut butter with almond butter or cashew butter for a different flavor profile. Each nut butter adds its unique flair!
- Sweeten It Up: If you enjoy a sweeter cookie, consider adding a tablespoon of honey or maple syrup along with the stevia.
- Nut-Free Delight: Use sunflower seed butter instead of peanut butter to create a nut-free version perfect for schools or allergy restrictions.
- Spice It Up: A dash of cinnamon or vanilla extract can elevate the flavor, offering aromatic notes and warmth.
- Veggie Boost: Mix in a few tablespoons of chia seeds or ground flaxseed for added nutrition without altering the taste!
Serving Suggestions for Easy No-Bake Peanut Butter Cookies
- Coffee or Tea: Enjoy these cookies with a warm cup of coffee or a soothing herbal tea for a cozy treat.
- Milk: Pair them with a glass of cold milk for a classic comforting combination that kids will love.
- Fruit Slices: Serve alongside fresh fruit like apple or banana slices for a balanced snack.
- Fancy Platter: Arrange cookies on a decorative plate and drizzle with melted chocolate for an elegant touch.
- Cookie Jar: Display them in a cute cookie jar on your counter; it adds charm and makes them easy to grab!
FAQs about Easy No-Bake Peanut Butter Cookies
Can I use crunchy peanut butter instead of creamy?
Absolutely! Using crunchy peanut butter will give your Easy No-Bake Peanut Butter Cookies a delightful texture. You’ll enjoy that extra crunch in every bite!
How long do these cookies last?
These cookies can be stored in the fridge for up to a week. Just make sure to keep them in an airtight container to maintain their freshness and crunch!
Can I substitute stevia with another sweetener?
Yes, you can use honey, maple syrup, or agave nectar as an alternative. Just keep in mind that liquid sweeteners may slightly alter the texture of your No-Bake Cookies.
Is this recipe suitable for vegan diets?
Definitely! Since this recipe uses coconut oil instead of butter and is naturally dairy-free, it’s perfect for those following a vegan lifestyle or anyone looking for a healthier dessert option!
Can I freeze these cookies?
Yes, you can freeze them! Place cookies in a single layer on a sheet and freeze until solid. Then, transfer them to a freezer-safe bag. When you’re ready, let them thaw in the fridge for a tasty treat!
Final Thoughts
Making these Easy No-Bake Peanut Butter Cookies is more than just preparing a snack; it’s about carving out moments of joy amidst the chaos of life. I adore how this recipe brings everyone together, creating shared smiles and satisfied munching. Each cookie is a reminder that indulgence can be effortless and delightful. Whether you’re treating yourself or aiming to impress your loved ones, these no-bake cookies deliver on all fronts. So grab your ingredients, and let the magic unfold. Trust me; once you make these, they’ll become a cherished staple in your home!
PrintEasy No-Bake Peanut Butter Cookies: Try This Simple Recipe!
These Easy No-Bake Peanut Butter Cookies are a simple and delicious treat, perfect for quick snacking without the need for an oven.
- Prep Time: 15 minutes
- Cook Time: 0 minutes
- Total Time: 3 hours 15 minutes
- Yield: 12 cookies 1x
- Category: Dessert
- Method: No-Bake
- Cuisine: American
- Diet: Vegan
Ingredients
- 1 cup flaked almonds (or chopped nuts)
- ½ cup shredded coconut
- ½ cup peanut butter
- ½ cup stevia
- 1/4 cup unsalted butter OR coconut oil (dairy-free)
Instructions
- Line a baking tray with greased parchment paper.
- In a large bowl, combine almonds and coconut.
- In a small saucepan, combine peanut butter, stevia, and butter (or coconut oil).
- Heat over medium heat until butter is melted and mixture is smooth and creamy.
- Pour the peanut butter mixture over the almond mixture and stir until well combined.
- Drop tablespoons of dough onto the prepared baking tray, spacing them apart for a single layer.
- Place the tray in the refrigerator for a few hours to set and harden.
- Enjoy these crisp cookies straight from the fridge! Store leftovers in an airtight container.
Notes
- For a nut-free version, you can use sunflower seeds instead of almonds.
- Ensure that the stevia you use is suitable for baking.
- These cookies can be stored in the fridge for up to a week.
Nutrition
- Serving Size: 1 cookie
- Calories: 120
- Sugar: 2g
- Sodium: 50mg
- Fat: 9g
- Saturated Fat: 3g
- Unsaturated Fat: 6g
- Trans Fat: 0g
- Carbohydrates: 10g
- Fiber: 2g
- Protein: 3g
- Cholesterol: 5mg


