Introduction to Homemade Caramel Apples
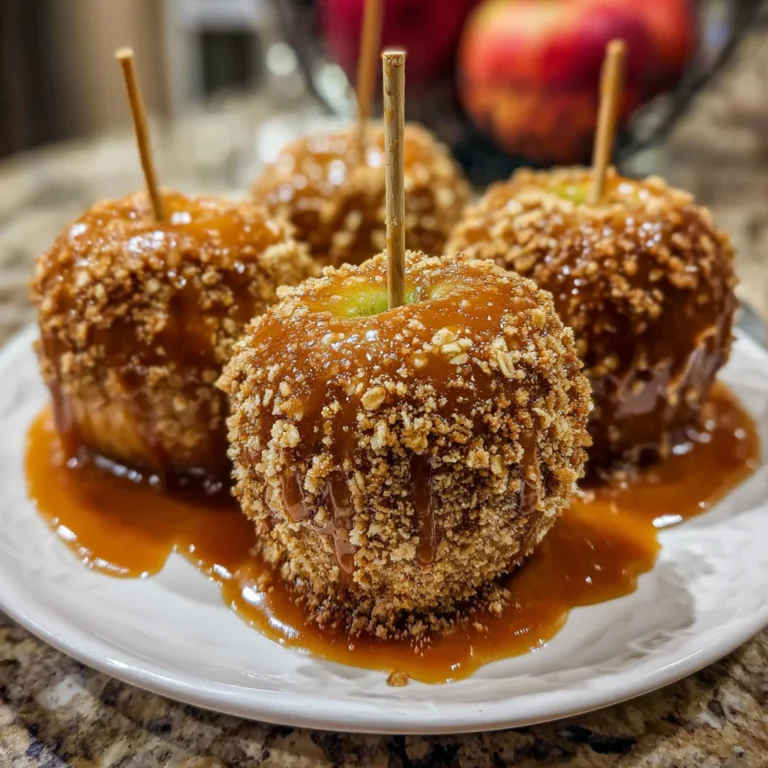
There’s something magical about Homemade Caramel Apples that just whispers sweet nostalgia. Remember those crisp fall days when you’d grab one at the fair? Now, you can recreate that delight right in your own kitchen! This is a charming, hands-on activity that can turn an ordinary day into a special moment for your family. Whether you’re looking for a quick dessert after dinner or a fun treat to impress your friends, this recipe ticks all the boxes. Let’s dive into this sweet adventure together, and soon, your loved ones will be eagerly asking for more!
Why You’ll Love This Homemade Caramel Apples
Homemade Caramel Apples are a delightful treat that checks all the boxes for busy moms and professionals like me. They’re surprisingly easy to make, taking just a short time from prep to plate. Plus, the taste is out of this world! Each crisp bite combines the tartness of apples with the rich sweetness of caramel. It’s a winning combo that brings smiles to everyone’s faces, making it a perfect family bonding activity.
Ingredients for Homemade Caramel Apples
Gathering the right ingredients is the first step in crafting your delicious Homemade Caramel Apples. Here’s what you’ll need:
- Cold apples: I always go for crisp varieties like Granny Smith or Honeycrisp. The coldness helps the caramel stick better.
- Brown sugar: Packed for that rich, deep flavor that makes the caramel unique.
- Heavy cream: This adds a velvety texture and luxurious feel to the caramel.
- Light corn syrup: It helps to prevent crystallization, ensuring that your caramel is smooth and shiny.
- Unsalted butter: Used for a rich taste; make sure it’s softened for easy incorporation.
- Salt: A pinch balances the sweetness of the caramel like a comforting hug for your taste buds.
- Vanilla extract: This tiny addition brings warmth and depth to your caramel sauce.
- Optional toppings: Go wild! Melted chocolate, flaky sea salt, sprinkles, or crushed nuts add personalization and fun.
The ingredient quantities can be found at the bottom of this article, along with options for printing. Get ready to whip up some sweetness!

How to Make Homemade Caramel Apples
Making Homemade Caramel Apples is a fun and rewarding experience that brings the whole family together. Here’s a straightforward guide to get you through it step-by-step!
Prepare Your Work Area
Setting the Stage for Success
Before you dive into making the caramel, take a moment to set up your workspace. A clean counter opens up possibilities and helps prevent mishaps.
Gather all your ingredients, as having everything at hand makes the process smoother. Laying out your tools—like the cooking pot and thermometer—creates a stress-free flow. You got this!
Prepare the Apples
Cleaning and Prepping
Start with washing your apples under cool running water. This step is crucial to remove any wax they might have. Just rub them gently, making sure they’re squeaky clean.
Once washed, dry them thoroughly. The drier they are, the better the caramel will adhere. Don’t forget to put a stick into each apple. Refrigerate them while you make the caramel; the chill makes a difference!
Make the Caramel
Cooking the Mixture
Now comes the magical part! In a heavy-bottomed pan, combine brown sugar, heavy cream, corn syrup, and butter.
Heat the mixture over medium heat. You’ll want to stir it occasionally to keep things moving. This is crucial because it reduces the chance of burning. Keep an eye on that thermometer.
Cook until it reaches 235°-240°. It should take about 15 to 20 minutes. Once it reaches that sweet spot, remove it from the heat and stir in the vanilla. That aroma? Heavenly!
Dip the Apples
Coating Technique
Now for the fun part: dipping! Grab a cold apple, and plunge it into the gooey caramel. Twist the apple to coat it well. A good swirl helps ensure a thick layer sticks to the apple.
Hold it up for a moment so the excess can drip off. Then place the dipped apple on your prepared parchment paper. Repeat for all the apples, and brace yourself for the deliciousness!
Finish and Cool
Topping Options
Before the caramel sets, feel free to sprinkle on your toppings. Melted chocolate or a dash of flaky sea salt? Yes, please! You can go wild with sprinkles or nuts, too.
Once adorned, let them cool for 30 to 60 minutes until the caramel becomes firm. Then, festively display your fabulous creations that are ready for enjoying!
Tips for Success
- Always start with cold apples for better caramel adherence.
- Use a candy thermometer to accurately gauge the caramel’s temperature.
- Stir the caramel occasionally to avoid burning, but don’t overdo it!
- Practice patience; let the caramel cool before adding toppings.
- Have fun! Get the family involved for a delightful experience.
Equipment Needed
- Heavy-bottomed pan: A good pot helps prevent the caramel from burning; use a Dutch oven for best results.
- Candy thermometer: Essential for monitoring the caramel’s temperature; if you don’t have one, a regular kitchen thermometer can work too.
- Parchment or waxed paper: For resting the dipped apples; aluminum foil is a fine substitute if necessary.
- Wooden sticks: Perfect for dipping; popsicle sticks can be just as effective!
Variations
- Chocolate Caramel Apples: Drizzle melted chocolate over your caramel-coated apples for a decadent twist.
- Nutty Crunch: Roll the caramel apples in crushed nuts like almonds or pecans for added texture and flavor.
- Spiced Caramel: Add a dash of cinnamon or nutmeg to the caramel mixture for a warm, spiced flavor perfect for fall.
- Vegan Option: Substitute coconut cream and maple syrup instead of heavy cream and corn syrup for a plant-based delight.
- Gluten-Free: Ensure any toppings, like sprinkles or chocolate chips, are labeled gluten-free for a safe treat.
Serving Suggestions
- Serve your Homemade Caramel Apples with a side of warm chocolate sauce for dipping.
- A tall glass of cold milk or hot apple cider pairs perfectly for a cozy touch.
- For a fun presentation, arrange apples on a decorative platter with colorful sprinkles around.
- Encourage family and friends to decorate their own with toppings!
FAQs about Homemade Caramel Apples
Cooking can be a delightful adventure, but questions often pop up along the way! Here are some common queries I’ve encountered about Homemade Caramel Apples, along with answers to guide you on this sweet journey.
How long do Homemade Caramel Apples last?
Homemade Caramel Apples are best enjoyed fresh. They can last in the fridge for about 3 to 5 days if stored in an airtight container. Just be warned; the caramel may soften over time!
Can I make Homemade Caramel Apples ahead of time?
Absolutely! You can prep the caramel sauce in advance and dip the apples just before serving. They also make perfect party favors if you want to impress your guests!
What types of apples are best for caramel apples?
Crisp, tart apples like Granny Smith or Fuji are my favorites. Their firmness holds up well against the caramel, and a bit of tartness balances the sweetness of the caramel. It’s a match made in heaven!
Can I use store-bought caramel for this recipe?
While homemade caramel is divine, store-bought caramel can save time if you’re in a pinch. Just melt it down and dip your apples for a quick solution to satisfy that sweet tooth.
How do I prevent the caramel from hardening too fast?
Working quickly is key! If your caramel starts to thicken too soon, keep it warm over low heat. Just remember, patience is a virtue here—enjoy the process, and soon you’ll be indulging in your delicious Homemade Caramel Apples!
Final Thoughts
Creating your own Homemade Caramel Apples is not just about the delicious treat; it’s an experience brimming with joy and laughter. The aroma of warm caramel swirls through your kitchen, calling everyone together for a delightful family activity. As you dip, swirl, and decorate, you’ll create memories that much like the apples themselves, are sweet and lasting. Whether it’s a chilly autumn evening or a festive gathering, these decadent apples are a hit. So roll up your sleeves, gather your loved ones, and savor the moments—because there’s nothing sweeter than sharing good food with great company!
PrintHomemade Caramel Apples: Indulge in This Sweet Treat!

Indulge in the sweet treat of Homemade Caramel Apples, perfect for parties or a fun family activity.
- Prep Time: 15 minutes
- Cook Time: 20 minutes
- Total Time: 35-60 minutes
- Yield: 8–10 apples 1x
- Category: Dessert
- Method: Stovetop
- Cuisine: American
- Diet: Vegetarian
Ingredients
- 8–10 cold apples
- 2 cups brown sugar packed
- 1 1/2 cups heavy cream
- 1 cup light corn syrup
- 4 tablespoons unsalted butter softened
- 1/2 teaspoon salt
- 1 teaspoon vanilla extract
- Optional toppings: melted chocolate, flaky sea salt, sprinkles, nuts
Instructions
- Place a sheet of parchment or waxed paper on a cookie sheet and spray with cooking spray.
- Wash and dry the apples, rubbing well to remove any waxy residue.
- Insert a caramel apple stick into each apple and refrigerate until ready to dip.
- In a heavy bottom pan, combine the brown sugar, heavy cream, corn syrup, butter, and salt. Cook over medium heat, stirring occasionally.
- Continue to cook until the caramel reaches 235°-240° on a candy thermometer, about 15 to 20 minutes. Stir in the vanilla after removing from heat.
- Dip the skewered apples into the caramel sauce and swirl to coat.
- Place dipped apples on the prepared paper-lined pan and let them sit for 30 to 60 minutes.
- Add optional toppings right after dipping, or drizzle with chocolate after the caramel has cooled.
Notes
- Make sure the apples are cold for better caramel adherence.
- Control the heat while cooking the caramel to avoid burning.
- Use a candy thermometer for the best results when measuring temperature.
Nutrition
- Serving Size: 1 caramel apple
- Calories: 250
- Sugar: 38g
- Sodium: 150mg
- Fat: 10g
- Saturated Fat: 6g
- Unsaturated Fat: 4g
- Trans Fat: 0g
- Carbohydrates: 40g
- Fiber: 1g
- Protein: 1g
- Cholesterol: 20mg