Introduction to Key Lime Pie Dessert
Welcome, fellow home cooks! If you’re like me, you know that life can get a bit hectic, especially when juggling family, work, and social commitments. That’s why I’m excited to share my recipe for Key Lime Pie Dessert. This delightful treat combines refreshing key lime juice with a creamy filling, creating a burst of flavor that’s perfect for any occasion. Whether you’re sweetening a family dinner or celebrating a special moment, this dessert is sure to impress without taking up all your precious time. Let’s dive into this sunshine-filled recipe together!
Why You’ll Love This Key Lime Pie Dessert
This Key Lime Pie Dessert is a breeze to whip up, making it perfect for busy days. In just 30 minutes, plus chilling time, you can serve a lovely treat that brings smiles all around the table. The burst of tangy key lime flavor combined with the creamy filling creates a balanced dessert. Best of all, it’s gluten-free, ensuring everyone can indulge without worry. You’ll be craving this refreshing dessert all summer long!
Ingredients for Key Lime Pie Dessert
To make this delicious Key Lime Pie Dessert, you’ll need a few simple ingredients. Here’s what you’ll require:
- Graham cracker crumbs: These will form the base of your pie crust, giving it a sweet and crunchy texture.
- Granulated sugar: A little sweetness balances the tartness of the key limes, enhancing the overall flavor.
- Unsalted butter: Melted, this helps bind the crust together and adds richness to the flavor.
- Egg yolks: These provide the creamy filling and help the pie set beautifully without being too heavy.
- Lime zest: Finely grated lime zest brings an extra punch of citrus flavor and a lovely aroma.
- Sweetened condensed milk: This ingredient adds sweetness and creaminess, making the filling rich and luscious.
- Fresh key lime juice: The star in this dessert! Fresh juice offers an authentic tang that elevates the pie.
- Heavy whipping cream: Used for making the whipped topping, it adds a light, airy texture on top of the pie.
- Additional granulated sugar: A small amount for sweetening the cream, making it a perfect complement to the tart filling.
If you can’t find fresh key limes, bottled lime juice will work in a pinch, but nothing beats that fresh zing! For a twist, consider adding a touch of coconut milk to the filling for a tropical twist. Remember, all the exact quantities are at the bottom of the article, ready for printing when you’re inspired to create this refreshing treat.
How to Make Key Lime Pie Dessert
Step 1: Prepare the Crust
Start by mixing graham cracker crumbs with granulated sugar and melted butter in a mixing bowl. The crumbs should be evenly moistened. This butter and crumb combo will form the crust. Once combined, you’ll need to press this mixture firmly into the base and sides of a pie plate. Think of it as building a cozy little home for the filling. You want the crust to be compact and sturdy!
Step 2: Bake the Crust
Next, preheat your oven to 175°C. This is the magic moment where that crust begins to transform. Pop the prepared crust into the oven for about 10 minutes. You want it to be just set but not overcooked, as we’re after a smooth and creamy texture in our dessert. Keep an eye on it! Once baked, remove the crust and let it cool completely while you prepare the filling. The smell will be heavenly!
Step 3: Create the Filling
Now, let’s focus on that luscious filling! In your stand mixer, beat egg yolks and lime zest on high speed until they become light and fluffy. This can take about five minutes. Next, gradually add in the sweetened condensed milk, mixing for another 3-4 minutes. This is where the magic happens! Finally, reduce the speed, and slowly pour in the fresh key lime juice, blending until it’s smooth and well-combined. Your taste buds will be dancing already!
Step 4: Bake the Pie
Pour that tangy lime filling into your cooled crust and make sure the surface is fairly even. Then, it’s back to the oven! Bake the pie for about 10 minutes. You want it to just set in the middle. Once it’s done, let it cool to room temperature. After cooling, cover it with plastic wrap and refrigerate until it’s thoroughly chilled. Trust me, the waiting will be worth it!
Step 5: Whip the Cream
While your pie chills, let’s prepare the delightful whipped cream. To do this, place a metal mixing bowl and whisk into the freezer for about 10 minutes. This little trick helps achieve the right consistency faster! After chilling, take them out and add the heavy whipping cream and the additional granulated sugar. Whip it until you have stiff peaks. Just be careful – over-whipping can make it grainy. Light and fluffy is the goal!
Step 6: Serve the Pie
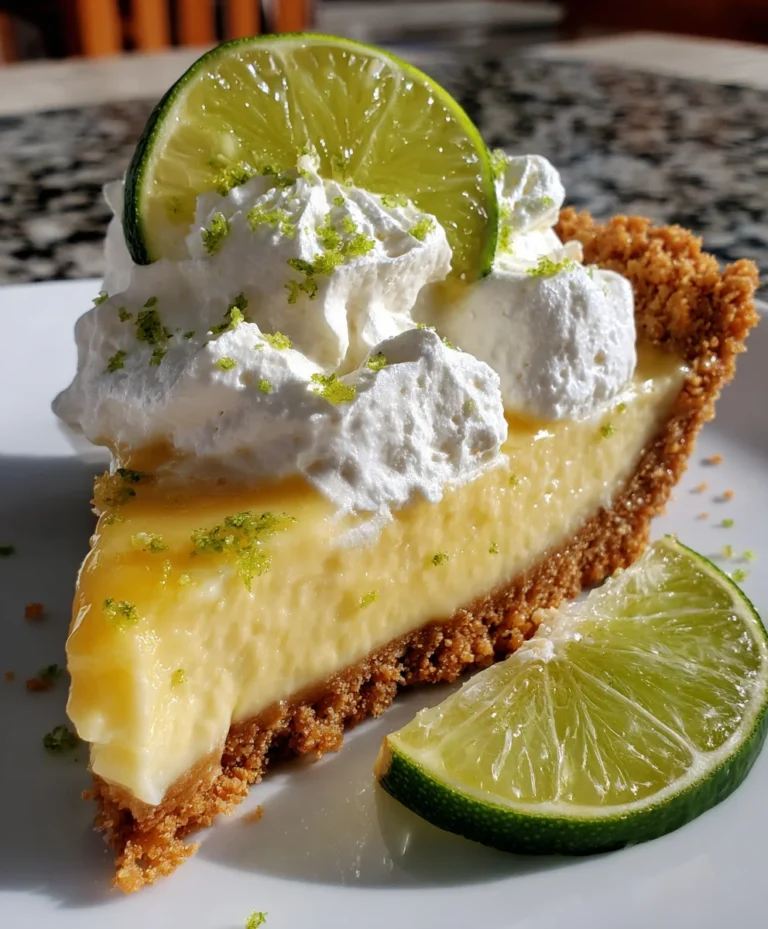
Finally, it’s time to bring everything together! Once your pie is chilled, take it out of the refrigerator. Generously spread the freshly whipped cream on top, creating beautiful soft waves. For an extra flair, you can even add a sprinkle of lime zest or decorative lime slices. Slice up the pie and serve this refreshing treat to your family and friends. Prepare for the oohs and aahs as they savor each bite of your homemade Key Lime Pie Dessert!
Tips for Success
- Use fresh key limes for the best flavor—they’re the heart of this dessert!
- Don’t over-bake the pie; it should be just set in the center for that creamy texture.
- Chill your mixing bowl and whisk before whipping cream to achieve perfect peaks quickly.
- For an extra zing, try adding a little lime juice to your whipped cream.
- Let the pie chill for at least four hours for optimal flavor.
Equipment Needed
- Mixing bowl: A large one will do, but a set of nested bowls can save space.
- Stand mixer or hand mixer: Both work well for creating that fluffy filling and whipped cream.
- Pie plate: A standard 9-inch dish is perfect, but you can use a tart pan too.
- Whisk: A handheld whisk is great if you prefer a workout.
- Measuring cups and spoons: Essential for perfecting your Key Lime Pie Dessert!
Variations
- Coconut Key Lime Pie: Add shredded coconut to your crust for a tropical twist. It gives a lovely texture and flavor.
- Crust Alternatives: Use digestive biscuits or almond flour for a gluten-free crust option. Both provide unique flavors!
- Sugar Substitutes: Use honey or maple syrup in place of granulated sugar for a naturally sweeter option.
- Chocolate Drizzle: For a decadent touch, drizzle melted dark chocolate over the whipped cream topping. This sweet contrast is delightful!
- Vegan Option: Swap out the egg yolks and heavy cream for silken tofu and coconut cream. You’ll get a creamy texture without the dairy!
Serving Suggestions
- Pair your Key Lime Pie Dessert with fresh berries for a colorful, fruity burst.
- A scoop of vanilla ice cream complements the tartness beautifully and adds more creaminess.
- Serve with a refreshing glass of iced tea or a spritz of sparkling water on the side.
- Garnish each slice with a sprig of mint for a pop of color and extra freshness.
FAQs about Key Lime Pie Dessert
Can I use bottled lime juice instead of fresh key lime juice?
While bottled lime juice will work in a pinch, nothing beats the fresh flavor of key limes. The natural tang really elevates this dessert.
How long can I store Key Lime Pie Dessert?
You can keep this pie in the refrigerator for up to four days. Just make sure to cover it well, so it stays fresh and delicious!
Can I make this dessert ahead of time?
Absolutely! This Key Lime Pie Dessert is perfect for prepping ahead. Make it a day or two before your event; just remember to chill it well!
Is this Key Lime Pie Dessert gluten-free?
Yes! With a graham cracker crust and other gluten-free ingredients, this dessert is safe for those with gluten sensitivities. Just double-check your cracker label!
What can I replace the heavy whipping cream with for a lighter option?
If you want a lighter option, consider using coconut cream or whipped coconut milk. Both provide a nice texture without the heaviness!
Final Thoughts
Making this Key Lime Pie Dessert is more than just whipping together a few ingredients; it’s about creating a little slice of joy in your life. Each bite is a zesty reminder of sunny days, bringing a refreshing tang that dances on your tongue. Whether you’re serving it at a family gathering or enjoying a quiet evening at home, this dessert has a way of making every moment feel special. I hope you find as much delight in making it as your loved ones will in devouring it. So roll up your sleeves, and get ready for some sweet smiles!
PrintKey Lime Pie Dessert

Key Lime Pie Dessert is the ultimate refreshing treat, featuring a tangy filling on a crumbly crust, topped with whipped cream.
- Prep Time: 20 minutes
- Cook Time: 10 minutes
- Total Time: 2 hours and 30 minutes (including cooling and chilling time)
- Yield: 8 servings 1x
- Category: Dessert
- Method: Baking
- Cuisine: American
- Diet: Vegetarian
Ingredients
- 150 g graham cracker crumbs
- 38 g granulated sugar
- 75 g unsalted butter, melted
- 3 large egg yolks
- 2 teaspoons finely grated lime zest
- 397 g sweetened condensed milk
- 160 ml fresh key lime juice
- 240 ml heavy whipping cream
- 25 g granulated sugar (for whipped cream)
Instructions
- Combine graham cracker crumbs, granulated sugar, and melted butter in a mixing bowl. Mix thoroughly until the crumbs are evenly moistened. Press the mixture firmly onto the base and sides of a 23 cm pie plate to form a compact crust. Set aside.
- Preheat the oven to 175°C.
- In a stand mixer fitted with a whisk attachment, beat egg yolks and lime zest on high speed until very light and fluffy, about 5 minutes. Gradually add sweetened condensed milk and continue beating for 3–4 minutes on high speed. Reduce speed, and slowly incorporate fresh key lime juice until the mixture is smooth and fully combined.
- Pour the lime filling into the prepared crust, smoothing the surface evenly. Bake in preheated oven for 10 minutes, until just set. Remove from oven, allow to cool to room temperature, and then refrigerate until thoroughly chilled.
- Place a metal mixing bowl and whisk into the freezer for 10 minutes to chill. Remove from freezer, add granulated sugar and heavy whipping cream to the bowl, then whip until stiff peaks form. Take care not to over-whip.
- Top the chilled pie with freshly whipped cream before serving.
Notes
- Make sure to use fresh key lime juice for the best flavor.
- The chilled pie can be made a day in advance for convenience.
Nutrition
- Serving Size: 1 slice
- Calories: 320
- Sugar: 20 g
- Sodium: 150 mg
- Fat: 18 g
- Saturated Fat: 10 g
- Unsaturated Fat: 8 g
- Trans Fat: 0 g
- Carbohydrates: 34 g
- Fiber: 1 g
- Protein: 4 g
- Cholesterol: 90 mg