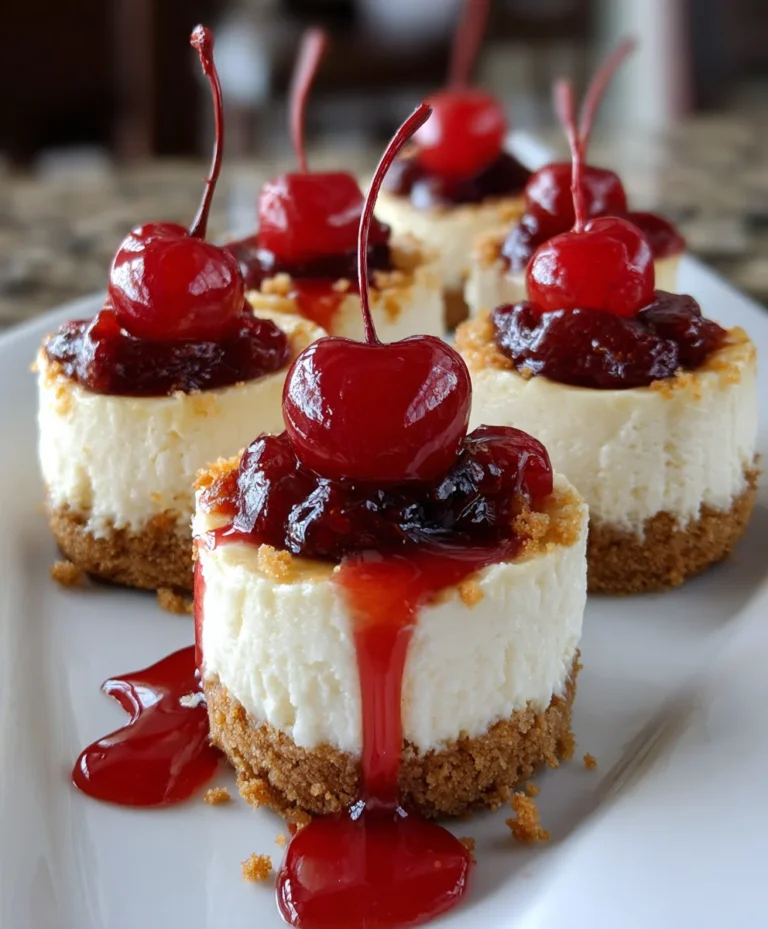
Introduction to Mini Cherry Cheesecake
Hey there, fellow dessert lovers! If you’re anything like me, life can get a bit hectic. Between work, kids, and everything in between, we all crave something quick yet delightful to satisfy our sweet tooth. That’s where these adorable Mini Cherry Cheesecakes come in! They’re the perfect balance of creamy and fruity, making them an ideal treat for any occasion. Whether you’re hosting a gathering or just looking to treat yourself, this recipe is here to save the day. Trust me, you’ll be the hero of dessert time with these little bites of heaven!
Why You’ll Love This Mini Cherry Cheesecake
Let me tell you why these Mini Cherry Cheesecakes have stolen my heart! First off, they’re incredibly easy to whip up, making them perfect for busy days. Plus, they bake in just 25 minutes, so you won’t be waiting long for that sweet satisfaction. The combination of creamy cheesecake and sweet cherry topping is pure bliss. Trust me, these mini delights will have your family asking for seconds, or even thirds!
Ingredients for Mini Cherry Cheesecake
Before we dive into the deliciousness, let’s gather our ingredients. Everything you need is pretty straightforward, and many items you might already have in your pantry. Here’s the list to get you going:
- Unsalted butter: This gives our crust a rich, buttery flavor.
You can substitute with margarine if needed. - Graham cracker crumbs: These create the perfect base for our mini cheesecakes.
Try using crushed cookies for a twist! - Cream cheese: This provides that classic, creamy cheesecake texture.
Low-fat cream cheese can be used, too. - White sugar: Essential for sweetness.
You can swap in honey or a sugar alternative if you prefer. - Eggs: These help bind our cheesecake and give it a lovely structure.
- Sour cream: This adds a touch of tanginess and creaminess to our filling.
Plain yogurt works as a great substitute! - Vanilla extract: It rounds out the flavors beautifully.
Use almond extract for a different flavor kick. - All-purpose flour: This thickens the filling just a bit, keeping it stable.
- Cherry pie filling: The best part—sweet, juicy cherries on top of our mini cheesecakes!
Fresh cherries can be used if you’re feeling adventurous.
For exact measurements, you’ll find everything nicely laid out at the bottom of this article, ready for printing!
How to Make Mini Cherry Cheesecake
Preheat Your Oven
First things first, let’s preheat that oven to 350°F! Preheating is crucial because it ensures that our mini cheesecakes bake evenly from the moment they hit the oven. Without this step, they could end up overcooked on the outside while still being raw inside. So, don’t skip this step!
Prepare Your Muffin Tins
Now, let’s prepare our muffin tins! Line 18 muffin cups with foil-lined wrappers. I love these wrappers because they make it super easy to peel off the cheesecakes once they cool. Fill each cup carefully, making sure you have enough room for the cheesecake batter. This will set the stage for our delicious mini treats!
Create the Crust
In a medium bowl, combine the melted unsalted butter with the graham cracker crumbs. Stir it all together until it looks like wet sand. That’s the perfect texture! Now, take about a tablespoon of this crumb mixture and press it firmly into the bottom of each cupcake wrapper. Make sure it’s packed in well, as this will give our mini cheesecakes a solid base. Just imagine that buttery crunch when you take a bite!
Make the Cheesecake Filling
Next up, let’s whip together the cheesecake filling. In a large mixing bowl, beat the softened cream cheese with the white sugar until you achieve a smooth consistency. Scrape down the sides of the bowl often to ensure even mixing. Now, add the eggs one at a time, mixing well after each addition. After that, gently fold in the sour cream, vanilla extract, and all-purpose flour. This cream cheese filling is what dreams are made of—smooth, rich, and oh-so-delicious!
Pour and Bake
Now it’s showtime! Scoop that luscious cheesecake filling into each prepared muffin cup, filling them about half an inch from the top. Remember, they will rise a little while baking, so don’t overdo it. Place your muffin tin in the oven and bake for 20 to 25 minutes. The cheesecakes are ready when they are just slightly jiggly in the center. This slight jiggle means they’ll set perfectly as they cool!
Cooling and Topping
Once they’re done baking, remove the mini cheesecakes from the oven and let them cool in the pan for about 20 minutes. This way, they firm up a bit before transferring them to the refrigerator. Now, cover them and let them chill for at least two hours. Once completely cooled, top each cheesecake with a generous scoop of cherry pie filling. That beautiful red hue adds a pop of color and flavor that’s simply irresistible!
Tips for Success
- Ensure your cream cheese is at room temperature for easy blending.
- Don’t skip the cooling time; it helps the cheesecakes set perfectly!
- Try adding a dash of lemon zest to the filling for an extra zing.
- For a healthier version, swap half the sugar with a sugar alternative.
- Keep an eye on your baking time; ovens can vary.
Equipment Needed
- Muffin tin: A regular one works perfectly, or opt for a silicone muffin pan for easy release.
- Mixing bowls: A medium and large size for mixing crust and filling.
- Electric mixer: A handheld mixer is great, but you can use a whisk and some elbow grease!
- Measuring cups and spoons: Essential for accuracy in baking.
- Spatula: Perfect for scraping down the sides of the bowl and transferring the filling.
Variations
- Chocolate Mini Cherry Cheesecake: Mix in some melted chocolate into the cream cheese filling for a rich, chocolatey twist.
- Peanut Butter Swirl: Add a swirl of peanut butter to the filling before baking for a delightful combination of flavors.
- Fresh Berry Topping: Instead of cherry pie filling, top with fresh raspberries or blueberries for a fruity alternative.
- Gluten-Free Option: Use gluten-free graham cracker crumbs or almond flour for a gluten-free crust.
- Vegan Mini Cherry Cheesecake: Substitute cream cheese with vegan cream cheese and eggs with flaxseed meal mixed with water for an egg-free version.
Serving Suggestions
- Serve these Mini Cherry Cheesecakes with a dollop of whipped cream for added fluffiness.
- Pair with a scoop of vanilla ice cream for a delicious contrast of temperatures.
- Garnish with fresh mint leaves to elevate the presentation and add color.
- Enjoy with a cup of coffee or tea for a delightful afternoon treat.
- Display on a decorative platter for special occasions to wow your guests!
FAQs about Mini Cherry Cheesecake
Can I make Mini Cherry Cheesecakes ahead of time?
Absolutely! You can prepare these mini treats a day in advance. Just remember to cool them completely before topping them with cherry filling.
What’s the best way to store leftovers?
Store any leftover Mini Cherry Cheesecakes in an airtight container in the fridge. They’ll stay fresh for about 3 to 5 days—if they last that long!
Can I freeze these cheesecakes?
Yes, these mini delights freeze well! Just wrap them tightly in plastic wrap and aluminum foil. They can be frozen for up to 2 months. When you’re ready, thaw them in the fridge overnight.
What can I use instead of sour cream?
If you don’t have sour cream on hand, plain yogurt works beautifully as a substitute, providing the same creamy texture and tangy flavor.
Can I use fresh cherries instead of cherry pie filling?
Of course! Fresh cherries would add a lovely, natural sweetness. Just wash, pit, and chop them, then mix with a bit of sugar to create a topping that brings out their flavor.
Final Thoughts
Creating these Mini Cherry Cheesecakes is like wrapping your family in a warm, sweet hug! The joy of seeing their faces light up with each bite makes the effort worth every moment. Whether it’s a casual weeknight dessert or a special occasion, this recipe brings delight and togetherness. Plus, the mini size means you can indulge without the guilt! I guarantee that this dessert will become a cherished favorite in your home. So, gather your loved ones, whip up a batch, and revel in the happiness that these scrumptious treats bring. Enjoy every moment—and every small bite!
PrintMini Cherry Cheesecake
Delicious mini cheesecakes topped with sweet cherry pie filling, perfect for any dessert lover.
- Prep Time: 20 minutes
- Cook Time: 25 minutes
- Total Time: 2 hours 45 minutes
- Yield: 18 mini cheesecakes 1x
- Category: Dessert
- Method: Baking
- Cuisine: American
- Diet: Vegetarian
Ingredients
- ½ cup unsalted butter (melted)
- 1½ cups graham cracker crumbs
- 16 ounces cream cheese (softened)
- 1 cup white sugar
- 2 large eggs
- ⅓ cup sour cream
- 1 teaspoon vanilla extract
- 1 tablespoon all-purpose flour
- 1 can cherry pie filling
Instructions
- Preheat oven to 350°F.
- Fill 18 muffin tins with foil-lined wrappers. The wrappers with the inside foil lining peel better from this dessert.
- In a medium bowl, stir together melted butter and graham cracker crumbs until mixed.
- Press about 1 tablespoon of graham cracker crumb and butter mixture in the bottom of each cupcake wrapper.
- In a large bowl, beat the cream cheese with the white sugar until smooth. Scrape down the sides of the bowl often.
- Beat in the eggs until well mixed. Again, scrape down the sides of the bowl often.
- Beat in the sour cream, vanilla, and flour until well mixed.
- Scoop the cheesecake mixture into each cupcake wrapper. Fill until each is filled to about ½ inch from the top. They will rise a bit while baking, so don’t overfill.
- Bake for 20 to 25 minutes. They’re done when still just slightly jiggly in the middle.
- Remove from oven and let cool for 20 minutes before placing in fridge to cool completely. These will need to cool in fridge for at least two hours before serving.
- Top each with a scoop of cherry pie filling before serving.
Notes
- Let the mini cheesecakes cool completely before topping with cherry filling.
- These can be prepared a day in advance.
Nutrition
- Serving Size: 1 mini cheesecake
- Calories: 210
- Sugar: 15g
- Sodium: 150mg
- Fat: 12g
- Saturated Fat: 7g
- Unsaturated Fat: 4g
- Trans Fat: 0g
- Carbohydrates: 22g
- Fiber: 1g
- Protein: 3g
- Cholesterol: 45mg