Introduction to Mini Pumpkin Pies Sweet Filling
As the leaves turn and the air gets crisp, I can’t help but crave cozy desserts like these Mini Pumpkin Pies Sweet Filling. They remind me of warm family gatherings and laughter over pumpkin-spiced everything.
If you’re a busy mom, professional, or just someone looking to impress loved ones without slaving away in the kitchen, this recipe is your answer.
These delightful, bite-sized treats are not only quick to make but are also bursting with fall flavors. Let’s whip up some joy together!
Why You’ll Love This Mini Pumpkin Pies Sweet Filling
These Mini Pumpkin Pies Sweet Filling are the ultimate solution for busy days. They’re super easy to make, taking just 40 minutes from start to finish! You’ll love how they pack all the warm, cozy flavors of autumn into individual servings.
Perfect for holiday gatherings or impromptu family treats, these little gems will have everyone asking for seconds. Plus, you can whip them up ahead of time! What’s not to love?
Ingredients for Mini Pumpkin Pies Sweet Filling
Gathering your ingredients is half the fun! Here’s what you’ll need for these delightful Mini Pumpkin Pies Sweet Filling:
- Refrigerated Pie Crust: A time-saver that gives a perfect flaky texture. Feel free to use homemade if you’re feeling ambitious!
- Pure Pumpkin Purée: Be sure to grab pure pumpkin, not the spiced filling. It’s like the golden foundation of our mini pies.
- Sweetened Condensed Milk: This creamy goodness sweetens the filling and gives it a luscious consistency. Can’t find it? Evaporated milk with sugar is a solid substitute.
- Large Eggs: These help bind everything together while adding a rich flavor.
- Pumpkin Spice: This warm blend of spices brings those cozy fall vibes. If you’re out, make your own with cinnamon, nutmeg, and ginger!
- Salt: Just a pinch to enhance the sweetness and flavors.
- Whipped Topping (Cool Whip): This adds a delightful touch when piped on top before serving. Want a healthier option? Whip up some fresh heavy cream or skip it entirely!
For exact quantities, check the recipe section at the bottom of the article. Happy cooking!
How to Make Mini Pumpkin Pies Sweet Filling
Step 1: Prepare the Oven and Tins
Before diving in, let’s get our oven ready! Preheat it to 200°C (about 400°F). This step is crucial because it sets the stage for your mini pumpkin pies to bake evenly, just like a warm hug on a chilly day. While your oven heats, lightly coat 12 muffin tins with cooking spray. This helps the pies slide right out later!
Step 2: Cut and Arrange Pie Crust
Next up is the pie crust. Unroll the refrigerated one and place it on a clean surface. Using a large round cutter or a wide-mouth jar, cut out circles from the dough. Arrange those circles closely together so you maximize the use of the crust. You don’t want to waste any dough—every bit counts when making these delicious mini pies!
Step 3: Press Crust into Muffin Cups
Now, gently press each dough circle into the muffin cups. Ensure the dough covers the base and sides evenly. It should fit snugly but not too tight. Think of it as tucking your dough into bed snugly. This uniformity will give you an even bake and a beautiful final presentation!
Step 4: Mix the Pumpkin Filling
In a mixing bowl, combine the pure pumpkin purée, sweetened condensed milk, large eggs, pumpkin spice, and salt. Whisk until the mixture is smooth and homogenous. You want to see that gorgeous orange color uniform throughout—kind of like the autumn leaves outside. This filling is where the magic happens, so blend well!
Step 5: Fill the Crusts
It’s time to fill those crusts! Carefully spoon the pumpkin mixture into each crust-lined muffin cup. Fill them nearly to the rim but leave a little space to avoid overflow while baking. Picture each of these mini pies as a warm, inviting hug, waiting to be shared with family and friends.
Step 6: Bake to Perfection
Pop those filled muffin tins into your preheated oven. Bake them at 200°C for the first 10 minutes. Then, reduce the temperature to 160°C (about 325°F), and continue baking for another 10 minutes. This two-part baking process is essential for achieving that signature creamy filling that pairs perfectly with the crisp crust.
Step 7: Cool and Serve
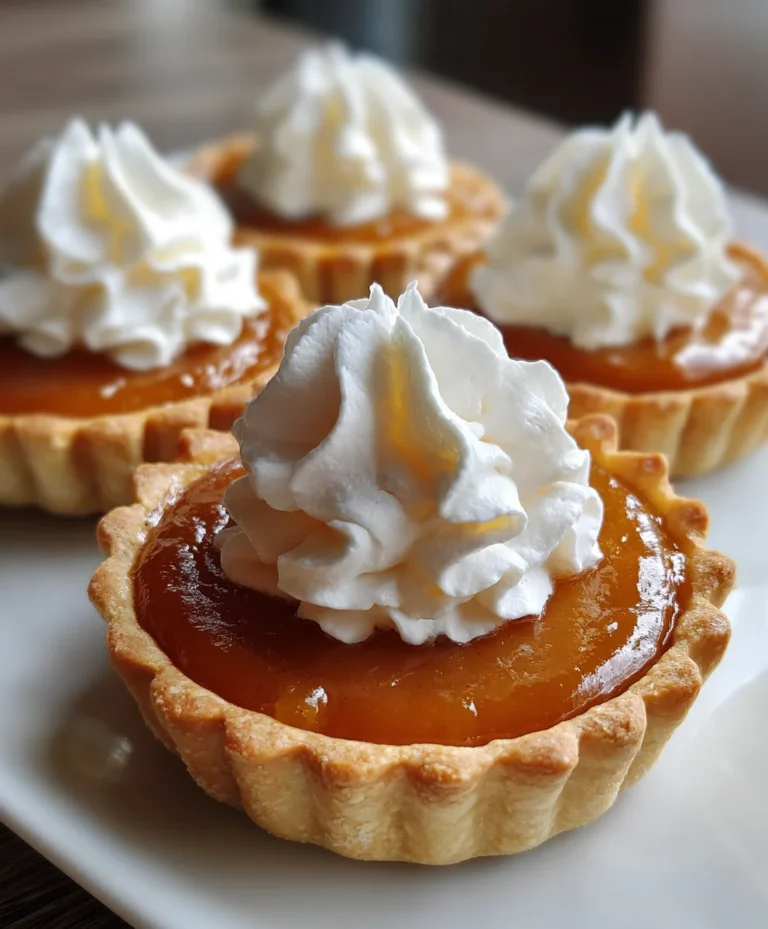
When the baking timer rings, check the pies! Insert a toothpick into the center of each filling. It should come out clean. If not, bake for an additional 2-3 minutes and check again. Once they’re baked, remove them from the oven and allow the mini pies to cool in the tins completely. Before serving, pipe a swirl of whipped topping on each pie. It’s the cherry on top—so delicious!
Tips for Success
- Use a sharp cutter for clean edges on your pie crust circles.
- Keep the filling smooth by whisking well—no lumps allowed!
- Line up your muffin tins in advance for efficient filling.
- Let the mini pies cool completely for that perfect texture.
- Experiment with toppings—chocolate shavings or crushed nuts add a fun twist!
Equipment Needed
- Muffin Tins: Standard 12-cup muffin tin works perfectly. A silicone version makes for easy removal.
- Mixing Bowls: Two medium-sized bowls will help keep things organized.
- Whisk: A good whisk is essential for that smooth filling.
- Pie Cutter: A large round cutter or jar works wonders for cutting dough.
- Measuring Cups: Handy for accurate ingredient quantities!
Variations on Mini Pumpkin Pies Sweet Filling
- Nutty Delight: Add crushed walnuts or pecans to the filling for an extra crunch and flavor twist.
- Ginger Snap Crust: Swap the traditional pie crust with crushed ginger snap cookies mixed with butter for a spicy kick.
- Vegan Version: Replace eggs with linseed meal mixed with water and use coconut cream instead of sweetened condensed milk.
- Spicy Kick: For a bolder flavor, add a pinch of cayenne pepper to the filling!
- Chocolate Pumpkin Pies: Drizzle melted dark chocolate into the filling for a rich texture and unexpected flavor.
Serving Suggestions for Mini Pumpkin Pies Sweet Filling
- Pair these mini pies with a warm cup of spiced apple cider for a cozy combination.
- Serve alongside a scoop of vanilla ice cream to create a delicious contrast in temperature and texture.
- Garnish with a sprinkle of cinnamon or nutmeg for that festive flair.
- Consider a side of whipped cream for extra indulgence!
FAQs about Mini Pumpkin Pies Sweet Filling
Can I use fresh pumpkin instead of canned purée?
Absolutely! If you’ve got fresh pumpkin on hand, just cook and blend it into a smooth purée. It’ll give your mini pumpkin pies an extra fresh taste!
How do I store leftover mini pies?
These adorable pies can be stored in an airtight container in the refrigerator for up to 4 days. Just reheat them slightly before enjoying!
Can I freeze these mini pumpkin pies?
You sure can! Once they’re completely cooled, freeze them in a single layer on a plate, then transfer to a freezer-safe container. They’ll stay fresh for up to 2 months. Just thaw and pipe on that whipped topping when you’re ready to serve!
What’s the best way to serve these mini pumpkin pies?
I love serving them warm with a dollop of whipped cream on top. They also shine next to spiced apple cider or a scoop of ice cream—yum!
Can I make variations of the pumpkin spice?
Definitely! You can create your own blend using ground cinnamon, nutmeg, and ginger if you’re out of pumpkin spice. Feel free to adjust it to your taste!
Final Thoughts on Mini Pumpkin Pies Sweet Filling
As we wrap up this delightful journey of creating Mini Pumpkin Pies Sweet Filling, I hope you feel inspired to dive into the cozy flavors of fall. These little pies are more than just a dessert; they’re a memory waiting to happen, a centerpiece for laughter and love.
Each bite is a warm reminder of home, perfect for sharing with family or enjoying solo with a cup of tea. So, gather your loved ones, create some scrumptious moments, and indulge in the joy of baking. Happy cooking, and may your kitchen be filled with warmth and happiness!
PrintMini Pumpkin Pies Sweet Filling

Delicious mini pumpkin pies filled with a sweet pumpkin filling, perfect for holiday gatherings or any autumn celebration.
- Prep Time: 20 minutes
- Cook Time: 20 minutes
- Total Time: 40 minutes
- Yield: 12 mini pies 1x
- Category: Dessert
- Method: Baking
- Cuisine: American
- Diet: Vegetarian
Ingredients
- 1 box refrigerated pie crust
- 425 g pure pumpkin purée
- 397 g sweetened condensed milk
- 2 large eggs
- 2 teaspoons pumpkin spice
- 0.5 teaspoon salt
- 120 ml whipped topping (Cool Whip)
Instructions
- Preheat oven to 200°C. Lightly coat 12 muffin tins with cooking spray.
- Unroll refrigerated pie crust. Using a large round cutter or wide-mouth jar, cut out circles of dough, arranging cuts closely to minimize waste.
- Press the dough circles evenly into the prepared muffin cups, ensuring the base and sides are well covered.
- In a mixing bowl, combine pumpkin purée, sweetened condensed milk, eggs, pumpkin spice, and salt. Whisk until smooth and homogenous.
- Spoon the pumpkin mixture into each crust-lined muffin cup, filling nearly to the rim.
- Bake in preheated oven at 200°C for 10 minutes.
- Reduce oven temperature to 160°C and bake for an additional 10 minutes.
- Insert a toothpick into the centre of the filling. If it emerges clean, remove from oven. If not, bake 2-3 more minutes and retest.
- Allow mini pies to cool completely in the tins. Once cool, pipe a swirl of whipped topping onto each pie before serving.
Notes
- Make sure to use pure pumpkin purée, not pumpkin pie filling, for the best results.
- These mini pies can be made ahead of time and stored in the refrigerator.
- Experiment with different toppings, such as crushed cookies or spices.
Nutrition
- Serving Size: 1 mini pie
- Calories: 150
- Sugar: 10g
- Sodium: 150mg
- Fat: 5g
- Saturated Fat: 2.5g
- Unsaturated Fat: 1.5g
- Trans Fat: 0g
- Carbohydrates: 22g
- Fiber: 1g
- Protein: 2g
- Cholesterol: 40mg