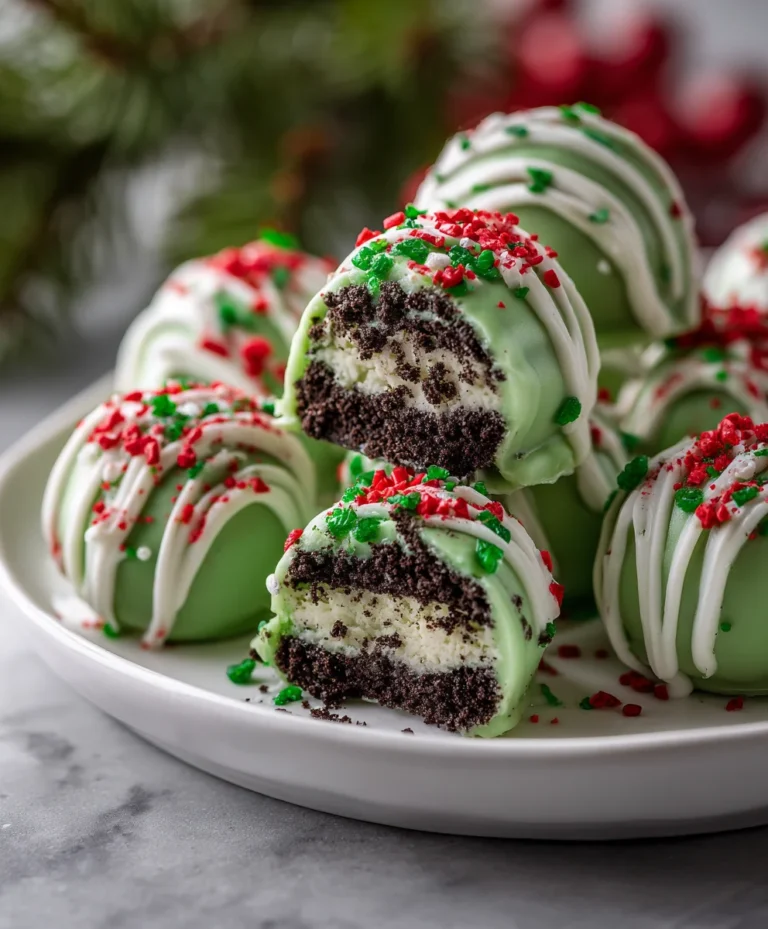
Introduction to No-Bake Grinch Oreo Truffles
The holiday season is a magical time, but let’s be honest—it can also be a whirlwind of chaos! That’s why I’m thrilled to share my No-Bake Grinch Oreo Truffles with you. These delightful little bites are the perfect solution for busy days when you still want to bring some festive cheer. With just a handful of ingredients and zero baking required, they’re effortless to whip up. Plus, they’re sure to impress your loved ones, making you the star of any holiday gathering. Trust me, these truffles will make your holiday season just a bit sweeter!
Why You’ll Love This No-Bake Grinch Oreo Truffles
There’s something truly special about No-Bake Grinch Oreo Truffles. Firstly, they take only about 20 minutes to prepare, making it easy to squeeze them in between holiday festivities. The creamy, rich filling combined with a sweet, white chocolate coating creates a taste sensation that kids and adults alike can’t resist. Plus, these little beauties are unbelievably versatile and can easily be made ahead of time, leaving you stress-free for your celebrations!
Ingredients for No-Bake Grinch Oreo Truffles
Creating these festive No-Bake Grinch Oreo Truffles is a breeze with just a few straightforward ingredients. Here’s what you’ll need:
- Oreo cookies: The star of the show! They give these truffles their rich flavor and satisfying crunch. Feel free to try different varieties like mint or peanut butter for a twist.
- Cream cheese: This adds that delightful creamy texture and rich taste, balancing out the sweetness of the Oreos.
- Green food coloring: This is where the fun begins! Add as much or as little as you like to capture the spirit of the Grinch. It’s a simple way to customize your truffles.
- White chocolate chips: Perfect for coating the truffles, lending them a sweet, smooth outer layer that’s hard to resist.
- Red sprinkles: These aren’t just decorative; they add a cheerful pop of color that can bring a smile to anyone’s face. You can also use other holiday-themed toppings!
For exact measurements and printing options, check the bottom of the article. Trust me, having these ingredients on hand will make your holiday baking even more enjoyable!
How to Make No-Bake Grinch Oreo Truffles
Now that we have our ingredients ready, it’s time for the fun part—making these delightful No-Bake Grinch Oreo Truffles! Follow these simple steps, and you’ll have a festive treat that’s sure to light up your holiday gatherings.
Step 1: Crush the Oreos
First things first, let’s crush those Oreos! I usually toss them into a food processor and pulse them until they resemble fine crumbs. If you don’t have a food processor, you can place them in a sturdy zip-top bag and crush them with a rolling pin. It’s oddly satisfying and perfect for stress relief! Aim for a texture similar to sand: not too chunky, but not completely powdery either.
Step 2: Mix in Cream Cheese
Next, grab that softened cream cheese and add it to your bowl of Oreo crumbs. Now, mix them together like a delicious dance party in your bowl! I like to use my hands for this—it gives the best texture, and it feels fun. Just keep mixing until you can’t see any more white streaks and the consistency is a smooth, moldable dough.
Step 3: Add Color
Here comes the creative part! Squeeze in some green food coloring. Feel free to go wild with it: a little for a pastel tone, or a lot for that Grinchy vibrance! Just remember, you can always add more, but you can’t take it away. Mix it in thoroughly so that beautiful green hue spreads evenly throughout your mixture.
Step 4: Form the Balls
Now onto shaping the truffles! Scoop about one tablespoon of your green mixture and roll it into a ball in your hands. Don’t sweat it if they aren’t perfectly round—quirky shapes add character! Place each truffle on a parchment-lined baking sheet. This step makes me feel like a kid again; there’s something so rewarding about shaping them with my hands!
Step 5: Chill the Truffles
Once all your truffles are formed, it’s time for a little chill time. Pop that baking sheet in the refrigerator for about 30 to 45 minutes. This step is crucial; chilling firms them up, ensuring they hold their shape when dipped in chocolate.
Step 6: Melt the Chocolate
As the truffles chill, melt your white chocolate chips. Use a microwave-safe bowl, and heat them in increments of 30 seconds, stirring in between. This keeps the chocolate smooth and prevents burning. If you overheat it, you might end up with a clumpy mess, and we definitely don’t want that!
Step 7: Dip the Truffles
Now the exciting dipping part! Grab your firm truffles from the fridge and dip each one into the melted white chocolate. A fork or a toothpick works wonders here—just lift them out, gently shake off any excess chocolate, and place them back on the parchment. This is where they start looking truly scrumptious!
Step 8: Decorate
Before the chocolate sets, don’t forget to sprinkle on those red sprinkles! It’s like adding the cherry on top of your sundae. You can get creative here with various toppings, too. Nuts, edible glitter, or mini marshmallows will make your truffles even more festive. Personalizing them is half the fun!
Step 9: Let Set
Finally, allow the chocolate to cool and set completely. This is the moment of anticipation! If you can resist, let them sit for about 30 minutes. Watching them transform into shiny, delightful bites is so satisfying. Soon, you’ll be enjoying these festive treats with family and friends!
Tips for Success
- Make sure the cream cheese is softened for easy mixing.
- Chill the truffles longer if they seem too soft; a firmer base helps with dipping.
- Use high-quality white chocolate for a smoother, richer coating.
- Experiment with different colors and toppings for a fun twist!
- Clean your hands between truffles to keep the rolling process neat.
Equipment Needed
- Food processor: Ideal for crushing Oreos; a zip-top bag and rolling pin work too.
- Baking sheet: Necessary for placing truffles; a plate will do in a pinch.
- Parchment paper: Great for easy cleanup; wax paper can be an alternative.
- Microwave-safe bowl: Perfect for melting chocolate; a double boiler could work as well.
- Fork or toothpick: Useful for dipping; try using a skewer if you’re in a bind.
Variations
- Flavor variations: Swap out regular Oreos for mint or berry-flavored cookies for a unique taste.
- Dark chocolate coating: Use dark chocolate instead of white chocolate for a richer flavor profile.
- Nut-free version: Leave out the sprinkles if nut allergies are a concern, or use nut-free sprinkles.
- Vegan option: Substitute cream cheese with vegan cream cheese and use dairy-free chocolate chips.
- Gluten-free option: Choose gluten-free Oreos for a festive treat everyone can enjoy!
Serving Suggestions
- Festive platters: Arrange the truffles on a colorful plate or tiered stand for a beautiful display.
- Pair with hot cocoa: These sweet treats complement a cozy cup of hot chocolate perfectly.
- Giftable delight: Package them in small boxes as thoughtful treats for friends and family.
- Holiday parties: Serve them alongside cookies and other desserts for a sweet spread.
FAQs about No-Bake Grinch Oreo Truffles
Can I make these truffles ahead of time?
Absolutely! These No-Bake Grinch Oreo Truffles can be made a day in advance. Just keep them stored in an airtight container in the refrigerator. This way, you’ll have less to do on party day, allowing you to enjoy the moment!
How should I store the truffles?
Store your delicious truffles in the fridge in an airtight container. They’ll stay fresh for up to a week, but trust me, they won’t last that long!
Can I customize the colors for different occasions?
Yes, you can! While green is perfect for the Grinch theme, you can switch it up for any holiday or celebration. Just use your desired color of food coloring to fit the occasion!
What if my chocolate didn’t melt smoothly?
If your chocolate turned clumpy, you may have overheated it. Next time, try melting in smaller increments and stirring more frequently. If it does happen, you can salvage it by adding a tiny bit of vegetable oil to help smooth it out!
Are these truffles suitable for dietary restrictions?
Yes! You can easily adapt these truffles. For a vegan option, use dairy-free cream cheese and chocolate chips. Gluten-free Oreos can also ensure that those with gluten sensitivities can indulge!
Final Thoughts
These No-Bake Grinch Oreo Truffles are more than just a treat; they’re little morsels of joy that bring smiles to faces young and old. As you gather around the table with family, sharing stories and laughter, these festive bites add a touch of sweetness to any holiday occasion. Each truffle embodies the spirit of the season, blending creativity and delightful flavors with ease. I hope these delectable bites inspire you to whip them up and share moments of happiness with those you love. So go ahead, spread some cheer this holiday with these simple, yet stunning, truffles!
PrintNo-Bake Grinch Oreo Truffles

A festive and fun treat perfect for the holiday season, these No-Bake Grinch Oreo Truffles are made with Oreo cookies, cream cheese, and white chocolate.
- Prep Time: 20 minutes
- Cook Time: 0 minutes
- Total Time: 1 hour 10 minutes
- Yield: Approximately 24 truffles 1x
- Category: Dessert
- Method: No-Bake
- Cuisine: American
- Diet: Vegetarian
Ingredients
- 1 package (14.3 ounces) Oreo cookies
- 8 ounces cream cheese, softened
- Green food coloring (as desired)
- 12 ounces white chocolate chips
- Red sprinkles or decorative topping (for finishing)
Instructions
- Crush the Oreos: In a food processor, blend the Oreo cookies into fine crumbs. Transfer the crumbs to a mixing bowl.
- Mix in Cream Cheese: Add the softened cream cheese to the Oreo crumbs. Mix well until fully combined and the mixture is smooth.
- Add Color: Incorporate green food coloring into the mixture. Adjust the amount to achieve your desired shade of green.
- Form the Balls: Using your hands, scoop out small portions of the mixture (about one tablespoon each) and roll them into balls. Place them on a baking sheet lined with parchment paper.
- Chill the Truffles: Place the baking sheet in the refrigerator for about 30-45 minutes to let the truffles firm up.
- Melt the Chocolate: In a microwave-safe bowl, melt the white chocolate chips in increments of 30 seconds, stirring in between, until smooth.
- Dip the Truffles: Once the truffles are firm, dip each one into the melted white chocolate. Gently shake off any excess chocolate.
- Decorate: Immediately sprinkle red sprinkles or your desired decoration on top before the chocolate sets.
- Let Set: Allow the chocolate to cool and set completely on the parchment paper.
Notes
- Feel free to adjust the amount of green food coloring to get the desired shade.
- Store the truffles in an airtight container in the refrigerator for up to a week.
- These truffles can be made a day in advance for convenience.
Nutrition
- Serving Size: 1 truffle
- Calories: 160
- Sugar: 10g
- Sodium: 50mg
- Fat: 9g
- Saturated Fat: 5g
- Unsaturated Fat: 2g
- Trans Fat: 0g
- Carbohydrates: 18g
- Fiber: 1g
- Protein: 2g
- Cholesterol: 20mg