Introduction to Rice Krispie Christmas Puddings Recipe
As the holiday season approaches, I find myself wanting to create festive treats without spending all day in the kitchen. That’s where my Rice Krispie Christmas Puddings Recipe comes into play! These delightful little bites are perfect for busy moms and professionals like us, marrying simplicity with festive cheer. They come together in just 45 minutes, allowing you to whip up a sweet treat while still having time for holiday shopping or that well-deserved cup of cocoa. So, let’s dive into the joy of creating these little puddings that will surely delight your family and friends!
Why You’ll Love This Rice Krispie Christmas Puddings Recipe
This Rice Krispie Christmas Puddings Recipe is a lifesaver during the busy holiday season. With minimal ingredients and no baking required, you can have delicious treats ready in no time. Plus, the taste is a wonderful blend of chocolate and sweetness that will enchant your taste buds. Whether you’re entertaining guests or simply want a festive snack, these puddings are sure to bring smiles all around!
Ingredients for Rice Krispie Christmas Puddings Recipe
Creating these delightful Rice Krispie Christmas Puddings starts with a handful of simple ingredients. Here’s what you’ll need to gather:
- Rice Krispies cereal: The crunchy base of our pudding, bringing texture and that familiar flavor. You can always swap for any puffed rice cereal if needed.
- Milk chocolate chips: These luscious chips provide a rich sweetness. Dark chocolate could be a delicious alternative if you prefer a bolder flavor.
- Unsalted butter: For that creamy base, we need butter to bind our ingredients together. You can use coconut oil for a dairy-free option!
- Golden syrup (or light corn syrup): This sticky addition ensures everything holds together beautifully. Maple syrup can be a sweet substitute if you’re out of the others.
- Vanilla extract: Just a dash of this comforting flavor enhances the overall taste of the puddings. Don’t skip it—it’s magic in a bottle!
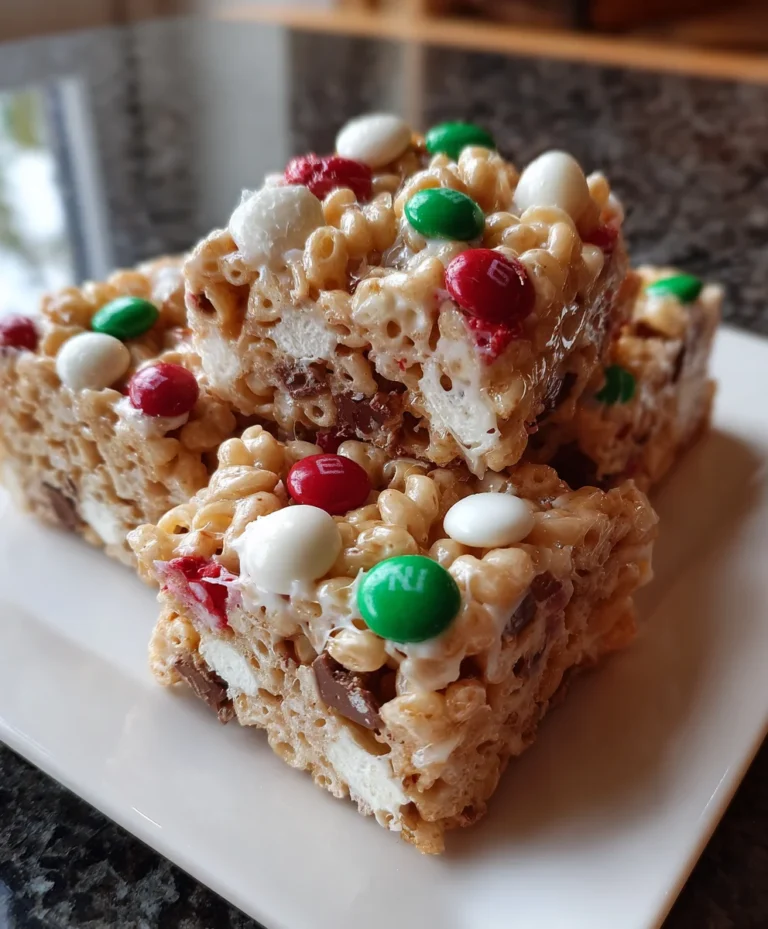
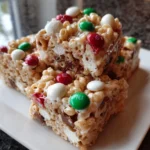
- White chocolate chips: These are crucial for the “custard” topping that makes the puddings look festive. Feel free to experiment with yogurt coating for a different look.
- Red and green M&M’s or small candies: These aren’t just for show; they add a pop of color and fun. You could also use chopped dried fruits for a twist.
- Green icing or fondant: For those who want to create adorable holly leaves, this optional extra elevates your puddings to a new level of celebration.
You can find exact measurements for these ingredients at the bottom of the article, along with a handy printable version!
How to Make Rice Krispie Christmas Puddings Recipe
Step 1: Melt the Chocolate Mixture
To kick off your Rice Krispie Christmas Puddings Recipe, grab a medium saucepan and set it over low heat. Add the butter, milk chocolate chips, and golden syrup. Stir constantly to ensure a creamy blend without burning. This slow melting method allows the chocolate to turn velvety smooth, turning the mixture into the glue that binds our festive treats. Once everything is beautifully combined, take it off the heat and stir in the vanilla extract. Trust me; this one step is where the magic truly begins!
Step 2: Combine with Rice Krispies
Now comes the fun part! In that same saucepan, gently fold in the Rice Krispies cereal. Use a sturdy spatula to ensure every single piece is generously coated in that luscious chocolate mixture. Take your time, mixing thoroughly. The more evenly coated, the better your puddings will hold together later. I find that folding helps maintain the crispy texture, ensuring each bite is a delightful crunch. It’s shaping up to be a delicious project!
Step 3: Shape the Puddings
Once your Rice Krispies are well-coated, let the mixture cool slightly so it’s easier to handle—nobody likes hot gooey hands! Scoop out heaping tablespoons of the mixture and roll them into balls, creating mini pudding shapes. They don’t have to be perfect; in fact, the rustic look adds to their charm. Place each ball onto a parchment-lined tray, creating space between them. This makes it easier as you prepare for the browning process, and trust me, they are so worth the effort!
Step 4: Chill the Puddings
Pop those trays into the refrigerator to chill for about 20 to 30 minutes. This is crucial! Chilling helps the puddings firm up, allowing them to hold their delightful shape. I sometimes use this time to clean up my mess or even sneak a few bites of leftover chocolate. When you hear that fridge humming, you know festive fun is almost on the way!
Step 5: Decorate with White Chocolate
Now that our puddings are firm and ready to dazzle, it’s time to melt the white chocolate chips. You can use a microwave in short bursts or a double boiler method for control—just don’t rush it! Once melted, spoon a small dollop of white chocolate over the top of each pudding. This creates the illusion of warm custard that looks decadent and tastes heavenly. Remember, a little goes a long way, so try not to overload them!
Step 6: Add Festive Toppings
Finally, it’s time for the fun part—decorating! Before the white chocolate sets, embellish each pudding with red and green M&M’s or those small candies that catch your eye. These little gems not only add vibrant color but make the puddings festive and joyful. If you’re feeling particularly creative, add holly leaves made from green icing or fondant. This personal touch elevates the pudding from delicious to fabulously festive, making it the perfect treat for your holiday table!
Tips for Success
- Ensure the chocolate mixture doesn’t burn by melting it over low heat.
- Use a sturdy spatula for combining the Rice Krispies to achieve even coating.
- Chill the puddings long enough for them to hold their shape well.
- Get creative with toppings—any festive candy works!
- Keep an eye on the white chocolate; a good pour can elevate the looks!
Equipment Needed
- Medium saucepan: Essential for melting chocolate; a microwave-safe bowl works too.
- Spatula: Perfect for mixing; you can use a wooden spoon instead if that’s what you have.
- Parchment paper: Great for lining trays; silicone mats can be a handy alternative.
- Refrigerator: Necessary for chilling; a cool spot on your countertop works in a pinch.
- Measuring spoons: Useful for accuracy; you can eyeball if you’re feeling adventurous!
Variations for Rice Krispie Christmas Puddings Recipe
- Nutty Delight: Add chopped nuts like almonds or pecans for a crunchy twist and extra flavor.
- Minty Fresh: Use mint chocolate chips instead of milk chocolate for a refreshing holiday twist.
- Fruit Fusion: Incorporate dried cranberries or chopped dried apricots to enhance the festive feel.
- Dairy-Free Option: Substitute dairy ingredients with coconut oil and dairy-free chocolate chips for a vegan treat.
- Spiced Up: Sprinkle a pinch of cinnamon or nutmeg into the chocolate mixture for a warm, spiced flavor.
Serving Suggestions for Rice Krispie Christmas Puddings Recipe
- Serve the puddings on a festive platter with a sprinkle of powdered sugar for a snowy effect.
- Pair them with a warm cup of spiced cider or hot chocolate for a cozy treat.
- Add a scoop of vanilla ice cream on the side for extra indulgence.
- Present them at holiday gatherings as delightful dessert options alongside cookies and fruitcake.
- Use seasonal cupcake liners for individual servings at parties or as gifts.
FAQs about Rice Krispie Christmas Puddings Recipe
Can I make these Rice Krispie Christmas Puddings ahead of time?
Absolutely! You can prepare these delightful treats a day or two in advance. Just store them in an airtight container in the refrigerator until you’re ready to serve. They maintain their yummy flavors and textures beautifully!
What can I substitute for golden syrup?
If you don’t have golden syrup, light corn syrup or maple syrup works wonderfully as alternatives. Each will give a slightly different flavor, but either will ensure your puddings stick together just right.
Can I use any other cereals in this recipe?
Sure thing! While Rice Krispies create a unique texture, you can swap in puffed corn or even puffed rice. Just stick to the same proportions for a similar result. It’s a fun way to experiment!
How long do these Rice Krispie Christmas Puddings keep?
These festive treats can stay fresh for up to a week when stored in an airtight container. Just be sure to keep them in a cool, dry place to maintain that delightful crunch!
Is this recipe suitable for children to help with?
Absolutely! This Rice Krispie Christmas Puddings Recipe is perfect for kids to join in on the fun. They can help mix, shape, and decorate the puddings. Just make sure an adult handles the melting chocolate to keep everyone safe.
Final Thoughts
Making these Rice Krispie Christmas Puddings is not just about creating a sweet treat; it’s about sharing joy and holiday cheer with loved ones. Each bite encapsulates the spirit of togetherness and celebration, reminding me of the warm memories made during the festive season. The simplicity of this recipe allows you to involve your family, making it a wonderful bonding experience. As we decorate these beautiful puddings, laughter fills the kitchen, and that’s what the holidays are all about! So gather your loved ones and create some sweet memories together—because every bite is a joyful celebration!
PrintRice Krispie Christmas Puddings Recipe
A delightful festive treat made with Rice Krispies, chocolate, and decorative toppings, perfect for Christmas celebrations.
- Prep Time: 15 minutes
- Cook Time: 10 minutes
- Total Time: 45 minutes
- Yield: 12 servings 1x
- Category: Dessert
- Method: No-Bake
- Cuisine: American
- Diet: Vegetarian
Ingredients
- 3 cups Rice Krispies cereal
- 1/2 cup milk chocolate chips
- 1/4 cup unsalted butter
- 1/4 cup golden syrup (or light corn syrup)
- 1/4 teaspoon vanilla extract
- 1/2 cup white chocolate chips (for topping)
- Red and green M&M’s or small candies (for decoration)
- Green icing or fondant (optional for holly leaves)
Instructions
- In a medium saucepan over low heat, gently melt the butter, milk chocolate chips, and golden syrup, stirring constantly until the mixture is smooth and fully combined. Remove from heat and stir in the vanilla extract for added flavor.
- Add the Rice Krispies cereal to the melted chocolate mixture and stir thoroughly until all cereal pieces are evenly coated with the chocolate mixture, ensuring every crisp is covered.
- Allow the mixture to cool slightly so it’s easier to handle. Then, scoop out heaping tablespoons and roll each into a ball to form mini pudding shapes. Place each formed ball onto a parchment-lined tray to prepare for chilling.
- Refrigerate the shaped pudding balls for 20 to 30 minutes until they are firm and hold their shape well.
- Melt the white chocolate chips using a microwave in short bursts or a double boiler method until smooth.
- Spoon a small amount of melted white chocolate over the top of each Rice Krispie ball to mimic traditional custard. Before the white chocolate sets, adorn each pudding with red and green M&M’s or small candies to represent holly berries and leaves. Optionally, add green icing or fondant holly leaves for an extra festive look.
- Return the decorated puddings to the refrigerator until the white chocolate topping is completely set. Once firm, they are ready to be served or stored in an airtight container for later enjoyment.
Notes
- These can be stored in an airtight container for up to a week.
- Feel free to customize decorations based on personal preference.
Nutrition
- Serving Size: 1 pudding
- Calories: 150
- Sugar: 10g
- Sodium: 50mg
- Fat: 7g
- Saturated Fat: 4g
- Unsaturated Fat: 2g
- Trans Fat: 0g
- Carbohydrates: 21g
- Fiber: 0g
- Protein: 1g
- Cholesterol: 10mg