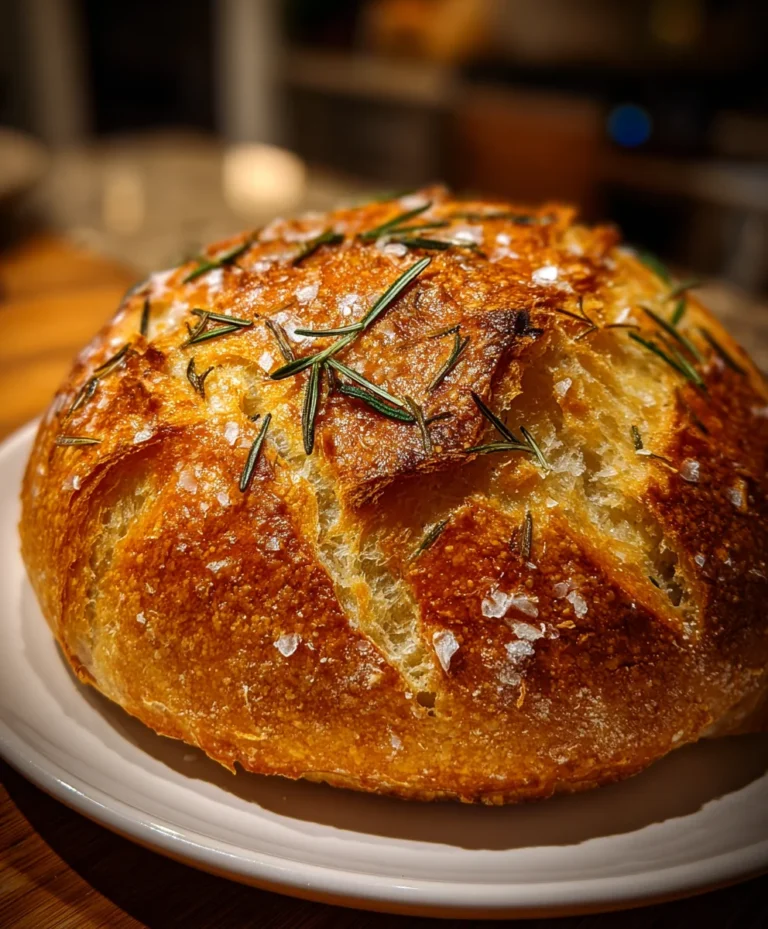
Introduction to Rustic Garlic Rosemary Skillet Bread
There’s something magical about home-baked bread, especially when it’s infused with the bold flavors of garlic and rosemary. This Rustic Garlic Rosemary Skillet Bread is my go-to recipe for a home-cooked touch, even on the busiest of days. The aroma alone is enough to make your family gather around the kitchen, eager to help. Whether I’m hosting friends or looking to impress my kiddos with fresh bread, this recipe hits all the right notes. With minimal fuss and incredible flavor, you’ll find it’s an easy answer to any mealtime dilemma.
Why You’ll Love This Rustic Garlic Rosemary Skillet Bread
This Rustic Garlic Rosemary Skillet Bread is a game changer for busy cooks! It requires minimal prep and the long fermentation adds incredible depth of flavor. Imagine slicing into a warm loaf with a golden crust, revealing a soft, aromatic interior. Perfect for soaking up soups, or enjoying with a smear of butter, this bread is sure to impress your family without spending hours in the kitchen. It’s truly the ultimate comfort food!
Ingredients for Rustic Garlic Rosemary Skillet Bread
Gathering the right ingredients is essential for achieving that perfect artisanal loaf of Rustic Garlic Rosemary Skillet Bread. Here’s what you’ll need:
- All-purpose flour: The backbone of your bread, all-purpose flour gives it structure and a delightful chewiness.
- Garlic: Freshly minced garlic offers a robust, aromatic flavor that’s impossible to resist. The more, the merrier, so feel free to add to your taste!
- Fresh rosemary: This fragrant herb elevates the flavor profile, adding an earthy and savory note. If fresh isn’t available, dried works too!
- Kosher salt: Essential for enhancing flavors, kosher salt ensures your bread isn’t bland but rather bursting with taste.
- Ground black pepper: A sprinkle of pepper rounds out the flavors, providing a subtle kick that complements the garlic and rosemary.
- Instant yeast: This magic ingredient acts quickly, allowing your dough to rise beautifully without too much waiting.
- Room-temperature water: The water helps activate the yeast, and using it at room temperature ensures a smoother dough formation.
- Cornmeal: A little sprinkle at the bottom of your skillet adds a delightful crunch and prevents sticking. Plus, it gives the bread a rustic touch!
These ingredients work harmoniously to create a bread that’s not just delicious but also easy to make. For a complete list of measurements, check the bottom of the article where the ingredients are available for printing.
How to Make Rustic Garlic Rosemary Skillet Bread
Now, let’s dive into making this delightful Rustic Garlic Rosemary Skillet Bread! Follow these simple steps, and don’t worry if it feels a bit intimidating at first. I promise it’s easier than it sounds, and the aroma filling your kitchen will be so worth it!
Step 1: Combine Dry Ingredients
In a large mixing bowl, I start by adding the flour, minced garlic, finely chopped rosemary, kosher salt, ground black pepper, and instant yeast.
Make sure the salt is well mixed, as it enhances the overall flavor of the bread. Grab a whisk or a spoon and mix everything together until it’s evenly combined. This is where the fun begins!
Step 2: Create the Dough
Once your dry ingredients are ready, it’s time to bring them to life! Pour in the room-temperature water. I love to slide my hands in there and mix it all up, but a wooden spoon works just as well.
Mix until you have a sticky, wet dough. Seriously, it only takes about half a minute. If it’s a bit messy, don’t fret! That’s part of the bread-making adventure.
Step 3: Let It Rise
Cover the mixing bowl tightly with plastic wrap. Let your dough rest at room temperature for 18-24 hours. This long fermentation gives your Rustic Garlic Rosemary Skillet Bread its fantastic flavor, so don’t rush this step!
You’ll know it’s ready when the surface is bubbly and appears alive with flavor. Just imagine the aroma of garlic wafting through your home!
Step 4: Preheat Your Skillet
About 30 minutes before you plan to bake, lightly grease a 10-inch cast iron skillet with oil or nonstick spray. Sprinkle a layer of cornmeal on the bottom, giving your bread a delightful crunch.
This skillet will be the stage for your delicious creation. Preheat your oven to 450°F, so it’s nice and hot when your dough is ready.
Step 5: Shape the Bread
Next, transfer your dough to a floured surface. With floured hands, gently shape the dough into a round ball. Don’t overwork it; we want to keep those beautiful air pockets!
Carefully place it in the prepared skillet. It’s like tucking your bread into a cozy bed!
Step 6: Final Rise
Cover the dough with a clean dish towel and let it rise at room temperature for about 2 hours. You’re looking for the dough to double in size and to hold an indentation when poked.
This step builds more flavor and gives that light, fluffy texture we crave in bread.
Step 7: Bake and Enjoy
It’s finally time to bake! Place your skillet in the preheated oven and let it work its magic for 30-40 minutes. You’ll know your Rustic Garlic Rosemary Skillet Bread is ready when it’s golden brown and sends the most mouthwatering aroma throughout your kitchen.
Once baked, take it out and let it cool for a few minutes. Then, slice into that warmth—there’s nothing like warm bread fresh from the oven!
Tips for Success
- Allow your ingredients to come to room temperature for better mixing.
- Don’t skip the long fermentation; it’s key for flavor.
- Use a kitchen scale for precise measurements, if possible.
- For a crispier crust, place a small pan of water in the oven while baking.
- Experiment with herbs—thyme or basil can add a twist!
Equipment Needed for Rustic Garlic Rosemary Skillet Bread
- 10-inch cast iron skillet: Perfect for even baking and a crispy crust. A regular oven-safe skillet works in a pinch!
- Mixing bowl: A large bowl for combining your ingredients. Use any sturdy bowl you have on hand.
- Whisk or wooden spoon: To mix the dry ingredients. A fork can do the job in a pinch!
- Plastic wrap: For covering the dough during fermentation. A clean kitchen towel can be an alternative.
- Measurement cups and spoons: For accurate ingredient portions. A kitchen scale is a great substitute if you have one!
Variations of Rustic Garlic Rosemary Skillet Bread
- Cheesy Delight: Add shredded cheese like mozzarella or parmesan to the dough for a cheesy twist that will melt in your mouth.
- Olive Oil Infusion: Swapping out some of the water for high-quality olive oil can bring a rich flavor that complements the garlic beautifully.
- Herb Medley: Experiment with different herbs like thyme, oregano, or even a sprinkle of red pepper flakes for a zesty kick.
- Whole Wheat Variation: Substitute half of the all-purpose flour with whole wheat flour for a nutty flavor and a healthy boost.
- Sweet Twist: Add a tablespoon of honey or sugar and some chopped dried fruits like cranberries to create a sweet version of this bread.
Serving Suggestions for Rustic Garlic Rosemary Skillet Bread
- Serve warm with a side of homemade butter or olive oil for dipping.
- Pair with a hearty soup, like tomato basil or minestrone, for a comforting meal.
- Use slices to make tasty sandwiches filled with fresh veggies and meats.
- Enjoy alongside a crisp salad dressed in balsamic vinaigrette.
- Present the bread on a rustic wooden board, garnished with extra rosemary sprigs for a beautiful display.
FAQs about Rustic Garlic Rosemary Skillet Bread
Can I use dried garlic or rosemary instead of fresh?
Absolutely! If you have dried garlic or rosemary on hand, feel free to use them. A general rule of thumb is to use one-third of the amount of dried herbs since they are more concentrated in flavor.
How can I store leftover Rustic Garlic Rosemary Skillet Bread?
Store any leftover bread in an airtight container at room temperature for up to 3 days. You can also wrap it tightly in foil or plastic wrap to maintain its freshness.
What if I want to make this bread ahead of time?
You can prepare the dough ahead of time and keep it in the fridge after the first rise. Just remember to let it come to room temperature before shaping and baking!
Can I freeze this bread?
Yes! This Rustic Garlic Rosemary Skillet Bread freezes wonderfully. Just wrap it tightly in plastic wrap and aluminum foil before placing it in the freezer. It stays fresh for up to three months.
What can I serve with this bread?
This bread is perfect paired with soups, salads, or as a side for pasta dishes. It’s also delightful with butter, olive oil, or even cheese spreads!
Final Thoughts
Making this Rustic Garlic Rosemary Skillet Bread is not just about satisfying hunger; it’s an experience that fills your home with warmth and love. Each slice reminds me of family gatherings, laughter, and shared moments around the table. With its delightful crust and aromatic flavors, this bread is perfect not only for special occasions but also for everyday meals. Whether you’re enjoying it with soup or simply slathering it with butter, it brings comfort and joy to busy lives. I promise, this bread will quickly become a cherished recipe in your collection!
PrintRustic Garlic Rosemary Skillet Bread
This Rustic Garlic Rosemary Skillet Bread is a beautifully crafted bread infused with the flavors of garlic and rosemary, perfect for any occasion.
- Prep Time: 30 seconds
- Cook Time: 30-40 minutes
- Total Time: 18-24 hours (including fermentation) + 30-40 minutes
- Yield: 1 skillet-sized bread 1x
- Category: Bread
- Method: Baking
- Cuisine: American
- Diet: Vegetarian
Ingredients
- 3 cups all-purpose flour
- 3 cloves garlic, minced
- 1 tablespoon fresh rosemary, finely chopped (or more, to taste)
- 1 ¼ teaspoons kosher salt
- ¾ teaspoon ground black pepper
- ½ teaspoon instant yeast
- 1 ½ cups room-temperature water
- 2 tablespoons cornmeal
Instructions
- In a large mixing bowl, combine flour, minced garlic, rosemary, salt, pepper, and yeast.
- Pour in the water and mix with a wooden spoon or by hand until a sticky, wet dough forms. This should take about 30 seconds.
- Cover the bowl tightly with plastic wrap and leave it at room temperature for 18-24 hours until the surface of the dough has bubbles.
- Lightly grease a 10-inch cast iron skillet with oil or nonstick spray, then sprinkle with cornmeal.
- Transfer the dough to a floured surface and gently shape it into a round.
- Place the dough in the prepared skillet, cover with a clean dish towel, and let rise at room temperature for 2 hours, or until it doubles in size and holds an indentation when poked.
- Preheat your oven to 450°F. Bake the bread in the skillet for 30-40 minutes, or until the crust is golden brown.
Notes
- Feel free to adjust the amount of garlic and rosemary based on your taste preferences.
- This bread can be served warm or at room temperature.
- Store any leftovers in an airtight container at room temperature for up to 3 days.
Nutrition
- Serving Size: 1 slice
- Calories: 180
- Sugar: 0g
- Sodium: 320mg
- Fat: 1g
- Saturated Fat: 0g
- Unsaturated Fat: 0g
- Trans Fat: 0g
- Carbohydrates: 35g
- Fiber: 2g
- Protein: 5g
- Cholesterol: 0mg