Introduction to Turtle Poke Cake
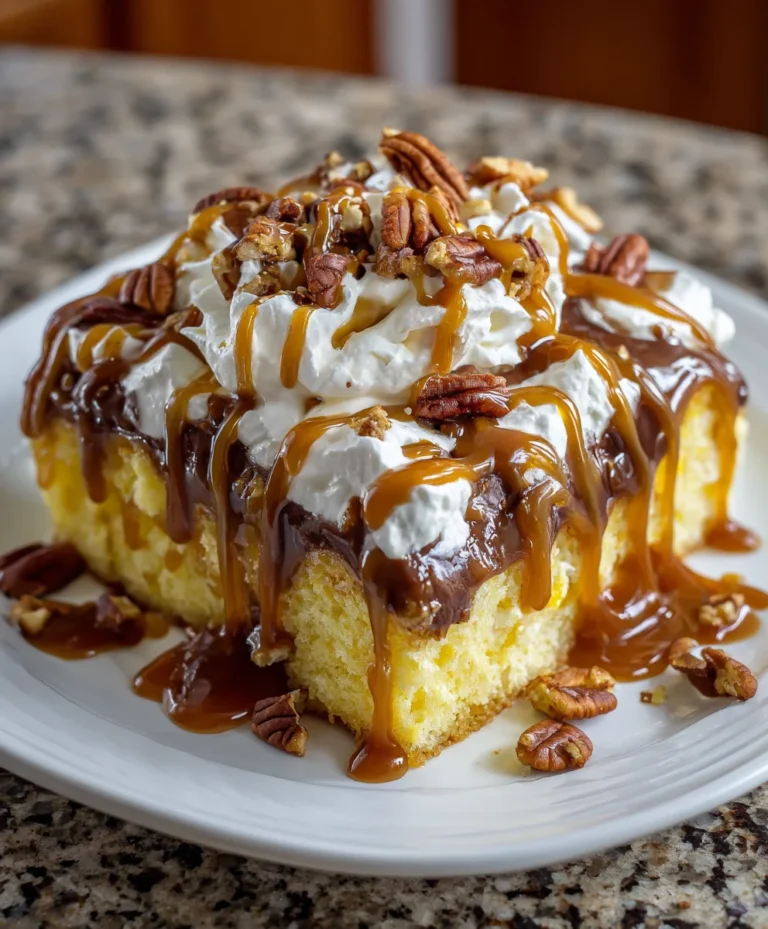
who loves to whip up something sweet, I often find myself in search of a dessert that’s not only delicious but also easy to prepare. That’s where my beloved Turtle Poke Cake comes in. Imagine a moist yellow cake, drenched in rich caramel, chocolate, and pecans—a delightful treat that’s perfect for any occasion! This recipe is perfect for when you want to impress friends at a gathering or simply indulge your family after a hectic day. I promise, each bite will have them raving!
Why You’ll Love This Turtle Poke Cake
This Turtle Poke Cake is a lifesaver for busy days! It’s quick to prepare and requires minimal effort, making it ideal for moms on the go. Plus, the combination of flavors—rich chocolate, creamy caramel, and crunchy pecans—will have your taste buds dancing with joy. Not to mention, it’s a crowd-pleaser at family gatherings or potlucks. You might just find it becoming your new go-to dessert recipe!
Ingredients for Turtle Poke Cake
Every great Turtle Poke Cake starts with a few key ingredients that work together to create a luscious flavor profile. First up, we have a yellow cake mix, which forms the cake base. It’s quick and easy, perfect for busy moms like us!
Next, we’ll add eggs, which provide richness and help bind the cake together. Room temperature water and canola oil keep the cake moist and tender.
The star of this decadent treat is the caramel sauce and sweetened condensed milk. Together, they create that indulgent, gooey filling.
To finish it off, we need chocolate fudge frosting for a creamy topping and Cool Whip to add a light and airy texture. Don’t forget the chopped pecans for that delightful crunch! You can find exact measurements for all these ingredients at the bottom of the article, ready for printing.
How to Make Turtle Poke Cake
Creating the perfect Turtle Poke Cake is a delightful journey that takes just a bit of time and love. Follow these step-by-step instructions, and you’ll serve up a dessert that never fails to impress. Let’s dive into the sweet adventure!
Step 1: Preheat the Oven
The first thing we need to do is preheat the oven to 350°F. This temperature is essential as it ensures that the cake bakes evenly. While the oven warms up, grab a 9×13-inch glass baking dish and give it a good spray with baking spray. This simple step prevents the cake from sticking and ensures a beautiful slice every time. Trust me, you’ll want each piece of this Turtle Poke Cake to come out perfectly!
Step 2: Prepare the Cake Batter
Now, let’s make that cake batter! In a large mixing bowl, combine the yellow cake mix, eggs, room temperature water, and canola oil. Using a handheld mixer, blend this mixture on medium speed for about 2 minutes. You want it to be smooth and well combined. This step is crucial, as it creates a tender cake that holds onto all those wonderful flavors. Make sure there are no lumps in your batter for the best result!
Step 3: Bake the Cake
Once your batter is ready, pour it into the prepared baking dish. Slide it into the oven and let it bake for 35 minutes. You’ll know it’s done when the cake springs back when gently pressed and a toothpick inserted in the center comes out clean. Be patient; the waiting will be worth it. That tantalizing aroma wafting through your kitchen will have your family rushing to the table!
Step 4: Poke the Cake
When the cake is done baking, take it out of the oven and let it cool for about 10 minutes. Then, using the handle of a wooden spoon, poke holes evenly across the surface of the cake. This step is key for absorbing that luscious caramel mixture we’ll make. The holes should be about an inch apart, reaching down into the cake to allow every bite to be infused with flavor. Your cake will thank you later!
Step 5: Pour the Caramel Mixture
In a small bowl, stir together the caramel sauce and sweetened condensed milk until well blended. Now, slowly pour this creamy concoction over your cake, ensuring it seeps into all those holes. Take your time with this step; it’s where the magic happens! As the caramel soaks in, it transforms your dessert into a decadent delight. Let the cake cool completely at room temperature for at least an hour.
Step 6: Prepare the Frosting
While the cake cools, we can whip up the chocolate fudge frosting. In a separate bowl, use the handheld mixer to whip the chocolate fudge frosting for about a minute until it’s light and fluffy. Next, gently fold in the thawed Cool Whip until everything is combined and the mixture is free of streaks. This will create a smooth and creamy topping. The combination of these two frostings adds a luxurious touch that perfectly complements the cake!
Step 7: Frost the Cake
Now that your cake is cooled and the frosting is ready, it’s time for the fun part! Spread the chocolate fudge whipped frosting evenly over the top of the cake. Don’t worry if it doesn’t look perfect; a little rustic charm adds character! Finish by drizzling some extra caramel and chocolate sauce in a decorative pattern. Sprinkle those chopped pecans on top for an extra crunch. Your Turtle Poke Cake is now ready to chill in the refrigerator for at least 4 hours, or even overnight for an enhanced flavor.
Tips for Success
- Let your eggs come to room temperature for an easier mix.
- Use high-quality caramel and chocolate sauces for the best flavor.
- For an extra moist cake, cover it with plastic wrap while it cools.
- Feel free to add a pinch of sea salt to the caramel mixture for a salted caramel twist.
- Chill the cake overnight for even better-tasting results!
Equipment Needed
- 9×13-inch glass baking dish (a metal pan works too)
- Handheld mixer (a whisk can be used, but it’ll take longer)
- Large mixing bowl (any bowl will do)
- Wooden spoon (a chopstick can work in a pinch!)
- Measuring cups (your usual kitchen ones)
Variations of Turtle Poke Cake
- For a chocolate lover’s delight, use chocolate cake mix instead of yellow cake mix.
- For a nut-free version, simply omit the chopped pecans or substitute with toasted coconut.
- Try adding a layer of sliced bananas between the cake and frosting for a fruity twist.
- Consider using gluten-free cake mix to cater to dietary restrictions.
- Add a layer of crumbled brownies on top for extra decadence!
Serving Suggestions for Turtle Poke Cake
- Pair it with a scoop of vanilla ice cream for a classic dessert experience.
- Serve it with a side of fresh berries to add a fruity contrast.
- Enjoy with a cup of coffee or a glass of cold milk.
- For presentation, add chocolate shavings or more pecans on top.
FAQs about Turtle Poke Cake
Have questions? Don’t worry, I’ve got you covered! Here are some frequently asked questions about this delicious Turtle Poke Cake.
Can I make this cake ahead of time?
Absolutely! In fact, making this Turtle Poke Cake a day in advance enhances the flavor. Just keep it covered in the fridge until you’re ready to serve.
What can I substitute for the Cool Whip?
If you’re looking for a homemade option, you can whip up heavy cream to use instead of Cool Whip. Just sweeten it to taste!
How should I store leftover cake?
Store any leftovers in an airtight container in the fridge for up to five days. Just be sure to keep it chilled!
Can I freeze Turtle Poke Cake?
Yes, you can freeze it! Just wrap individual slices in plastic wrap, and then place them in an airtight container. Enjoy later!
Final Thoughts
There’s something truly special about bringing a Turtle Poke Cake to the table. The combination of chocolate, caramel, and pecans creates a delightful symphony of flavors that never fails to impress. As you slice through the cake and serve it to your loved ones, watch their faces light up with excitement. Plus, knowing that you pulled off this culinary masterpiece in no time adds a sprinkle of joy to your busy day. So grab your apron and give this recipe a whirl. I promise, it will become a cherished favorite in your home!
PrintTurtle Poke Cake

A delectable turtle poke cake that combines the flavors of chocolate, caramel, and pecans for a delightful dessert experience.
- Prep Time: 20 minutes
- Cook Time: 35 minutes
- Total Time: 5 hours 55 minutes (including cooling and refrigeration)
- Yield: 12 servings 1x
- Category: Dessert
- Method: Baking
- Cuisine: American
- Diet: Vegetarian
Ingredients
- 15.25 ounces yellow cake mix
- 3 large eggs
- 1 cup water, room temperature
- ½ cup canola oil
- 14 ounces caramel sauce, ice cream topping
- 14 ounces sweetened condensed milk
- 16 ounces chocolate fudge frosting
- 8 ounces Cool Whip whipped topping, thawed
- ¼ cup pecans, chopped
- Good quality chocolate sauce, for garnish
- Good quality caramel sauce in squeeze container, for garnish
Instructions
- Preheat oven to 350°F. Spray a 9×13-inch glass baking dish with baking spray.
- In a large mixing bowl, use a handheld mixer on medium speed to blend yellow cake mix, eggs, water, and canola oil for 2 minutes following box directions.
- Pour batter into prepared dish and bake for 35 minutes.
- While cake bakes, stir caramel sauce and sweetened condensed milk together in a small bowl with a pour spout until smooth.
- Using the handle of a wooden spoon, poke holes evenly across the hot cake. Slowly pour caramel mixture over cake, ensuring it fills all holes. Let cool at room temperature for at least 1 hour.
- Whip chocolate fudge frosting in a large bowl on medium speed for 1 minute until light and fluffy.
- Fold thawed Cool Whip into the whipped chocolate fudge frosting until fully combined with no streaks.
- Spread the chocolate fudge whipped frosting evenly over the cooled cake.
- Drizzle caramel sauce and chocolate sauce in a decorative pattern over the cake. Sprinkle chopped pecans evenly. Refrigerate for at least 4 hours or overnight.
Notes
- This cake can be made a day in advance for enhanced flavor.
- Make sure to use room temperature water for best results.
- For a decorative touch, you can drizzle extra caramel and chocolate sauce just before serving.
Nutrition
- Serving Size: 1 slice
- Calories: 380
- Sugar: 40g
- Sodium: 290mg
- Fat: 20g
- Saturated Fat: 6g
- Unsaturated Fat: 14g
- Trans Fat: 0g
- Carbohydrates: 47g
- Fiber: 1g
- Protein: 3g
- Cholesterol: 35mg