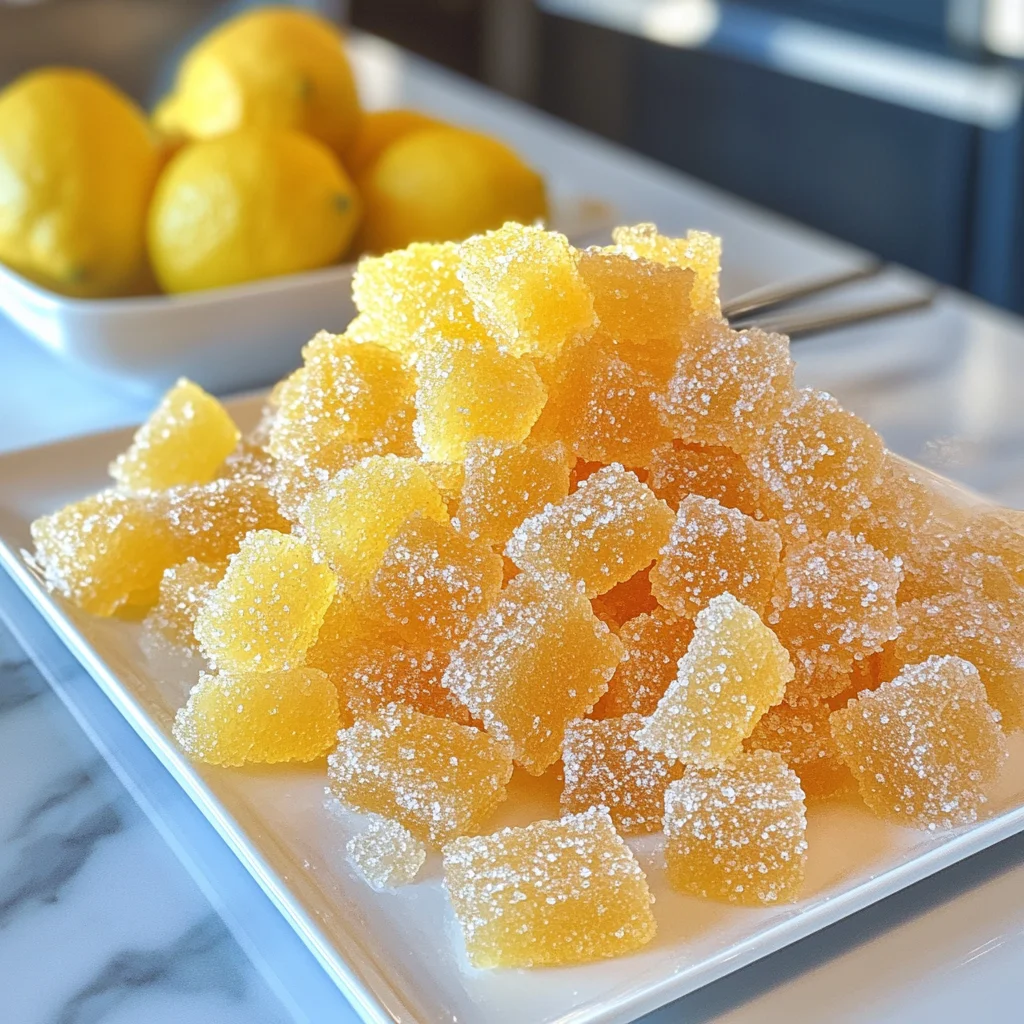
Introduction to Lemon Drops Hard Candy
There’s something magical about homemade treats, and these Lemon Drops Hard Candy are no exception! Whether you’ve had a long day or simply want to add some sunshine to your afternoon, these bright, zesty candies are the perfect solution. Making your own candy can be a fun and rewarding experience, especially when you can share them with loved ones. Imagine presenting a jar of these delightful sweets as a thoughtful gift, or enjoying them during a cozy family movie night. Let’s dive into this easy recipe that will surely become a favorite!
Why You’ll Love This Lemon Drops Hard Candy
Making your own Lemon Drops Hard Candy is not only simple but also incredibly satisfying. In just about 35 minutes, you can whip up a batch that rivals any store-bought version. They’re bursting with fresh lemon flavor, providing a delightful sensory experience. Plus, you can control the sweetness, and let’s be honest—who doesn’t love the nostalgia of homemade candy? It’s a treat that everyone can enjoy!
Ingredients for Lemon Drops Hard Candy

Creating your own Lemon Drops Hard Candy is a delightful adventure, and the ingredients are simple yet essential. Here’s what you’ll need:
- Granulated sugar: This is the main ingredient, providing sweetness and structure to your candy.
- Water: Helps dissolve the sugar and creates the syrupy consistency essential for candy making.
- Cream of tartar: A stabilizing agent that helps prevent sugar crystallization, ensuring smooth candies.
- Naturals lemon oil: This adds a concentrated lemon flavor that’s bright and zesty—absolutely crucial for that classic taste!
- Yellow gel food coloring: While optional, a couple of drops can enhance the vibrant appearance of your candies.
- Citric acid: Another optional ingredient that lends a delightful tartness, making the candy extra special.
- Confectioner’s sugar: Used for coating the finished pieces to prevent them from sticking together.
- Vegetable oil or nonstick spray: Used to coat your kitchen shears, making cutting the candy easier and less sticky.
For precise measurements and to make your candy-making experience seamless, all ingredient quantities can be found at the bottom of this article, available for printing!
How to Make Lemon Drops Hard Candy
Prepare Your Work Surface
To start this sweet adventure, begin by covering your work surface with a silicone baking mat. This is crucial for a couple of reasons. First, it ensures easy cleanup once you’re done making your Lemon Drops Hard Candy. Nobody wants to scrub sticky surfaces after a fun cooking session. Second, the silicone mat provides a non-stick surface, allowing your finished candies to cool properly without sticking.
Create the Sugar Mixture
Now, it’s time to make the star of the show—the sugar mixture! In a medium saucepan, combine the granulated sugar, water, and cream of tartar. Stir gently over medium heat until the sugar completely dissolves. This isn’t just about mixing; it’s a delicate dance! Once the sugar dissolves, stop stirring and attach a candy thermometer. This is key because you need to monitor the temperature closely. Cook until the mixture reaches 300°F (149°C). As it cooks, brush the sides of your saucepan with a little water to prevent sugar from crystallizing. It’s a small step that makes a big difference!
Adding Flavor and Color
Once your mixture hits that perfect temperature, it’s time to add flavor! Carefully remove the saucepan from heat. Stir in the natural lemon oil, giving it that bright, zesty punch we all love. If you want to elevate the flavor even more, this is the moment to add citric acid for a fun sour kick. You can also add a couple of drops of yellow food coloring if you want the candies to pop visually! Stir well to combine everything, creating a beautifully fragrant mixture.
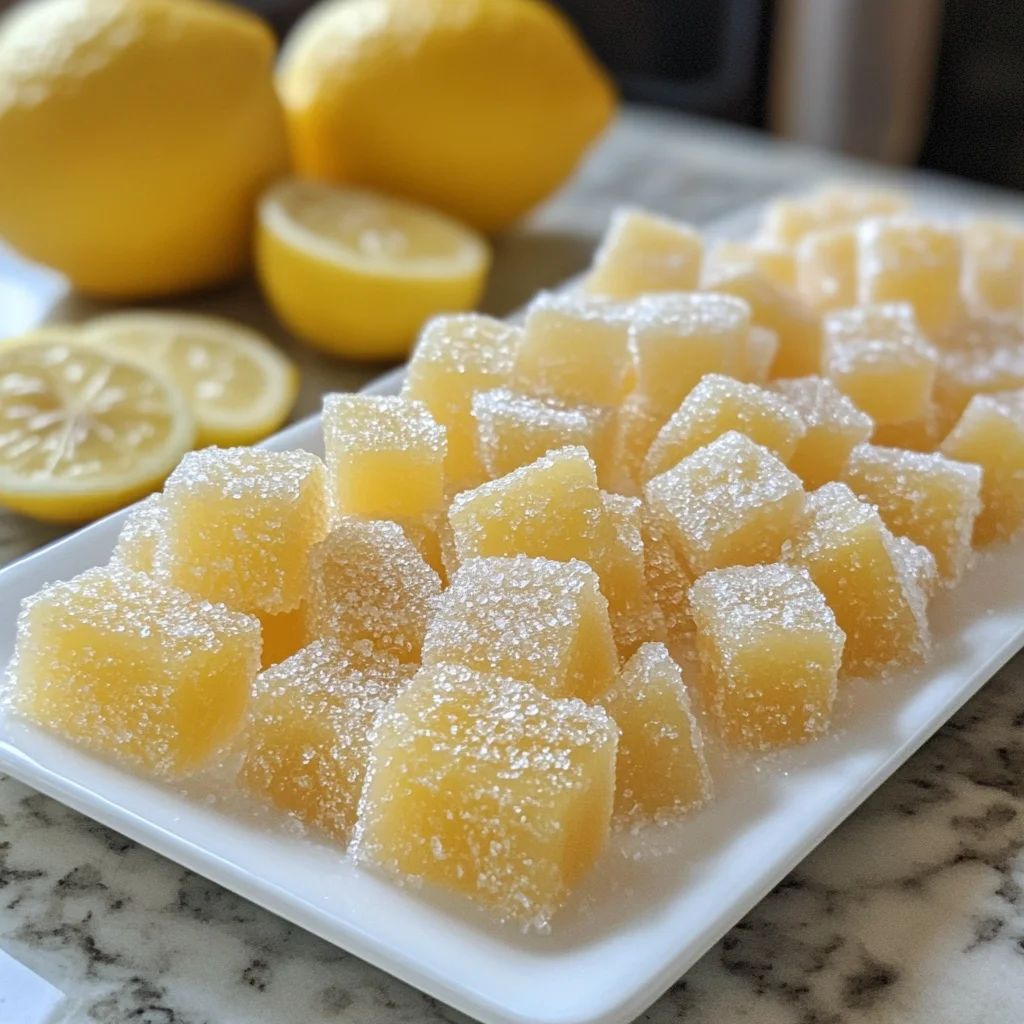
Forming the Candy
Handling hot sugar is like a dance with danger, so put on your cotton gloves and cover them with rubber gloves for safety. Carefully pour the hot sugar mixture onto your silicone mat. Allow it to sit for about a minute, letting it cool slightly. Now, fold the mat over the mixture multiple times until it thickens into a mass that holds its shape. This part is so satisfying! With gloved hands, continue folding the sugar over itself until you see fine white streaks appear. Pull the sugary mass into a short, thick tube and stretch a section into a 1/2-inch rope. Use your oiled kitchen shears to cut the rope into 3/4-inch pieces. Remember to work in small sections, keeping the rest of the mixture warm until you’re ready to cut. Finally, toss each piece in confectioner’s sugar to coat, keeping them from sticking together!
Tips for Success
- Always use gloves when handling hot sugar to prevent burns.
- Monitor the mixture closely while cooking; keeping the exact temperature is crucial.
- Brush the saucepan sides with water regularly to avoid crystallization.
- If the sugar hardens too much, reheat slightly to make it more pliable.
- Coat your shears generously with oil to cut through the candy easily.
Equipment Needed
- Medium saucepan: A sturdy pot to cook your sugar mixture. A Dutch oven works well, too!
- Candy thermometer: Essential for monitoring temperature. If you don’t have one, a digital thermometer does the trick.
- Silicone baking mat: Great for avoiding sticky situations. Parchment paper is a good alternative!
- Kitchen shears: To cut your candy. Regular kitchen scissors can also work if coated with oil.
- Gloves: Cotton and rubber gloves for safety while handling hot sugar.
Variations on Lemon Drops Hard Candy
- Infused flavors: Experiment with different flavors by substituting lemon oil with oils like orange, lime, or even grapefruit for a fruity twist.
- Herbal notes: Add a hint of mint or basil extract to the lemon for a refreshing herbal candy experience.
- Customized sugar: Use flavored confectioner’s sugar, like vanilla or lavender, for an aromatic coating around your candies.
- Natural colorants: Instead of yellow gel food coloring, try beet juice or turmeric for a more natural hue.
- Vegan option: Ensure that any flavor extracts you use are plant-based and replace the cream of tartar with a cornstarch alternative.
Serving Suggestions for Lemon Drops Hard Candy
- Pair your Lemon Drops Hard Candy with a refreshing iced tea or lemonade for a perfect summer treat.
- Serve in a decorative jar as a thoughtful gift or a charming centerpiece at gatherings.
- Enjoy them alongside a warm cup of herbal tea for a cozy evening.
- Add a few candies to a gift basket, alongside other homemade goodies.
FAQs about Lemon Drops Hard Candy
Can I use fresh lemon juice instead of lemon oil?
While fresh lemon juice adds a nice flavor, it contains water which can affect the candy’s consistency. Stick with lemon oil for that concentrated lemon taste!
How can I prevent my Lemon Drops Hard Candy from sticking together?
Coating the pieces in confectioner’s sugar after cutting is essential. Store them in an airtight container without humidity, as moisture can cause sticking.
Can I make these candies without a candy thermometer?
Yes, but it’s a bit tricky! If you don’t have one, look for the hard crack stage, which means the syrup will solidify into hard candy when cooled. You can test by dropping a small amount into cold water—it should form hard, brittle threads!
How long do homemade Lemon Drops Hard Candy last?
These delightful candies can stay fresh in an airtight container at room temperature for up to six weeks. Just keep them away from humid areas!
Can I add more flavoring to the candy?
Absolutely! Feel free to experiment with various extracts—like raspberry or peppermint—to create unique flavors. Just remember to adjust other ingredients accordingly to maintain the right consistency!
Final Thoughts
Making your own Lemon Drops Hard Candy is more than just a cooking experience—it’s a joyful adventure filled with sweetness and laughter. Each piece is a reminder of the warmth of home and the love we share with family and friends. As you unwrap these delightful candies, remember the little moments spent in the kitchen, the excitement of trying something new, and the smiles they bring to loved ones. Homemade treats like these candies have a unique way of connecting us, creating memories that linger far beyond their zesty flavor. Cherish the experience, and enjoy every bite!
PrintLemon Drops Hard Candy

Learn how to make your own delicious Lemon Drops Hard Candy with this easy recipe. Perfect for a sweet treat or a homemade gift!
- Prep Time: 15 minutes
- Cook Time: 20 minutes
- Total Time: 35 minutes
- Yield: Approximately 24 pieces 1x
- Category: Candy
- Method: Stovetop
- Cuisine: American
- Diet: Vegetarian
Ingredients
- 200 grams granulated sugar (1 cup)
- 110 milliliters water (1/2 cup)
- 1 teaspoon natural lemon oil
- 1/4 teaspoon cream of tartar
- 2–3 drops yellow gel food coloring (optional)
- 1 teaspoon citric acid (optional)
- 70 grams confectioner’s sugar (1/2 cup), in a large bowl
- Vegetable oil or nonstick spray, for coating scissors
Instructions
- Cover your work surface with a silicone baking mat.
- Spray kitchen shears with oil or nonstick spray.
- Place confectioner’s sugar in a small bowl and set aside.
- In a saucepan, combine granulated sugar, water, and cream of tartar. Stir over medium heat until sugar dissolves.
- Stop stirring and attach a candy thermometer or keep a digital one nearby.
- Continue cooking until the mixture reaches 300°F (149°C), brushing the pan sides with water to prevent crystallization.
- Remove from heat and stir in lemon oil, food coloring, and citric acid (if using).
- Pour the hot mixture onto the silicone mat and let it sit.
- Put on cotton gloves and rubber gloves over them.
- Fold the mat over the sugar mixture repeatedly until it thickens into a mass and holds its shape.
- With gloved hands, fold the sugar over itself several times until fine white streaks appear.
- Pull into a short, thick tube and stretch a section into a 1/2-inch rope.
- Use oiled scissors to cut into 3/4-inch pieces.
- Work in small sections and keep the remaining sugar in a large mass until ready.
- Toss candy pieces in the confectioner’s sugar bowl to coat.
- Store in an airtight container at room temperature up to six weeks.
Notes
- Make sure to use gloves when handling the hot sugar mixture for safety.
- Optional citric acid adds a sour kick to the candies.
- Keep the candy away from humidity for best storage results.
Nutrition
- Serving Size: 1 piece
- Calories: 42
- Sugar: 10g
- Sodium: 0mg
- Fat: 0g
- Saturated Fat: 0g
- Unsaturated Fat: 0g
- Trans Fat: 0g
- Carbohydrates: 10g
- Fiber: 0g
- Protein: 0g
- Cholesterol: 0mg