The first time I made Coconut Shrimp, I was feeling a little adventurous in the kitchen. It was a rainy Saturday, and I wanted something fun and a bit tropical to brighten the day. I stumbled upon this Coconut Shrimp recipe, and honestly, the idea of creating a crunchy, coconut-coated shrimp dish had me dreaming of sandy beaches and gentle ocean breezes. Spoiler alert: it turned out just as delightful as I imagined!
Why You’ll Love This Coconut Shrimp
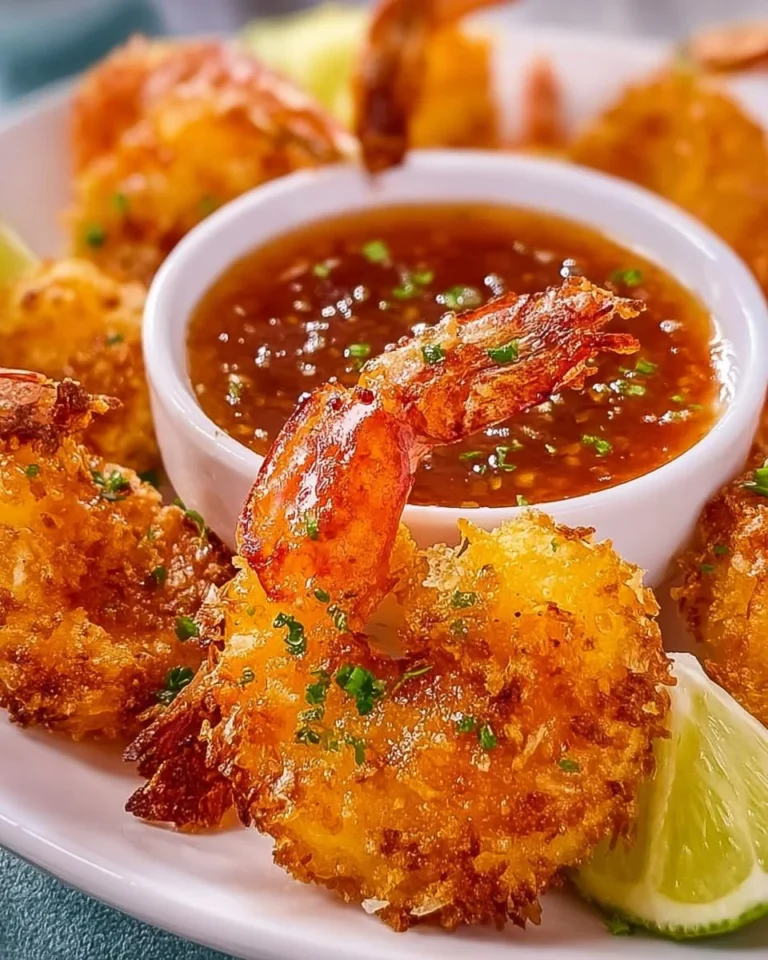
There’s something about the combination of juicy shrimp, crispy coconut coating, and a sweet chili dipping sauce that just sings. Trust me, this Coconut Shrimp is not only perfect for a cozy night in but also makes a fantastic appetizer for gatherings. You could serve it at a fancy dinner party, or whip it up for a casual movie night.
And yes, it’s easy! You’ll see that the steps are simple, but the flavors are out of this world. Plus, it’s a dish that everyone seems to love, and who doesn’t adore the crunch of panko and coconut?
Keep reading, this part matters…
This Coconut Shrimp recipe is perfect for quick meals, easy snacks, or special occasions. It’s all about that golden brown crispiness and tropical vibe that will make your taste buds dance.
Preparation Phase & Tools to Use
Before diving into the cooking, let’s talk about the tools you’ll need. Having the right gear makes things much smoother. Here’s what you should gather:
- Deep skillet or heavy-bottomed pot
- Three shallow bowls for coating
- Paper towels for draining excess oil
- A wire rack (if you have one)
Nothing complicated here! Just a few essentials for a delicious outcome.
Ingredients for Coconut Shrimp
To make this gorgeous Coconut Shrimp, you’ll need the following ingredients:
- 1 pound large shrimp, peeled and deveined with tails on
- 1 cup all-purpose flour
- 2 large eggs
- 1 tablespoon water
- 1 cup panko breadcrumbs
- 1 cup sweetened shredded coconut
- 1 teaspoon salt
- 1/2 teaspoon black pepper
- 1 teaspoon garlic powder
- 1 teaspoon paprika
- 2 cups vegetable oil for frying
- 1/2 cup sweet chili sauce
- 1 lime cut into wedges
So gather your ingredients, and let’s get cooking!
How to Make Coconut Shrimp at Home
Now for the fun part—making your very own Coconut Shrimp! Here’s a step-by-step guide:
-
Prep the Shrimp: Pat the shrimp completely dry using paper towels. This is key! If they’re too wet, the coating won’t stick properly, and nobody wants that. Lightly season them with salt and pepper.
-
Set Up Your Coating Stations: Prepare three shallow bowls. In the first bowl, combine flour, garlic powder, paprika, salt, and pepper. In the second bowl, whisk together the eggs with water. Finally, in the third bowl, combine panko breadcrumbs and sweetened shredded coconut.
-
Coat the Shrimp: Take each shrimp and coat it in the flour mixture first. Shake off any excess. Then dip it into the egg mixture, followed by pressing it into the coconut breadcrumb mixture until it’s fully coated. This step can be messy, but it’s all part of the fun!
-
Chill the Coated Shrimp: Place the breaded shrimp on a tray and refrigerate for about 15 to 20 minutes. This little rest helps the coating stick better while frying.
-
Heat the Oil: In a deep skillet or heavy pot, heat vegetable oil over medium heat until it reaches 350°F. Here’s the thing: use a kitchen thermometer if you have one; it makes everything easier!
-
Fry the Shrimp: Fry the shrimp in small batches for about 2 to 3 minutes on each side or until they’re golden brown and crispy. Don’t rush this step! If you overcrowd the pan, it can drop the oil temperature and lead to soggy shrimp.
-
Drain the Shrimp: Use a wire rack or a paper towel-lined plate to drain excess oil. Nobody likes greasy shrimp!
-
Serve & Enjoy: Serve immediately with sweet chili sauce and lime wedges. Dive in while they’re still hot!
Pro Tips for Best Results
- Don’t Skip the Refrigeration: Seriously, this step is so important! It helps the coating adhere better.
- Watch Your Oil Temperature: If it’s too hot, the shrimp will brown too quickly and remain raw inside. If it’s too low, you’ll end up with oily shrimp.
- Small Batches Are Key: Frying in batches helps you stay in control.
Variations & Customization Ideas
Feeling adventurous? Here are a couple of variations to consider:
- Spicy Twist: Add a pinch of cayenne pepper to the flour mixture for a kick.
- Bake Instead of Fry: For a healthier option, you can bake the shrimp at 400°F for about 15-20 minutes. Just make sure to spray the shrimp with cooking spray for that crispy texture.
Common Mistakes to Avoid
- Wet Shrimp: As I mentioned earlier, moisture is not your friend. Make sure they’re dry!
- Skipping the Chill: If you skip chilling the shrimp after breading, you’re asking for a coating disaster. Trust me on this one.
- Overcrowding: It’s tempting, but frying too many at once can lead to uneven cooking.
What to Serve With Coconut Shrimp
Now that you’ve made these delicious Coconut Shrimp, what should you serve them with? Here are a few ideas:
- A zesty mango salsa for a fresh twist.
- Coconut rice for an island-themed meal.
- Mixed greens salad with a light vinaigrette.
Storage & Reheating Instructions
If you have leftovers (though I doubt you will!), store them in an airtight container in the fridge for up to two days.
To reheat, pop them in a preheated oven at 375°F for about 10 minutes. This helps retain the crispiness, which is key!
Estimated Nutrition Information
Based on the ingredients listed, one serving (about 4 shrimp) has approximately:
- Calories: 300
- Protein: 15g
- Carbohydrates: 36g
- Fat: 12g
Remember, this can vary based on brand and quantities used.
FAQs
1. Can I use frozen shrimp?
Yes! Just make sure to thaw and dry them well before coating.
2. What kind of shrimp is best for this recipe?
Large shrimp are ideal, but medium works too. Just adjust cooking times slightly.
3. Can I make this in advance?
You can prepare and bread the shrimp ahead of time but fry them just before serving for the best texture.
4. Is it gluten-free?
If you use gluten-free panko breadcrumbs, this Coconut Shrimp can be gluten-free!
5. What if I don’t have panko?
Regular breadcrumbs work, but panko gives you that amazing crunch.
Expert Tips for the Best Coconut Shrimp
- Use fresh shrimp for the best taste.
- Double-dip in the egg if you want an extra thick coating.
- Experiment with different spices in your breadcrumb mixture.
Conclusion
This Coconut Shrimp recipe is honestly one of my favorites! It’s quick, easy, and can transport you right to a tropical paradise, even if you’re just in your home kitchen.
Try it, and see how it turns out. I promise you won’t be disappointed. Enjoy this crispy delight with family, friends, or just a cozy evening alone. Save this recipe for later, and take your taste buds on a little adventure!
And remember, the kitchen is all about joy and experimentation. Enjoy making your Coconut Shrimp!
PrintCoconut Shrimp

A delightful and crispy coconut-coated shrimp recipe perfect for any occasion.
- Prep Time: 20 minutes
- Cook Time: 10 minutes
- Total Time: 30 minutes
- Yield: 4 servings 1x
- Category: Appetizer
- Method: Frying
- Cuisine: Tropical
- Diet: Gluten-free (if using gluten-free panko)
Ingredients
- 1 pound large shrimp, peeled and deveined with tails on
- 1 cup all-purpose flour
- 2 large eggs
- 1 tablespoon water
- 1 cup panko breadcrumbs
- 1 cup sweetened shredded coconut
- 1 teaspoon salt
- 1/2 teaspoon black pepper
- 1 teaspoon garlic powder
- 1 teaspoon paprika
- 2 cups vegetable oil for frying
- 1/2 cup sweet chili sauce
- 1 lime cut into wedges
Instructions
- Prep the shrimp: Pat the shrimp completely dry using paper towels. Lightly season with salt and pepper.
- Set up your coating stations: Prepare three shallow bowls with flour mixture, egg mixture, and coconut breadcrumb mixture.
- Coat the shrimp: Dip each shrimp in flour, then egg, then coat with coconut breadcrumbs.
- Chill the coated shrimp: Refrigerate for about 15 to 20 minutes.
- Heat the oil: In a deep skillet, heat vegetable oil over medium heat until 350°F.
- Fry the shrimp: Fry in small batches for 2 to 3 minutes on each side until golden brown.
- Drain the shrimp: Use a wire rack or paper towel-lined plate to drain excess oil.
- Serve & enjoy: Serve immediately with sweet chili sauce and lime wedges.
Notes
For a healthier option, bake the shrimp instead at 400°F for about 15-20 minutes. Make sure to spray the shrimp with cooking spray for a crispy texture.
Nutrition
- Serving Size: 4 shrimp
- Calories: 300
- Sugar: 5g
- Sodium: 400mg
- Fat: 12g
- Saturated Fat: 7g
- Unsaturated Fat: 5g
- Trans Fat: 0g
- Carbohydrates: 36g
- Fiber: 2g
- Protein: 15g
- Cholesterol: 150mg