Introduction to Fresh Cherry Pie
Fresh Cherry Pie is like a warm hug on a plate. I can still remember the first time I made it—my kids’ faces lit up like it was Christmas morning! This delicious homemade fresh cherry pie is not just a treat; it’s a memory-maker. If you’re looking for a quick solution for dessert lovers or a delightful dish to impress your loved ones, this pie fits the bill perfectly. Plus, the vibrant color and sweet-tart flavor will make any gathering feel special. Let’s dive into this cherry-filled adventure together!
Why You’ll Love This Fresh Cherry Pie
You’re going to adore this fresh cherry pie for so many reasons! First off, it’s incredibly easy to whip up, even on your busiest days. The sweet and tart flavors dance on your taste buds like a summer breeze. Plus, with just a handful of simple ingredients, you can create a gourmet dessert that will impress everyone at your table. Trust me, this pie is happiness in every slice!
Ingredients for Fresh Cherry Pie
Gathering the right ingredients is the first step to creating this delightful masterpiece. Here’s what you’ll need for your fresh cherry pie:
- Fresh Cherries: These beauties are the star of the show! Plump, juicy cherries bring that sweet tart flavor that’s hard to beat. Make sure they’re ripe for the best results.
- Granulated Sugar: This helps to balance the tartness of the cherries. Adjust it based on your sweetness preference. If you have a sweet tooth, feel free to add a little extra!
- All-Purpose Flour: This thickens the filling and gives it the right consistency. You could swap it out for cornstarch if you prefer a gluten-free version.
- Lemon Juice: A splash brightens the flavor and enhances the cherries’ natural sweetness. Think of it as a refreshing twist!
- Salt: Just a pinch brings all the flavors together. It’s amazing what a little salt can do!
- Double Pie Crust: You can use store-bought or homemade crust, depending on how much time you want to invest. A flaky crust is essential for that perfect finish.
- Unsalted Butter: Adding tiny pieces of butter over the filling gives a rich flavor and silky texture. It’s like a little creamy surprise in every bite!
For more intense flavor, you might consider adding almond extract. It’s a delightful enhancement for cherry pies. And don’t forget, the ingredient quantities will be detailed below for your convenience.

How to Make Fresh Cherry Pie
Now that you have all your fresh ingredients ready, it’s time to create magic in the kitchen! Follow these simple steps for a delightful fresh cherry pie that’s bound to impress.
Prepare Your Ingredients
Start by washing your cherries. A gentle rinse under cool water will do the trick.
Next, pit those cherries. I like to use a cherry pitter, but you can also cut them in half and remove the pits by hand if necessary. Just be careful; losing a finger is not part of the experience!
Make the Cherry Filling
Once your cherries are pitted, toss them into a large bowl.
Add granulated sugar, flour, lemon juice, and salt. Stir gently to combine everything. The sugar will draw out the juices, creating this amazing cherry filling. Let it sit for a few minutes. This helps intensify the flavors.
Assemble the Pie
Roll out your first pie crust and place it in a 9-inch pie dish. Keep it neat!
Next, pour in that luscious cherry filling and dot the top with small pieces of butter. This is where the magic happens.
Now, roll out your second pie crust and place it over the top. Seal those edges by crimping them together with your fingers or a fork. Don’t forget to cut slits in the top crust! This allows steam to escape while baking, preventing a messy explosion.
Bake the Pie
Preheat your oven to 425°F (220°C). Once hot, pop in your pie and bake for about 45 minutes.
Keep an eye on it; you want a golden brown crust with bubbling cherry juices. The aroma? It’ll have your family drifting into the kitchen like moths to a flame!
Cooling Time
After baking, let the pie cool on a wire rack for at least an hour. Trust me; this is crucial!
Cooling helps the filling set up and makes serving easier. Plus, it gives you a moment to enjoy the delightful scent wafting through your home!
Tips for Success
- Use ripe cherries for the best flavor. Their sweetness and tartness define your pie!
- Don’t skip the cooling time. It helps the filling set perfectly.
- Experiment with spices! A dash of cinnamon or nutmeg adds an extra layer of depth.
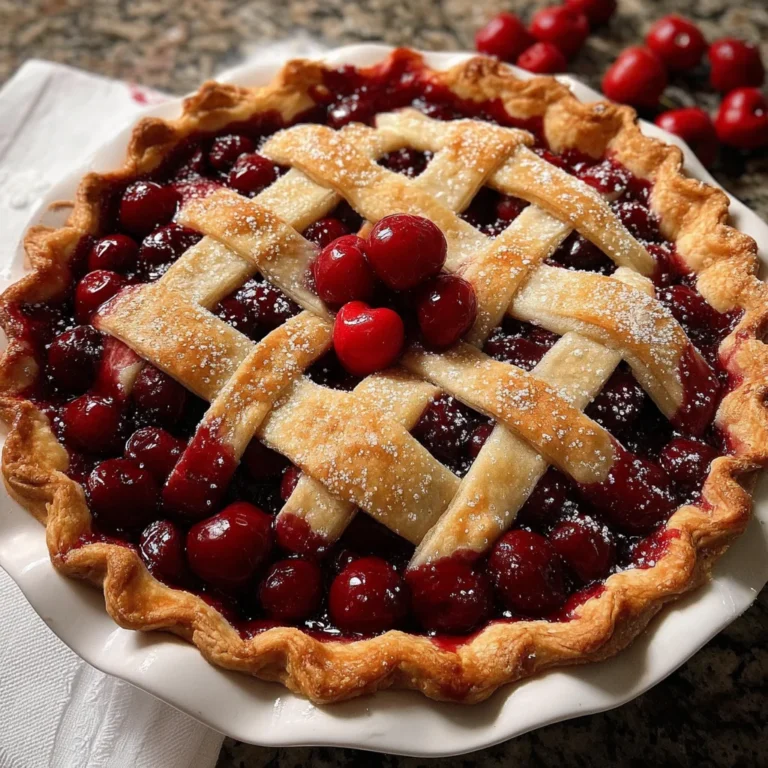
- Consider using a lattice crust for a beautiful presentation. It’s easier than it looks!
- Serve with ice cream or whipped cream for a decadent treat.
Equipment Needed for Fresh Cherry Pie
- 9-inch Pie Dish: A classic choice. Any oven-safe dish works as a substitute!
- Rolling Pin: Essential for those beautiful pie crusts. A wine bottle can get the job done in a pinch!
- Mixing Bowl: For combining your ingredients. Any large bowl will do.
- Cherry Pitter: Makes pitting a breeze. A small knife also works fine.
- Wire Rack: Perfect for cooling. If you don’t have one, a cutting board is a good alternative.
Variations of Fresh Cherry Pie
- Almond Cherry Pie: Add a splash of almond extract to the filling for a delightful twist on flavor.
- Cherry Crumble Pie: Top your pie with a mixture of oats, flour, butter, and brown sugar for a crunchy, crumbly topping instead of a crust.
- Gluten-Free Cherry Pie: Substitute all-purpose flour with a gluten-free blend to make this pie suitable for gluten-sensitive friends.
- Mixed Berry Pie: Combine cherries with blueberries or raspberries for a colorful and fruity variation.
- Cherry Chocolate Pie: Add chocolate chips to the filling for a decadent dessert that brings together two classic flavors.
Serving Suggestions for Fresh Cherry Pie
- Pair with a scoop of vanilla ice cream for a classic combination that balances the tartness.
- Serve with a dollop of whipped cream for an airy, sweet touch that complements the flavors.
- Drizzle with chocolate sauce or caramel for an indulgent twist.
- Garnish with fresh mint leaves for a pop of color and freshness.
- Accompany with a glass of chilled lemonade or iced tea for a perfect summer dessert experience.
FAQs about Fresh Cherry Pie
Can I use frozen cherries instead of fresh?
Absolutely! Frozen cherries work well, but make sure to thaw them and drain excess liquid before using them in your fresh cherry pie. This helps avoid a soggy crust.
How do I store leftover fresh cherry pie?
Store your pie in the refrigerator, covered loosely with plastic wrap or aluminum foil. It will keep for about 3-4 days. You can also freeze slices for longer storage, just remember to wrap them well!
What’s the best way to serve fresh cherry pie?
I love serving fresh cherry pie with a scoop of vanilla ice cream or a dollop of whipped cream. It adds a creamy contrast to the tart cherries, making each bite unforgettable!
Can I make the pie crust ahead of time?
Yes! You can make the pie crust a day or two in advance. Just wrap it tightly in plastic wrap and store it in the refrigerator. This can save you time on a busy baking day!
What if my pie filling is runny?
If your cherry filling seems runny, there are a couple of fixes! You can add a bit more flour or cornstarch to thicken it up. Cooking the filling on the stove with a little more heat can also help reduce excess liquid.
Final Thoughts
Making a fresh cherry pie isn’t just about satisfying your sweet tooth; it’s about sharing joy and creating memories with your loved ones. The process, from washing those glistening cherries to rolling out the crust, is a delightful adventure that invites laughter and conversation into your kitchen. Each slice is filled with the sweet and tart symphony of flavors that brighten any day. So, whether you’re baking for a special occasion or just because, this fresh cherry pie recipe brings warmth and happiness to the table. Trust me, your family will be asking for seconds!
PrintFresh Cherry Pie: Discover the Ultimate Recipe Today!

A delicious homemade fresh cherry pie filled with sweet and tart cherries, perfect for any dessert lover.
- Prep Time: 20 minutes
- Cook Time: 45 minutes
- Total Time: 1 hour 5 minutes
- Yield: 8 servings 1x
- Category: Dessert
- Method: Baking
- Cuisine: American
- Diet: Vegetarian
Ingredients
- 4 cups fresh cherries, pitted
- 1 cup granulated sugar
- 3 tablespoons all-purpose flour
- 2 tablespoons lemon juice
- 1/4 teaspoon salt
- 1 double pie crust (store-bought or homemade)
- 2 tablespoons unsalted butter, cut into small pieces
Instructions
- Preheat your oven to 425°F (220°C).
- Wash and pit the cherries, then combine them in a bowl with sugar, flour, lemon juice, and salt.
- Roll out one pie crust and place it in a pie dish. Pour in the cherry mixture and dot with butter.
- Cover with the second pie crust, sealing the edges. Cut slits in the top crust to allow steam to escape.
- Bake for 45 minutes or until golden brown and bubbly.
- Let cool for at least an hour before serving.
Notes
- For a more intense flavor, consider adding a splash of almond extract.
- Serve with vanilla ice cream or whipped cream for an extra treat.
Nutrition
- Serving Size: 1 slice
- Calories: 300
- Sugar: 26g
- Sodium: 150mg
- Fat: 12g
- Saturated Fat: 7g
- Unsaturated Fat: 3g
- Trans Fat: 0g
- Carbohydrates: 45g
- Fiber: 2g
- Protein: 2g
- Cholesterol: 20mg