Introduction to Halloween Oreo Cheesecake Fluff
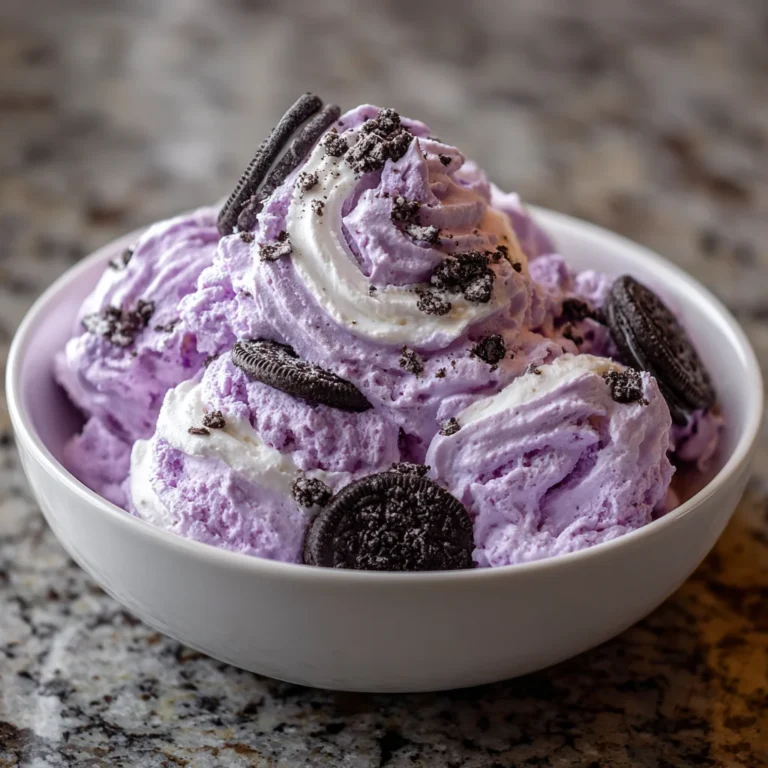
As the leaves turn and Halloween creeps around, I find myself craving festive treats that are both simple and delicious. That’s where my Halloween Oreo Cheesecake Fluff comes in! This dessert is like a cozy hug on a plate, combining the beloved flavors of crunchy Oreos with a creamy cheesecake goodness. Whether you’re a busy mom juggling school events or a professional looking to impress your colleagues at a potluck, this recipe is your golden ticket. It comes together in a snap while still delivering all the spooky joy needed for the season!
Why You’ll Love This Halloween Oreo Cheesecake Fluff
This Halloween Oreo Cheesecake Fluff is not just a treat; it’s a lifesaver in the kitchen! With its effortless preparation and no-bake appeal, you can whip it up in just 15 minutes. The rich, creamy texture paired with the crunch of Halloween Oreos creates a delicious harmony that will delight both kids and adults alike. Plus, it’s perfect for last-minute gatherings, ensuring you always have a spooky dessert ready to go!
Ingredients for Halloween Oreo Cheesecake Fluff
To create the magic of Halloween Oreo Cheesecake Fluff, you’ll need a few key ingredients that come together beautifully. First off, there’s creamy cream cheese, which forms the luscious base of this dessert. Next, you’ll sprinkle in powdered sugar to sweeten the blend and achieve that silky texture.
Of course, we can’t forget the fun aspect—Halloween Oreos! They add delightful chunks of cookie goodness throughout the fluff. Lastly, heavy whipping cream helps achieve that light, airy whipped topping, and a touch of vanilla extract enhances the flavor. For a spooky twist, purple food dye adds festive flair. Exact quantities are available for printing at the bottom!

How to Make Halloween Oreo Cheesecake Fluff
Are you ready to dive into making this amazing Halloween Oreo Cheesecake Fluff? It’s as easy as pie—actually easier! Let’s walk through the steps together, where simple meets spooky in the kitchen.
Step 1 – Make the Homemade Whipped Topping
First up, let’s create that fluffy whipped topping that’ll elevate our dessert. In a large bowl or a stand mixer, pour in 1 1/2 cups of heavy whipping cream. I like to keep my cream chilled, as it helps achieve those lovely stiff peaks more quickly.
Next, sprinkle in 1/3 cup of powdered sugar and add 1 1/2 teaspoons of vanilla extract. Now, start mixing on low-medium speed—trust me; we’re avoiding any creepy splatters here! Once everything is combined, crank it to high speed.
Watch closely, as the cream transforms into a silky cloud. After about 2-5 minutes, you should see stiff peaks forming. This is when you want to stop mixing. Overmixing can turn that fluffy delight into butter, and we definitely don’t want that! Once done, set it aside while we tackle the next step.
Step 2 – Prepare the Cream Cheese Mixture
Now, let’s move on to the heart of our Halloween Oreo Cheesecake Fluff: the cream cheese base. In another large bowl, add 8 ounces of softened cream cheese along with 1/4 to 1/3 cup of powdered sugar. The amount you choose depends on how sweet you want it to be.
Using your mixer, start again on low-medium speed. Once the sugar is incorporated, bump it up to high speed. Your goal is to whip it until it becomes light and fluffy. This should take another 2-3 minutes. It’s like magic watching the cream cheese transform! You want to ensure there are no lumps, so keep mixing until smooth.
Step 3 – Combine Mixtures and Add Color
Now comes the fun part! It’s time to bring it all together. Gently fold the whipped topping we made earlier into your cream cheese mixture. Use a spatula or wooden spoon and fold it in gradually. Remember, folding is key here; we want to keep that light and airy texture!
Once the two mixtures are combined, it’s time to add the fun, spooky color. Grab your purple food dye and add just a few drops to your mixture. Stir gently until you achieve your desired shade of purple. You can make it as bright or soft as you like. You’re the artist here!
Step 4 – Fold in the Oreos
Now, for the pièce de résistance: the Halloween Oreos! Take 15 of those delightful cookies and crush them up. You can place them in a zip lock bag and crush them with a rolling pin or simply use a food processor for quicker results—whatever suits your style!
Carefully fold the crushed Oreos into the purple cheesecake mixture. This is where the magic happens. You should see dark specks of cookie mingling with your creamy fluff. It’s like a Halloween fairy tale, and your kitchen will smell heavenly!
Once everything is nice and mixed, transfer it into your serving dish. Before serving, top it off with more either crushed or whole Halloween Oreos to decorate. This will make your Halloween Oreo Cheesecake Fluff look even more appetizing. Trust me, no one can resist a little extra crunch!
Now, just pop it into the fridge to chill for a bit. I recommend at least an hour, so the flavors mingle even more beautifully. You’re done—or should I say, *spook-tacularly* done! Serve it up and enjoy the delighted faces as they dive into this delicious creation.
Tips for Success
- Chill your mixing bowl for the whipped topping to achieve fluffier peaks.
- Use softened cream cheese for a smoother texture; leave it out for about 30 minutes before mixing.
- Fold gently to preserve the lightness of the whipped topping.
- Let your Halloween Oreo Cheesecake Fluff chill for at least one hour before serving for the best flavor.
- Experiment with different colors or festive toppings to personalize your treat!
Equipment Needed
- A large mixing bowl (or use a stand mixer for convenience)
- A hand mixer (a whisk works too, but it’ll take more effort)
- A spatula for folding in ingredients
- A measuring cup and spoons to ensure accuracy
- A zip lock bag or food processor for crushing Oreos
Variations of Halloween Oreo Cheesecake Fluff
- For a gluten-free option, use gluten-free Halloween Oreos or any gluten-free chocolate sandwich cookies.
- If you prefer a dairy-free version, swap the cream cheese for dairy-free cream cheese and the whipping cream for coconut cream.
- Want to give it a seasonal twist? Try adding a pinch of pumpkin spice to the cream cheese mixture for a fall flavor.
- For a fun crunch, mix in some chocolate chips or chopped nuts along with the Oreos.
- Feeling adventurous? Use other flavored cookies, like mint Oreos or peanut butter Oreos, to change up the taste profile!
Serving Suggestions for Halloween Oreo Cheesecake Fluff
- Serve in mason jars for a fun, individual touch that adds to the Halloween spirit.
- Pair with fresh fruit like strawberries or blueberries for a refreshing contrast.
- How about a drizzle of chocolate syrup on top? It adds extra sweetness!
- A spooky cocktail, like a black vodka soda, complements the dessert perfectly.
- Don’t forget to label your dessert with fun Halloween-themed signs!
FAQs about Halloween Oreo Cheesecake Fluff
I’m sure you have some questions buzzing in your mind about this delightful Halloween Oreo Cheesecake Fluff. Let’s dive into the answers!
Can this be made ahead of time? Absolutely! In fact, making it a day ahead allows the flavors to meld beautifully. Just store it in the refrigerator in an airtight container.
How long can it last in the fridge? Typically, you can enjoy your cheesecake fluff for up to 3-4 days when stored properly. However, it’s best consumed fresh for the ultimate taste experience!
Can I freeze this dessert? Freezing is not recommended, as it can alter the texture of the cream cheese and whipped topping. It’s best to savor it fresh instead!
Is it suitable for kids? Yes, this sweet treat is perfect for everyone! Kids will adore the creamy texture and the fun of Halloween Oreos mixed in.
Can I adjust the sweetness? Definitely! You can add less powdered sugar if you prefer a less sweet flavor. Tailor it to your taste, and enjoy the flexibility!
Final Thoughts
Creating this Halloween Oreo Cheesecake Fluff goes beyond just making a dessert; it’s about bringing a little joy and festivity into your home. The ease of preparation means you can focus on what really matters—making magical memories with your family. With every spoonful, you’re not just serving dessert; you’re sharing laughter and smiles. So, whether it’s a Halloween gathering or a cozy night in, this fluffy treat will surely enchant everyone. Embrace the spirit of the season and let this dessert become a cherished part of your Halloween traditions!
PrintHalloween Oreo Cheesecake Fluff
A delightful Halloween-themed dessert featuring a creamy cheesecake fluff mixed with crushed Oreo cookies.
- Prep Time: 15 minutes
- Cook Time: 0 minutes
- Total Time: 15 minutes
- Yield: Serves 6-8 1x
- Category: Dessert
- Method: No-bake
- Cuisine: American
- Diet: Vegetarian
Ingredients
- 8 oz cream cheese (softened)
- 1/4 to 1/3 cup powdered sugar (depending on your sweetness preferences)
- purple food dye
- 15 Halloween Oreos (crushed, plus more to decorate)
- 1 1/2 cups heavy whipping cream
- 1/3 cup powdered sugar
- 1 1/2 tsp vanilla extract
Instructions
- Begin by making Homemade Whipped Topping in a large bowl or stand mixer by mixing heavy whipping cream, powdered sugar, and vanilla extract.
- Start on low-medium speed, then increase to high until stiff peaks form. Set aside.
- To another large bowl, add cream cheese and powdered sugar. Again start on low-medium speed, then increase to high until cream cheese is light and fluffy.
- Gently fold the Homemade Whipped Topping into the cream cheese mixture, then use food dye to dye the mixture to your desired shade of purple.
- Gently fold in the crushed Oreos. Add more (crushed or whole) on top to decorate. Serve and enjoy!
Notes
- Adjust the amount of powdered sugar based on your personal sweetness preference.
- Be careful not to overmix the whipped topping when folding it into the cream cheese mixture.
- This dessert can be prepared ahead of time and stored in the refrigerator.
Nutrition
- Serving Size: 1/2 cup
- Calories: 350
- Sugar: 14g
- Sodium: 180mg
- Fat: 30g
- Saturated Fat: 18g
- Unsaturated Fat: 8g
- Trans Fat: 0g
- Carbohydrates: 30g
- Fiber: 1g
- Protein: 3g
- Cholesterol: 70mg