No-Fry Fried Ice Cream. Honestly, when I first stumbled upon this recipe, I didn’t think it could be anything close to the real deal. I mean, fried ice cream? That crispy, warm, melt-in-your-mouth dessert you crave after a spicy Mexican meal? It feels like magic to me. But the beautiful part about this No-Fry Fried Ice Cream recipe is that it gives you the taste and texture of the classic treat without all that messy oil frying. Trust me, once you give this a whirl, you’ll be hooked!
Why You’ll Love This No-Fry Fried Ice Cream
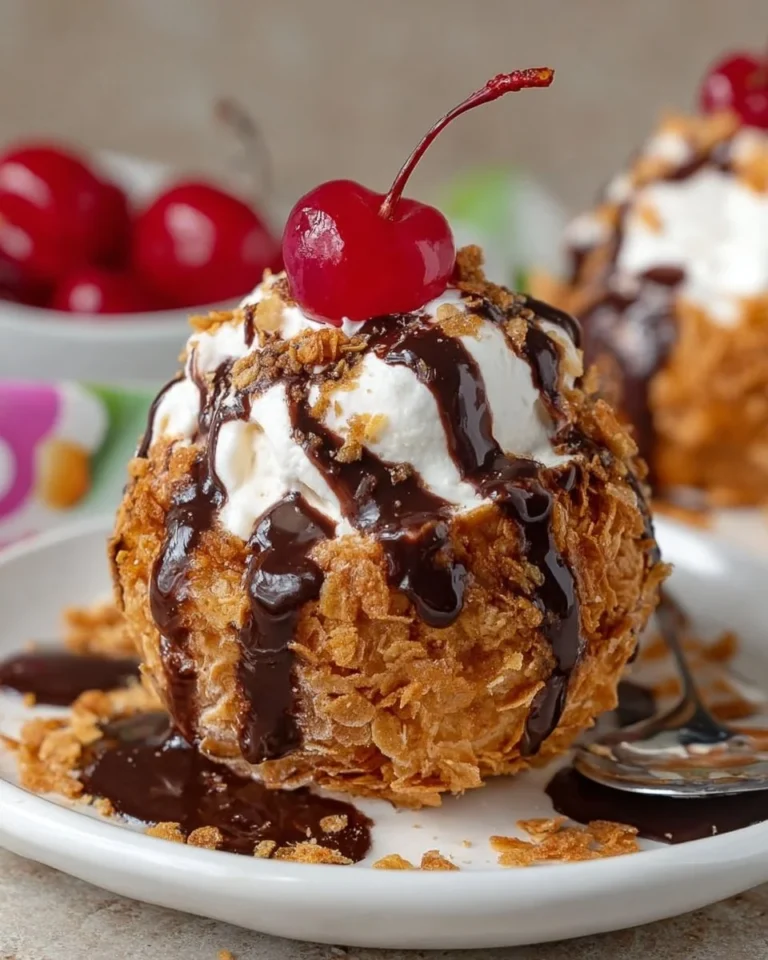
Imagine digging into a scoop of your favorite ice cream, coated in crunchy corn flakes and topped with luscious chocolate fudge and fresh cherries. Honestly, the first time I made this for my family, their eyes lit up. It felt like we were at a fancy restaurant, but right in the comfort of our own kitchen.
This recipe is not just about impressing guests—it’s about making little moments special. Plus, it’s a fun project with kids, allowing them to get hands-on with the rolling and coating. What’s not to love about that?
Preparation Phase & Tools to Use
You won’t need any fancy gadgets for this recipe. A rolling pin or a food processor is enough to crush the corn flakes, and a muffin pan is key to shaping the ice cream. It’s a straightforward process.
Here’s what you’ll need:
- Rolling pin or food processor
- Medium frying pan
- Muffin pan
- Plastic wrap
- Mixing bowl for whipped cream (if you’re making it)
And that’s it! You’ll see, nothing complicated here. Just a few simple steps and you’re set.
Ingredients for No-Fry Fried Ice Cream
Before we dive into the making process, here’s a quick rundown of what you’ll need:
- 2½ cups of Corn Flakes, crushed
- 6 tablespoons of Crystal unsalted butter
- 1 teaspoon of ground cinnamon
- Crystal Cherry Chocolate Chunk ice cream (or your favorite flavor)
- Fresh cherries (for topping)
- Chocolate fudge (for topping)
- 1 cup of Crystal heavy whipping cream (for frosting, optional)
- ⅓ cup of powdered sugar (for frosting, optional)
- ½ teaspoon of vanilla extract (for frosting, optional)
How to Make No-Fry Fried Ice Cream at Home
-
Crush the Corn Flakes: Start by putting the corn flakes in a ziplock bag and crush them with a rolling pin. If you have a food processor, that works beautifully too. Just don’t turn them into dust; you want some texture.
-
Sauté the Mixture: In a medium frying pan, melt the butter over medium heat. Once melted, add the crushed corn flakes and cinnamon. You’ll want to sauté this for about 4 minutes, stirring often so it doesn’t stick. The smell? Absolutely delightful. Pour the mixture into a shallow dish to cool.
-
Prepare the Muffin Pan: Line a muffin pan with plastic wrap—this will help you pop those ice cream balls out later.
-
Scoop the Ice Cream: Scoop generous amounts of your chosen ice cream into the muffin pan cavities. Freeze for about 30 minutes. This step is crucial, so don’t rush it.
-
Coat the Ice Cream Balls: Take the frozen ice cream balls and roll each one in the corn flake mixture. Make sure they’re well coated. Pop them back into the muffin pan and freeze for another 20 minutes.
-
Whipped Cream Frosting (Optional): If you’re making the whipped cream, go ahead and whip the heavy cream in a stand mixer. Add in the powdered sugar and vanilla until stiff peaks form. This adds a wonderful touch if you’re feeling a little fancy.
-
Serve It Up: Finally, serve those lovely ice cream balls in dishes, top with whipped cream, drizzle with chocolate fudge, and don’t forget the cherries. It’s a feast for the eyes!
Pro Tips for Best Results
-
Chill Time: Give yourself enough time to freeze the ice cream. Honestly, if it’s not frozen enough when you try to coat it, you’ll be left with a melty mess.
-
Texture Check: The corn flakes should be crispy when you roll the ice cream balls; if they’re soft, they won’t give that perfect crunch.
-
Top It Off: Don’t skip on the toppings. The whipped cream and chocolate fudge are game-changers!
Variations & Customization Ideas
The beauty of No-Fry Fried Ice Cream is that it’s super flexible. Try using different ice cream flavors—think mint chocolate chip or even a fruity sorbet for a refreshing twist. You can mix in crushed nuts or drizzle caramel instead of chocolate sauce.
And if you’re feeling adventurous, experiment with crushed cookies instead of corn flakes. You might just create your signature version!
Common Mistakes to Avoid
-
Too Warm Ice Cream: If your ice cream isn’t frozen hard enough, it will melt. No one wants soup for dessert, right?
-
Skipping the Sauté: That step where you sauté the corn flakes matters. Don’t skip it—it gives depth to the flavor.
-
Not Using Plastic Wrap: You’ll be thanking yourself later if you line the muffin pan with plastic wrap.
What to Serve With No-Fry Fried Ice Cream
This dessert is rich and classic, so it pairs well with light, refreshing dishes. Think fresh fruit salads or even a nice cup of coffee to balance the sweetness.
You can also serve it after a savory Mexican meal—flautas or tacos, perhaps? Perfect combo, I say!
Storage & Reheating Instructions
If you somehow have leftovers (and I’m not sure how), keep them in an airtight container in the freezer. They should be good for up to a week. Just remember to allow them a few minutes to thaw before serving again.
Estimated Nutrition Information
- Calories: Approximately 280 per serving
- Total Fat: 18g
- Saturated Fat: 10g
- Cholesterol: 50mg
- Sodium: 150mg
- Total Carbohydrates: 30g
- Dietary Fiber: 1g
- Sugars: 18g
- Protein: 4g
FAQs
Can I use any type of ice cream?
Yes! Go wild with flavors.
What can I substitute for corn flakes?
Try crushed graham crackers or even cookies.
How can I make this healthier?
Use low-fat ice cream or freeze yogurt for a lighter twist.
Can I prepare this in advance?
Absolutely! You can make everything and freeze it for a couple of days before serving.
What if I don’t have a muffin pan?
You can use small bowls or silicone molds instead.
Expert Tips for the Best No-Fry Fried Ice Cream
-
Give it time to set. An extra few minutes in the freezer can make all the difference.
-
If you like a cooler dessert, consider freezing your serving bowls beforehand. You’ll be in for a treat.
Conclusion
So there you have it! This No-Fry Fried Ice Cream recipe is perfect for quick meals, easy snacks, or special occasions. Remember that cooking is about having fun and creating memories in the kitchen. Try it and see how it turns out in your home.
And if you enjoyed this, check out some of my other quick recipes, like easy dinner recipes or quick breakfast recipes, for even more delicious ideas. Happy cooking!
PrintNo-Fry Fried Ice Cream
A delightful dessert that mimics the classic fried ice cream without the oil, featuring crunchy corn flakes and chocolate fudge.
- Prep Time: 15 minutes
- Cook Time: 10 minutes
- Total Time: 55 minutes
- Yield: 4 servings 1x
- Category: Dessert
- Method: No-Cook
- Cuisine: Mexican
- Diet: Vegetarian
Ingredients
- 2½ cups Corn Flakes, crushed
- 6 tablespoons unsalted butter
- 1 teaspoon ground cinnamon
- Cherry Chocolate Chunk ice cream (or your favorite flavor)
- Fresh cherries (for topping)
- Chocolate fudge (for topping)
- 1 cup heavy whipping cream (for frosting, optional)
- ⅓ cup powdered sugar (for frosting, optional)
- ½ teaspoon vanilla extract (for frosting, optional)
Instructions
- Crush the corn flakes in a ziplock bag using a rolling pin or in a food processor until textured, not dust.
- Sauté the crushed corn flakes with melted butter and cinnamon in a frying pan for about 4 minutes.
- Prepare the muffin pan by lining it with plastic wrap.
- Scoop ice cream into the muffin pan cavities and freeze for about 30 minutes.
- Coat the frozen ice cream balls in the corn flake mixture and freeze for an additional 20 minutes.
- Whip the heavy cream with powdered sugar and vanilla until stiff peaks form if making frosting.
- Serve the ice cream balls topped with whipped cream, chocolate fudge, and cherries.
Notes
Ensure ice cream is frozen enough before coating for the best texture. Don’t skip sautéing the corn flakes for added flavor.
Nutrition
- Serving Size: 1 serving
- Calories: 280
- Sugar: 18g
- Sodium: 150mg
- Fat: 18g
- Saturated Fat: 10g
- Unsaturated Fat: 4g
- Trans Fat: 0g
- Carbohydrates: 30g
- Fiber: 1g
- Protein: 4g
- Cholesterol: 50mg