Introduction to Oreo Layered Halloween Brownies
As the leaves turn and the air cools, there’s an undeniable excitement that fills the October air. Halloween is just around the corner, inviting us to embrace all things spooky and sweet. That’s where my Oreo Layered Halloween Brownies come in—a playful and delicious treat that captures the festive spirit perfectly! These brownies don’t just look fabulous; they’re quick to make, perfect for busy schedules, and loved by kids and adults alike. Imagine the smiles they’ll bring to your family’s faces! It’s this kind of joy that makes baking such a delightful experience.
Why You’ll Love This Oreo Layered Halloween Brownies
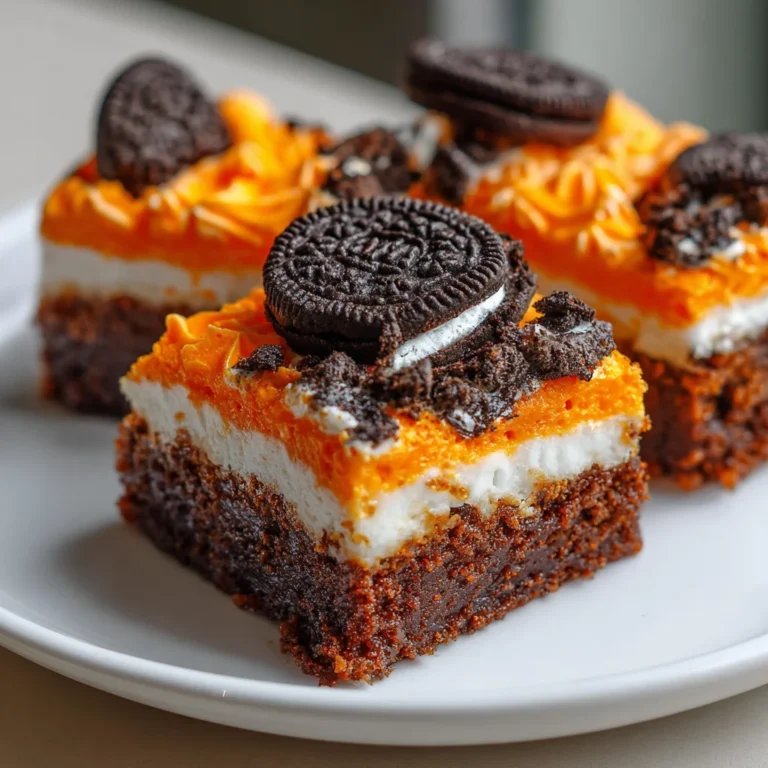
There’s something magical about baking for Halloween that brings out the kid in all of us. These Oreo Layered Halloween Brownies not only look stunning with their vibrant layers but taste heavenly too! The delightful combo of rich brownie and crunchy Oreo is a match made in dessert heaven. Plus, they’re super easy to whip up, making them perfect for busy moms like me and anyone juggling a jam-packed schedule!
Ingredients for Oreo Layered Halloween Brownies
Here’s what you’ll need to create these spooky treasures:
- 1 package brownie mix: The base of our brownies, offering a rich chocolate flavor.
- 2 large eggs: These help bind everything together, giving the brownies a deliciously fudgy texture.
- 1/3 cup vegetable oil: Adds moisture and richness to the batter.
- 1/3 cup whole milk: This keeps the brownies from being too dense.
- 1 package Oreo cookies with orange filling: These add a playful crunch and festive flair.
- 1 can milk chocolate frosting: For a luscious topping that complements the brownies.
- 1 can white or vanilla frosting: This will be transformed into our vibrant orange layer.
- 1 teaspoon orange food coloring gel: To make our frosting pop with Halloween spirit!
If you’re looking for substitutions, a gluten-free brownie mix can easily be switched in. You can also experiment with other flavored frostings to give your brownies a unique twist. For exact quantities, check the bottom of the article for printing!

How to Make Oreo Layered Halloween Brownies
Now, let’s dive into making these adorable Oreo Layered Halloween Brownies. Follow these simple steps, and you’ll have a treat that’s sure to impress family and friends. Remember, baking doesn’t have to be overwhelming—just enjoy the process!
Step 1: Prepare the Baking Pan
First, preheat your oven to 350°F. This ensures an even bake. Next, line a 9×9-inch baking pan with parchment paper. Trust me, this step is a game-changer! It’ll make removing the brownies so much easier after baking. Less fuss means more time for eating, right?
Step 2: Mix the Brownie Batter
In a large bowl, combine the brownie mix, two large eggs, vegetable oil, and whole milk. Using a whisk or stand mixer, mix everything thoroughly until the batter is silky smooth. This part is key; well-mixed batter translates to fudgy, even brownies—who doesn’t want that?
Step 3: Add Oreo Cookies
Now it’s time for the fun part! Pour the brownie batter into your prepared pan and spread it out evenly. Gently press the Oreo cookies with orange filling into the surface of the batter. You want them to nestle right in, adding an extra layer of flavor and that signature Halloween touch. Just look at how festive it already is!
Step 4: Bake and Cool
Slide the pan into the oven and bake for 25-30 minutes. How do you know they’re done? Insert a toothpick into the center—if it comes out clean, they’re ready! Once baked, remove the pan from the oven and let the brownies cool completely. This cooling step is crucial for frosting later. Heat and frosting don’t mix well!
Step 5: Prepare the Frosting
While the brownies cool, let’s prep the frosting! In a mixing bowl, take your white or vanilla frosting and add the orange centers of about 10 Oreo cookies. Toss in the orange food coloring gel, and mix until it looks vibrant and smooth. The combo of Oreo cream and frosting brings a playful burst of flavor—so delicious!
Step 6: Frost and Refrigerate
Spread that lovely orange frosting evenly over the cooled brownies. Then, pop the pan into the refrigerator for about 30 minutes. This setting time is crucial; it helps the frosting firm up beautifully, ensuring a neat presentation when you cut them.
Step 7: Serving the Brownies
When you’re ready to serve these spooky delights, cut them into 3×2-inch squares. For the best experience, try serving them chilled or at room temperature. Each bite will feel soft yet decadent, with a delightful crunch from the Oreos. Trust me, your guests will be begging for seconds!
Tips for Success
Here are some quick tips to ensure your baking adventure goes smoothly!
To test brownie doneness, insert a toothpick in the center; if it comes out with a few moist crumbs, you’re golden! Store any leftover brownies in an airtight container to keep them fresh for up to a week. I often find they taste even better the next day, as the flavors meld beautifully. So, don’t worry about leftovers—they’re a treat later too!
Equipment Needed
To whip up your Oreo Layered Halloween Brownies, you’ll need a few essential kitchen tools:
- 9×9-inch baking pan: Any square baking dish works, just ensure it’s oven-safe!
- Parchment paper: For lining the pan, aiding easy removal of brownies.
- Mixing bowl: A large one is preferable for combining the brownie mix.
- Whisk or stand mixer: For smoothing out the brownie batter to perfection.
- Spatula: Essential for spreading frosting and scraping out every last bit of batter.
Variations on Oreo Layered Halloween Brownies
These Oreo Layered Halloween Brownies are delicious as-is, but why not unleash your creativity? Here are some fun adaptations you can try to keep things exciting in the kitchen:
- Add Nuts: For a crunchy twist, stir in some chopped walnuts or pecans into the brownie batter.
- Use Different Cookies: Swap the Oreo cookies for another favorite, like peanut butter cookies or even pumpkin spice cookies, to give a seasonal flair.
- Go Gluten-Free: Use a gluten-free brownie mix to cater to dietary needs without compromising on flavor!
- Mix in Chocolate Chips: Toss in some semi-sweet or white chocolate chips for an extra gooey treat.
- Flavor the Frosting: Experiment with different flavors by adding a bit of peppermint extract or hazelnut spread to your frosting for a unique touch.
- Layer with Caramel: Drizzle caramel sauce between the brownie and frosting layers for a decadent surprise!
- Colorful Sprinkles: Top the frosting with colorful Halloween sprinkles or edible glitter to make your brownies pop even more when serving.
These variations will keep your baking fresh and allow you to create custom treats that fit any Halloween gathering!
Serving Suggestions for Oreo Layered Halloween Brownies
To elevate your Halloween gathering, serve these delightful brownies with spooky cocktails or hot apple cider. Imagine pairing them with pumpkin spice lattes or a fun bubble tea! For a festive touch, display them on a Halloween-themed platter, adorned with colorful decorations—your guests will adore the attention to detail!
FAQs about Oreo Layered Halloween Brownies
Let’s tackle some common questions about these scrumptious Oreo Layered Halloween Brownies. First off, can I use a different brownie mix? Absolutely! Feel free to swap it for gluten-free options or any flavor you love. This recipe is quite flexible.
How should I store these Halloween desserts? Keep them in an airtight container at room temperature for up to a week, or in the fridge if you prefer them chilled. They may even taste better a day later!
If my brownies are undercooked, what should I do? Simply pop them back into the oven for a few more minutes. Don’t worry; the Oreo cookies will stay tasty!
Lastly, can I freeze them? Yes, make sure to wrap them tightly in plastic wrap before placing them in an airtight container. Enjoy your baking adventures!
Final Thoughts
Creating these delightful Oreo Layered Halloween Brownies is more than just baking; it’s about making memories with family and friends. As you mix, layer, and frost, you’re embracing a tradition that brings everyone together during this spooktacular season. The smiles and laughter that follow with each delicious bite are truly the sweetest rewards. Whether it’s for a festive gathering or a cozy night in, these brownies are bound to create lasting joy. So, roll up your sleeves, gather your loved ones, and let the magic of baking fill your home with warmth and happiness this Halloween!
PrintOreo Layered Halloween Brownies: A Spooky Delight!

Oreo Layered Halloween Brownies are a festive and delicious dessert perfect for Halloween, featuring layers of brownie, Oreo cookies, and colorful frosting.
- Prep Time: 20 minutes
- Cook Time: 30 minutes
- Total Time: 50 minutes
- Yield: 12 servings 1x
- Category: Dessert
- Method: Baking
- Cuisine: American
- Diet: Vegetarian
Ingredients
- 1 package brownie mix
- 2 large eggs
- 1/3 cup vegetable oil
- 1/3 cup whole milk
- 1 package Oreo cookies with orange filling
- 1 can milk chocolate frosting
- 1 can white or vanilla frosting
- 1 teaspoon orange food coloring gel
Instructions
- Preheat oven to 350°F and line a 9×9-inch baking pan with parchment paper.
- In a large bowl, combine brownie mix, eggs, vegetable oil, and milk. Mix thoroughly until smooth using a whisk or stand mixer.
- Pour batter into prepared pan and spread evenly. Press Oreo cookies with orange filling gently into the surface to cover.
- Bake for 25-30 minutes, or until a toothpick inserted in the center comes out clean. Remove from oven and let cool completely before frosting.
- Mix white or vanilla frosting with the orange centers of about 10 Oreo cookies and orange food coloring gel until vibrant and smooth.
- Spread orange frosting evenly over cooled brownies. Refrigerate for 30 minutes to allow frosting to set.
- Spread milk chocolate frosting over set orange frosting. Top with crumbled remaining Oreos for garnish.
- Cut into 3×2-inch squares and serve chilled or at room temperature for softer texture.
Notes
- For a more intense orange color, add more orange food coloring gel if desired.
- Make sure the brownies are completely cool before applying the frosting to prevent melting.
- These brownies can be stored in an airtight container for up to a week.
Nutrition
- Serving Size: 1 brownie
- Calories: 250
- Sugar: 20g
- Sodium: 150mg
- Fat: 12g
- Saturated Fat: 4g
- Unsaturated Fat: 6g
- Trans Fat: 0g
- Carbohydrates: 32g
- Fiber: 1g
- Protein: 3g
- Cholesterol: 30mg