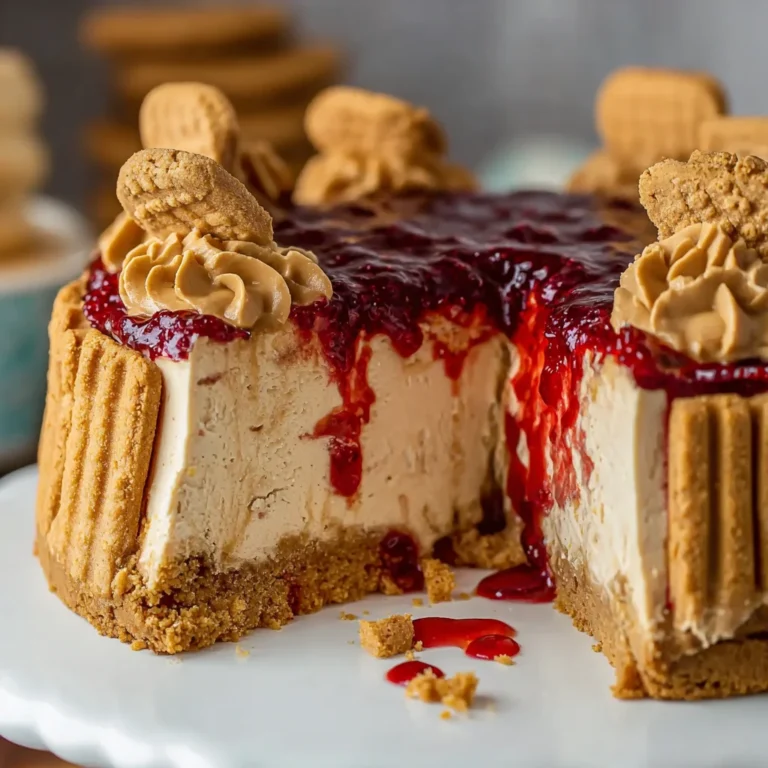
Introduction to Peanut Butter and Jelly Cheesecake Recipe
As a busy mom, I know how challenging it can be to find time to create desserts that not only satisfy cravings but also wow the family. That’s why I adore this delightful Peanut Butter and Jelly Cheesecake Recipe. It’s the perfect blend of creamy peanut butter, sweet grape jelly, and a crunchy Nutter Butter crust, making it a sweet escape for both kids and adults alike. This no-bake treat is a quick solution for those hectic days. Trust me, it will impress your loved ones and add a touch of joy to any occasion!
Why You’ll Love This Peanut Butter and Jelly Cheesecake Recipe
This Peanut Butter and Jelly Cheesecake Recipe is a dream for busy lifestyles! There’s no baking required, so you can whip it up in no time. The flavors are absolutely delightful, combining childhood nostalgia with an indulgent twist. Plus, the creamy texture and crunchy crust create a dessert that feels decadent but is surprisingly easy to make. Whether it’s for a family gathering or just a cozy night in, this cheesecake will surely brighten your day!
Ingredients for Peanut Butter and Jelly Cheesecake Recipe
Gathering the right ingredients is half the fun, isn’t it? Here’s what you’ll need to craft this delightful cheesecake.
- Crust:
- Nutter Butter cookies – These add a sweet, buttery crunch that serves as the base of our cheesecake.
- Unsalted butter – It binds the cookie crumbs together and enhances the richness of the crust.
- Whole Nutter Butter cookies – These will stand tall around the edge, giving a gorgeous finish to your cheesecake.
- Filling:
- Cream cheese – Make sure it’s at room temperature so it combines easily for a smooth filling.
- Powdered sugar – This sweetener gives the cheesecake its luscious sweetness without any grittiness.
- Vanilla extract – A splash of this adds warm, comforting flavor to enhance the other ingredients.
- Creamy peanut butter – The star of the show! It’s what gives our cheesecake its irresistible flavor.
- Whipped topping (Cool Whip) – This lightens up the filling, making it fluffy and creamy.
- Topping:
- Grape jelly – Because what’s a peanut butter and jelly cheesecake without jelly? This adds that nostalgic and fruity touch.
For exact measurements, be sure to check the bottom of this article, where they’re laid out clearly for printing. Let’s get ready for some deliciousness!

How to Make Peanut Butter and Jelly Cheesecake Recipe
Now let’s dive into making this creamy masterpiece! I promise each step feels simpler than the last, making it easy for anyone to create their own slice of happiness.
Prepare the Crust
Start by lining a 9-inch springform pan with parchment paper. This ensures easy removal later! Next, crush the Nutter Butter cookies into fine crumbs.
In a bowl, combine those crumbs with melted butter. Mix until everything is evenly coated and resembles wet sand. Press this mixture firmly into the bottom of the pan to form the crust.
Then, stand some whole Nutter Butters up around the edge. This not only looks great but adds a delightful crunch when serving!
Spread the Grape Jelly Layer
Now, take about ¼ cup of grape jelly and spread it in a thin layer over your crust. It adds a lovely fruity zing to each slice!
If the jelly feels too sticky, heat it gently for 10-15 seconds to loosen it up. This little trick makes spreading a breeze!
Prepare the Cream Cheese Filling
Grab your large mixing bowl, and beat the cream cheese with a handheld mixer until smooth and fluffy. This is where your cheesecake really starts to come together!
After that, add powdered sugar and vanilla extract. Keep mixing until all the ingredients are well combined. You want a velvety filling that’s rich in flavor.
Combine the Filling Ingredients
It’s time to add the star of the show—creamy peanut butter! Blend it in with the cream cheese mixture until everything is nice and smooth.
Skip the workout for your arms—there’s no need to overbeat! Just ensure you scrape down the sides of the bowl, so nothing gets left behind.
Assemble the Cheesecake
With a rubber spatula, gently fold in the whipped topping. This is what gives our cheesecake that light, fluffy texture!
Once everything is combined, pour the creamy filling over the grape jelly layer. Smooth the top with your spatula to create a perfect, even layer.
Last but not least, spread the remaining grape jelly on top. It looks beautiful and hints at the deliciousness to come!
Refrigerate and Set
Cover your cheesecake tightly with plastic wrap or aluminum foil. Now, toss it in the fridge for at least four hours, but overnight is best for an amazing flavor infusion.
When it’s time to serve, carefully remove the springform pan. Slice into pieces, serve chilled, and watch the smiles light up the room!
Tips for Success
- Make sure your cream cheese is truly at room temperature for easier mixing.
- Press the crust firmly enough to hold it together when sliced.
- For easier spreading, microwave the grape jelly slightly if it’s too thick.
- Chill the cheesecake overnight for the best texture and flavor.
- Use a hot knife to slice clean pieces; it makes a big difference!
Equipment Needed
- 9-inch springform pan – Essential for easy removal. A regular pie dish works too but may be harder to serve.
- Mixing bowls – Use a large one for the filling and another for the crust. Any sturdy bowl will do!
- Handheld mixer – This makes mixing effortless. A whisk works, but prepare for a workout!
- Rubber spatula – Perfect for folding in the whipped topping. A wooden spoon can be a backup option.
Variations
- Crunchy Delight: Swap creamy peanut butter for crunchy to add a delightful texture.
- Fruit Fusion: Experiment with other fruit jellies like strawberry or raspberry for a fresh twist.
- Chocolate Lover: Fold in mini chocolate chips into the filling for a rich chocolate-peanut butter combination.
- Healthier Option: Use natural peanut butter and reduce the powdered sugar for a less sweet version.
- Dairy-Free: Substitute cream cheese with a vegan cream cheese and whipped topping for a dairy-free delight.
Serving Suggestions
- Pair slices with fresh fruit, like strawberries or blueberries, for a vibrant touch.
- Serve with a dollop of whipped cream on top for added indulgence.
- For a delightful beverage, enjoy with a glass of cold milk or a warm cup of coffee.
- Garnish with chopped peanuts for an extra crunch!
FAQs about Peanut Butter and Jelly Cheesecake Recipe
Can I use a different type of jelly?
Absolutely! While grape jelly is classic, feel free to swap it for strawberry or raspberry jelly for a unique twist. It’s your cheesecake, after all!
How long can I store the cheesecake?
You can keep the leftover cheesecake in the refrigerator for up to four days. Just be sure to cover it tightly to maintain freshness.
Can I freeze the Peanut Butter and Jelly Cheesecake?
Yes! For freezing, wrap the cheesecake (without jelly) securely in plastic wrap and foil. It can last up to two months. Thaw it in the fridge overnight before adding the jelly topping.
How do I get clean slices when serving?
Run your knife under hot water, then wipe it dry before making a cut. This little trick helps create clean, beautiful slices!
Can I make this cheesecake ahead of time?
Yes! In fact, making it a day ahead is highly recommended. It allows the flavors to meld beautifully and makes for easier slicing.
Final Thoughts
Every time I make this Peanut Butter and Jelly Cheesecake, it brings back cherished childhood memories. The combination of creamy peanut butter and sweet jelly nestled in a crunchy crust is simply irresistible. It’s more than a dessert; it’s a joyful experience that creates smiles around the table. Whether it’s a family gathering or a simple evening treat, this cheesecake has a special way of bringing loved ones together. Plus, the ease of preparation means I can share this moment of joy without stress. Give it a try, and let it brighten your day, just as it has mine!
PrintPeanut Butter and Jelly Cheesecake Recipe

A deliciously indulgent Peanut Butter and Jelly Cheesecake that combines the rich flavors of creamy peanut butter and sweet grape jelly, all on a crust made from Nutter Butter cookies.
- Prep Time: 30 minutes
- Cook Time: 0 minutes
- Total Time: 4 hours 30 minutes
- Yield: 12 servings 1x
- Category: Dessert
- Method: No-Bake
- Cuisine: American
- Diet: Vegetarian
Ingredients
- Crust:
- 24 Nutter Butter cookies (crushed into crumbs)
- 6 tablespoons unsalted butter (melted)
- 10–12 whole Nutter Butter cookies (for the edge)
- Filling:
- 3 (8 oz) blocks cream cheese (room temperature)
- 1 1/2 cups powdered sugar
- 1 teaspoon vanilla extract
- 30 oz creamy peanut butter
- 16 oz whipped topping (Cool Whip)
- Topping:
- 3/4 cup grape jelly (divided)
Instructions
- Line a 9” springform pan with parchment paper. Mix the crushed Nutter Butters with melted butter until evenly combined. Press the mixture into the bottom of the pan to form the crust. Stand whole Nutter Butters vertically around the edge of the pan.
- Spread about 1/4 cup of the grape jelly in a thin layer over the bottom crust. Set aside.
- Using a handheld mixer, beat the cream cheese in a large bowl until smooth and fluffy. Add the powdered sugar and vanilla extract, then mix until fully incorporated.
- Add the peanut butter to the cream cheese mixture and beat until smooth and creamy. Scrape down the sides of the bowl as needed to ensure everything is mixed evenly.
- Gently fold in the whipped topping using a rubber spatula, careful not to deflate the mixture. Once well combined, pour the filling over the jelly layer in the pan and smooth the top with a spatula.
- Spread the remaining grape jelly on top of the cream cheese layer. If the jelly is too thick to spread quickly, microwave it for 10-15 seconds to loosen it.
- Cover the pan tightly with plastic wrap or aluminum foil and refrigerate for at least 4 hours or overnight for best results.
- Once set, carefully remove the springform pan. Slice into pieces and serve chilled. Enjoy!
Notes
- Cover leftover cheesecake tightly and store it in the refrigerator for up to 4 days.
- You can freeze the cheesecake (without jelly on top) by wrapping it securely in plastic wrap and foil for up to 2 months. Thaw it in the fridge overnight, then add the jelly topping before serving.
- For added crunch, fold chopped peanuts or mini chocolate chips into the filling before pouring it into the crust.
- You can swap creamy peanut butter for crunchy, but the texture will change slightly. If you prefer, use strawberry or raspberry jelly.
- Chilling overnight is highly recommended. It helps the flavors meld and gives a firmer texture for easier slicing.
- If Cool Whip isn’t available, use homemade whipped cream by whipping 2 cups of heavy cream with four tablespoons of powdered sugar to stiff peaks.
- Run your knife under hot water for clean slices, wipe it dry, and cut. Repeat between slices.
Nutrition
- Serving Size: 1 slice
- Calories: 400
- Sugar: 20g
- Sodium: 250mg
- Fat: 25g
- Saturated Fat: 10g
- Unsaturated Fat: 12g
- Trans Fat: 0g
- Carbohydrates: 35g
- Fiber: 2g
- Protein: 6g
- Cholesterol: 30mg