Apple Pie Biscuit Sandwiches—the name alone is enough to make your mouth water, right? I made these delightful treats for the first time during a cozy fall evening when the leaves were dancing outside my window. Honestly, there’s something magical about the smell of warm apples and cinnamon that just wraps around you like a soft blanket. And when you pair that with buttery, flaky biscuits? Pure heaven.
Why You’ll Love This Apple Pie Biscuit Sandwiches Recipe
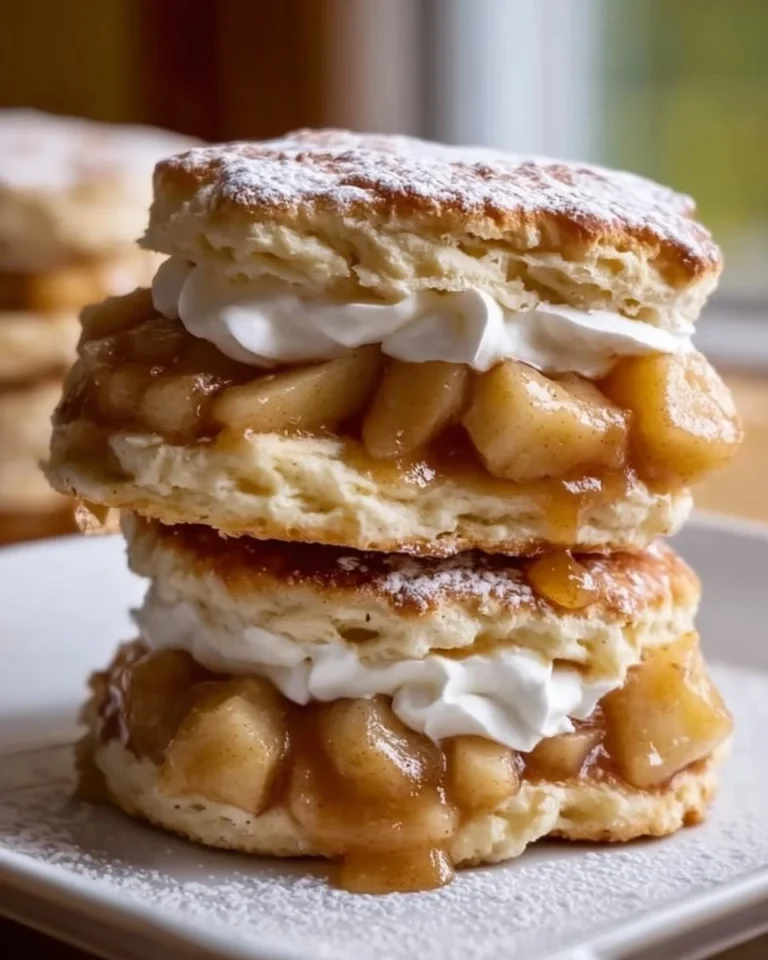
These Apple Pie Biscuit Sandwiches are not only easy to whip up but also showcase that delicious sweet and spicy apple filling tucked between warm biscuits. You know those days when you want a snack that feels like a warm hug? Yeah, this is it.
They’re perfect for brunch, simple desserts, or even a snack. Trust me, everyone will be coming back for seconds—or thirds! They also remind me of childhood trips to the orchard, picking apples and just devouring all the goodies. You’ll see the joy on everyone’s faces when they take that first bite.
Preparation Phase & Tools to Use
Before we dive into the baking bliss, let’s get set up. You’ll need a few tools:
- Large Mixing Bowl: For the dry ingredients and dough.
- Saucepan: To cook those sweet apples.
- Rolling Pin: To flatten out the biscuit dough.
- Round Cutter: For cutting the biscuits (you can even use a glass if you don’t have one!).
- Baking Sheet: A trusty friend for the oven.
And of course, preheat your oven to a cozy 425°F (220°C)—that’s the secret to those golden biscuits.
Ingredients for Apple Pie Biscuit Sandwiches
Gather these ingredients before you start cooking:
- 2 cups all-purpose flour
- 1 tablespoon baking powder
- 1/2 teaspoon salt
- 1/4 cup sugar
- 1/2 cup cold butter, cubed
- 3/4 cup milk
- 2 cups apples, peeled and diced
- 1 teaspoon cinnamon
- 1/2 teaspoon nutmeg
- 1/4 cup sugar (for apples)
- Whipped cream (for serving)
Nothing complicated here! Most items are pantry staples.
How to Make Apple Pie Biscuit Sandwiches at Home
Now for the fun part—let’s get baking!
-
Preheat the Oven: Get that oven going to 425°F (220°C).
-
Mix Dry Ingredients: In a large bowl, mix the flour, baking powder, salt, and the 1/4 cup sugar. It’s all about getting the right balance of flavors here.
-
Cut in the Butter: This step is super important. Cut the cold butter into the flour mixture until it resembles coarse crumbs. Feel free to use your fingers for this—the warmth will help break down the butter a bit.
-
Add Milk: Stir in the milk until just combined. Don’t go crazy mixing; we want our biscuits to stay tender and fluffy.
-
Roll Out Dough: Turn the dough onto a floured surface and gently roll it out to about 1 inch thick. You might notice it’s a bit sticky—add a touch more flour if needed.
-
Cut the Biscuits: Use your round cutter to make circles. Don’t worry if they’re not perfect. Each biscuit has its own personality!
-
Bake: Place them on a baking sheet and bake for 10-12 minutes or until golden brown. Keep an eye on them—you might need an extra minute depending on your oven.
-
Prepare the Apple Filling: While the biscuits are baking, combine your diced apples, 1/4 cup sugar, cinnamon, and nutmeg in a saucepan. Cook over medium heat until the apples are tender, about 5-7 minutes. You’ll know it’s ready when the kitchen smells absolutely divine.
-
Assemble: Once the biscuits are cool enough to handle, slice them in half and fill with that warm, spiced apple filling. Oh man, the magic is happening!
-
Serve with Whipped Cream: Add a dollop on top, and you’re all set!
Pro Tips for Best Results
- Keep Everything Cold: You’ll get flakier biscuits if your butter is really cold.
- Don’t Rush the Dough: Mixing too much can lead to tough biscuits, and nobody wants that!
- Thicken That Filling: If your apple filling seems too watery, add a sprinkle of cornstarch and cook a little longer.
Variations & Customization Ideas
Feel free to play around! You could swap apples for pears or add some dried cranberries for a tart twist. Try different spices—ginger adds a nice kick!
Common Mistakes to Avoid
- Neglecting to Preheat: Seriously, preheating makes all the difference.
- Overworking the Dough: This is a common mistake. Mix just until combined—trust me.
- Skipping the Cooling: Filling the biscuits while warm can take them from perfect to soggy quickly. Let them chill a bit.
What to Serve With Apple Pie Biscuit Sandwiches
These sandwich treats pair beautifully with a cup of hot cider or vanilla ice cream. Or you could even go for a simple coffee—so many options!
Storage & Reheating Instructions
Store leftovers in an airtight container in the fridge for up to three days. They can be warmed in the microwave, but I find they taste best when warmed in the oven for a few minutes to regain that fresh-baked flavor.
Estimated Nutrition Information
(per serving, makes about 8 servings):
- Calories: 280
- Protein: 3g
- Fat: 12g
- Carbohydrates: 40g
- Fiber: 2g
- Sugar: 8g
FAQs
1. Can I make the biscuits ahead of time?
Yes! You can freeze unbaked biscuits. Just thaw and bake when you’re ready.
2. Can I use other fruits?
Absolutely! Peaches and cherries are fantastic substitutes.
3. What if my apples get mushy?
Keep an eye on them while cooking. Cooking them just until tender is key.
4. Are these biscuits sweet?
The biscuits are slightly sweet, perfect for balancing the apple filling.
5. Can I make mini versions?
For sure! Just use a smaller cutter for bite-sized treats. Everyone loves a mini snack!
Expert Tips for the Best Apple Pie Biscuit Sandwiches
- Experiment with different spices in the apple filling. A pinch of cardamom can elevate the flavor!
- Try adding a bit of lemon juice to the apples for zing. It cuts the sweetness beautifully.
Conclusion
These Apple Pie Biscuit Sandwiches are not just a recipe; they’re a moment in the kitchen that becomes a memory. They are perfect for quick meals, easy snacks, or special occasions. So go ahead and gather your ingredients. It’s time to create something delicious. Save this recipe for later and trust me, you’ll want to make it again and again! ✨
For more delightful recipes, check out my posts on easy dinner recipes and quick breakfast recipes. Happy cooking!
PrintApple Pie Biscuit Sandwiches

Delightful treats with spiced apple filling tucked between warm, buttery biscuits.
- Prep Time: 15 minutes
- Cook Time: 15 minutes
- Total Time: 30 minutes
- Yield: 8 servings 1x
- Category: Dessert
- Method: Baking
- Cuisine: American
- Diet: Vegetarian
Ingredients
- 2 cups all-purpose flour
- 1 tablespoon baking powder
- 1/2 teaspoon salt
- 1/4 cup sugar
- 1/2 cup cold butter, cubed
- 3/4 cup milk
- 2 cups apples, peeled and diced
- 1 teaspoon cinnamon
- 1/2 teaspoon nutmeg
- 1/4 cup sugar (for apples)
- Whipped cream (for serving)
Instructions
- Preheat the oven to 425°F (220°C).
- Mix dry ingredients in a large bowl: flour, baking powder, salt, and 1/4 cup sugar.
- Cut in the cold butter until it resembles coarse crumbs.
- Add milk and stir until just combined.
- Roll out the dough to about 1 inch thick on a floured surface.
- Cut biscuits with a round cutter.
- Bake for 10-12 minutes or until golden brown.
- Prepare the apple filling by cooking apples with 1/4 cup sugar, cinnamon, and nutmeg until tender (5-7 minutes).
- Assemble by slicing the biscuits in half and filling with the apple mixture.
- Serve with whipped cream on top.
Notes
For best results, keep the butter cold, don’t overmix the dough, and allow the biscuits to cool slightly before filling.
Nutrition
- Serving Size: 1 sandwich
- Calories: 280
- Sugar: 8g
- Sodium: 200mg
- Fat: 12g
- Saturated Fat: 7g
- Unsaturated Fat: 5g
- Trans Fat: 0g
- Carbohydrates: 40g
- Fiber: 2g
- Protein: 3g
- Cholesterol: 30mg