Introduction to Old Fashioned Pecan Tassies
Nothing warms my heart quite like the smell of freshly baked Old Fashioned Pecan Tassies wafting through the kitchen. These delightful mini tarts remind me of family gatherings and cherished moments spent with loved ones. They’re a sweet slice of nostalgia, beautifully combining rich, buttery crusts with a glossy pecan filling. Perfect for busy moms and professionals, these tarts come together quickly, making them an easy treat to whip up when you want to impress. Plus, they’re a wonderful way to show your family you care without spending hours in the kitchen!
Why You’ll Love This Old Fashioned Pecan Tassies
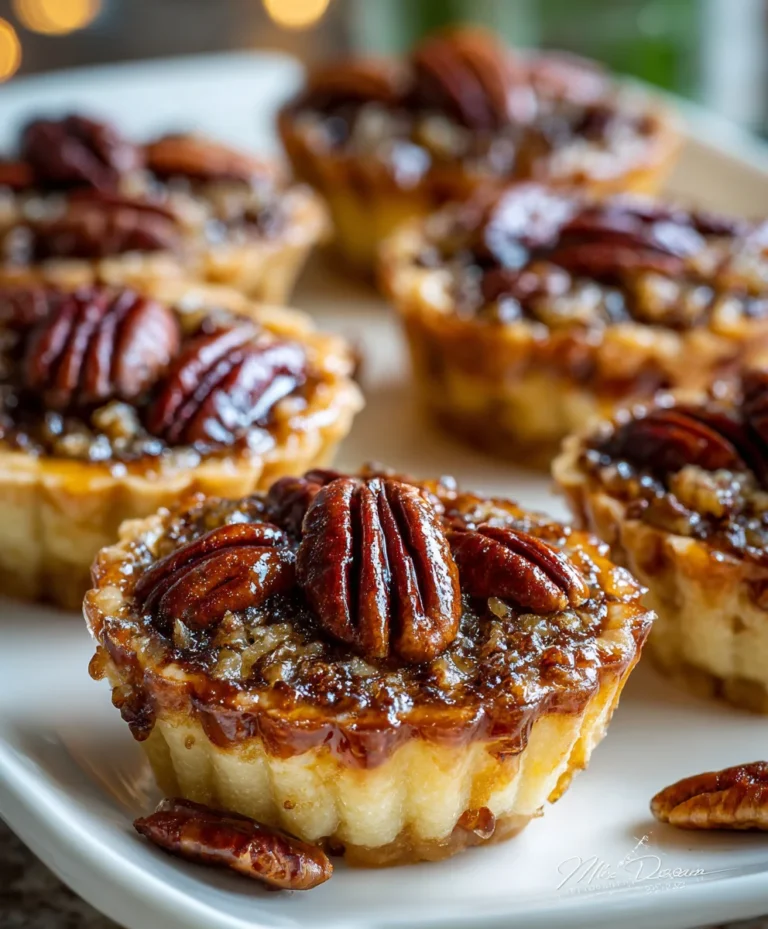
Old Fashioned Pecan Tassies are a delightful marriage of sweetness and crunch in every bite. The buttery crust cradles a gooey, nutty filling that’s simply irresistible. Each tart carries that nostalgic charm that evokes memories of home and family. Plus, they come together in no time, making them ideal for both cozy family gatherings and sophisticated soirées. A tray of these tarts is sure to win hearts and make any occasion extra special!
Ingredients for Old Fashioned Pecan Tassies
Creating these Old Fashioned Pecan Tassies is a breeze with a few simple ingredients that you probably already have in your pantry. Let’s explore their delightful roles in making these tarts truly special!
- Salted Butter: The base for a tender, flaky crust that melts in your mouth.
- Cream Cheese: Adds richness and a subtle tang to balance the sweetness.
- All-Purpose Flour: Forms the structure of the tart shell, keeping it sturdy for that luscious filling.
- Dark Brown Sugar: Infuses a deep caramel flavor into the sweet filling.
- Large Eggs: These help bind the filling together, creating a lovely custard-like texture.
- Maple Extract: A touch of sweetness that enhances the pecan flavor; feel free to substitute with vanilla if needed.
- Pecans: The star of the show! Their crunch and nuttiness are simply perfect.
- Pecan Halves: These serve as a gorgeous topping, adding texture and presentation.
For a twist, you can try using chocolate chips or different nuts, like walnuts or almonds, to create your own signature flavor. Don’t forget to check the bottom of the article for precise measurements!
How to Make Old Fashioned Pecan Tassies
Now, let’s dive into the delightful process of making Old Fashioned Pecan Tassies. Follow along with me, and I promise you’ll find it both easy and enjoyable. These steps will guide you through creating those wonderful mini tarts that everyone will love!
Step 1: Prepare the Tart Dough
First up, let’s tackle that buttery crust. In a small bowl, I like to use my hand mixer to cream together the room temperature salted butter and cream cheese until they’re fully combined. It takes just about 2 minutes, and it should be delightfully fluffy. Then, gradually add the all-purpose flour. Mix until you have a smooth, soft dough that looks like a dream waiting to happen!
Step 2: Chill the Dough
After mixing the dough, we need to give it a little chill time. Here’s a pro tip: Spray three mini muffin pans with cooking spray first; this will prevent any sticky situations later. Then, using a mini cookie scoop, portion out the dough into each muffin cup, filling them evenly to create about 36 little dough balls. Pop those pans in the fridge for about 15 minutes while we make the filling. This step helps the dough firm up and makes it easier to work with.
Step 3: Make the Pecan Filling
While the dough is chilling, let’s whip up that delectable pecan filling. In a medium bowl, mix together the dark brown sugar, melted butter, large eggs, and maple extract. The aroma of that maple extract adds such a delicious touch! Stir in the finely chopped pecans, and you’ll have a luscious, gooey mixture that’s begging to be poured into those lovely tart shells.
Step 4: Form the Tart Shells
Once the dough is nice and chilled, it’s time to get our hands involved. Preheat your oven to 350ºF for that golden bake we’re aiming for. Grab one pan from the fridge and carefully press the chilled dough into the bottom and up the sides of each muffin cavity. The goal is to create a little cup that will hold all that delicious filling. If it’s sticking a bit, dust your fingers with a touch of flour. It will roll right out!
Step 5: Fill and Top
Now for the fun part! Fill each tart shell about ⅔ full with the creamy pecan filling. Be sure not to overfill them; otherwise, you might end up with a messy oven. Once each is filled, take a pecan half and gently press it on top of the filling. It looks pretty and adds an extra crunch. Trust me; it’s totally worth it!
Step 6: Bake and Cool
Finally, it’s time to let the magic happen. Place your filled pans in the preheated oven and bake for about 18 minutes. You’ll know they’re ready when the tops are golden brown and you can smell that heavenly scent in the air. Once they’re baked to perfection, allow them to cool for a bit in the pans. Then, use a small knife to gently loosen each tart before transferring them to a cooling rack. The anticipation will be overwhelming, but let them cool completely before indulging. Trust me—it’s totally worth the wait!
Tips for Success
- Always have your butter and cream cheese at room temperature for easy mixing.
- Chilling the dough is key to preventing sticky mishaps when forming the tart shells.
- Don’t overfill the tarts; they’ll rise during baking and create a delightful overflow!
- For an extra touch, sprinkle some sea salt on top before baking.
- Make sure to allow the tarts to cool completely before serving for the best flavor.
Equipment Needed
- Mini muffin pans (36 cups) – If you don’t have these, you can use a regular muffin pan and adjust baking time.
- Electric hand mixer – A whisk works too, just be prepared for a good workout!
- Baking spray – If unavailable, use butter to grease the pans.
- Mixing bowls – Any size will do, just make sure they’re big enough to blend!
- Measuring cups and spoons – Precision is key for sweet success!
Variations of Old Fashioned Pecan Tassies
These Old Fashioned Pecan Tassies are delicious as is, but don’t hesitate to get creative! Here are some fun variations to inspire your baking adventures:
- Add a handful of semi-sweet chocolate chips for a delightful chocolate-pecan combo.
- Try using different nuts like walnuts or almonds for a twist on texture and flavor.
- Incorporate a dash of cinnamon or nutmeg into the filling for a warm spice kick.
- Drizzle melted chocolate over cooled tarts for a show-stopping presentation.
Serving Suggestions for Old Fashioned Pecan Tassies
Elevate your Old Fashioned Pecan Tassies experience with these delightful serving suggestions:
- Pair with a scoop of vanilla ice cream or whipped cream for a luscious blend.
- Serve alongside freshly brewed coffee or a warm cup of tea.
- Garnish with a sprinkle of powdered sugar for a beautiful finish.
- Arrange on a decorative platter for an eye-catching presentation.
FAQs about Old Fashioned Pecan Tassies
Got questions about these delightful Old Fashioned Pecan Tassies? I’m here to help!
How should I store the tarts? Keep your pecan tassies in an airtight container at room temperature for up to three days. If you need to store them longer, pop them in the fridge for up to a week.
Can I make these ahead of time? Absolutely! You can prepare the tart dough and pecan filling a day in advance. Just refrigerate the dough and filling separately, and assemble and bake when you’re ready.
Are there gluten-free options? Yes! You can substitute all-purpose flour with a gluten-free flour blend. Just ensure it contains xanthan gum for better structure.
Can I freeze the tarts? Definitely! They freeze well for up to three months. Just thaw them at room temperature before enjoying.
Final Thoughts
As I pull a tray of Old Fashioned Pecan Tassies from the oven, I can’t help but reminisce about warm family gatherings, laughter, and shared moments around the table. These delightful tarts aren’t merely a dessert; they embody love, tradition, and the joy of baking for those we cherish. Each bite brings a wave of nostalgia, reminding us of the sweet simplicity of life. So, as you create your own batch, know that you’re not just making a treat, but continuing a legacy of happiness and warmth that will be enjoyed by your loved ones for years to come.
PrintOld Fashioned Pecan Tassies

Old Fashioned Pecan Tassies are delightful mini tarts filled with a rich pecan filling, perfect for any occasion.
- Prep Time: 30 minutes
- Cook Time: 18 minutes
- Total Time: 48 minutes
- Yield: 36 tarts 1x
- Category: Dessert
- Method: Baking
- Cuisine: American
- Diet: Vegetarian
Ingredients
- 3/4 cup salted butter (room temperature)
- 5 ounces cream cheese (room temperature)
- 1 1/2 cups all-purpose flour
- 1 ½ cups dark brown sugar
- 2 tablespoons salted butter (melted)
- 2 large eggs
- ½ teaspoon maple extract
- ½ cup finely chopped pecans
- 36 pecan halves (for topping)
Instructions
- In a small bowl, use a hand mixer to cream together the butter and cream cheese until well combined. Add the flour and mix until smooth.
- Spray three mini muffin pans (36 tarts total) with cooking spray. Using a mini cookie scoop, scoop dough balls into the muffin pans, dividing the dough between the 36 cups evenly. Refrigerate the dough while making the filling.
- In a medium bowl, mix together the brown sugar, melted butter, eggs, maple extract and finely chopped pecans.
- Preheat the oven to 350ºF. After the tarts have refrigerated for about 15 minutes, remove one pan from the fridge. Press the dough on the bottom and up the sides of each muffin cavity to create a “cup” with the dough.
- Fill the dough shells ⅔ full with the filling. Place a pecan half on top of each cup.
- Bake for 18 minutes or until the tarts are golden brown on top. Allow the tarts to cool, then loosen them with a small knife and remove to a cooling rack.
Notes
- Ensure the butter and cream cheese are at room temperature for easier mixing.
- Do not overfill the tarts to prevent overflow during baking.
- Variations can include adding chocolate chips or using different nuts.
Nutrition
- Serving Size: 1 tart
- Calories: 150
- Sugar: 10g
- Sodium: 100mg
- Fat: 8g
- Saturated Fat: 4g
- Unsaturated Fat: 2g
- Trans Fat: 0g
- Carbohydrates: 18g
- Fiber: 1g
- Protein: 2g
- Cholesterol: 30mg