
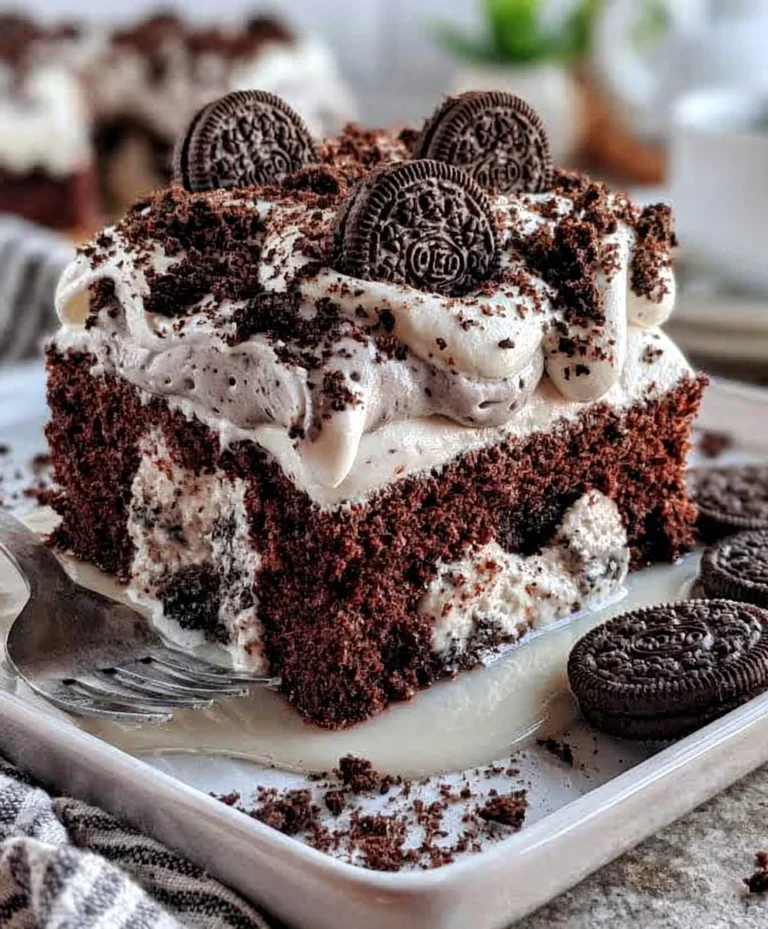
Introduction to Oreo Poke Cake
Let me tell you about my love for desserts, especially when they’re as delightful as an Oreo Poke Cake. Picture this: a rich, chocolate cake drenched in sweetened condensed milk, topped with fluffy whipped topping and crushed Oreos. It’s a simple solution for those busy days when you want to impress your family or friends without exhausting yourself in the kitchen. This treat not only satisfies your sweet tooth but also brings everyone together. It’s the perfect blend of convenience and decadence that’ll leave you yearning for just one more slice!
Why You’ll Love This Oreo Poke Cake
This Oreo Poke Cake is a game-changer for busy moms and professionals alike. It requires minimal effort, making it a breeze for anyone short on time. Plus, the incredible chocolatey flavor combined with that creamy, cookie topping will have your family singing your praises. You’ll love how it’s perfect for celebrations or a cozy night in, making any moment feel special without the fuss!
Ingredients for Oreo Poke Cake
Creating a delicious Oreo Poke Cake is all about having the right ingredients on hand. Here’s what you’ll need:
- Chocolate Cake Mix: This is the foundation of your cake, delivering rich chocolate flavor. You’ll also need the ingredients listed on the box, typically eggs, oil, and water.
- Sweetened Condensed Milk: This ingredient adds an irresistible sweetness and ensures your cake stays moist and luscious throughout.
- Cookies and Cream Pudding Mix: It not only enhances the dessert’s chocolatey goodness but also gives it a creamy texture that pairs perfectly with Oreos.
- Whole Milk: Essential for mixing the pudding, whole milk provides a richness that complements the other flavors. You could use low-fat or almond milk if needed.
- Oreos: Crushed Oreos bring that signature crunch and flavor. Feel free to use any variation of Oreos — mint or double-stuffed can mix things up!
- Whipped Topping: This light and airy topping adds a beautiful finish to your cake. If you prefer, you can use homemade whipped cream for an all-natural option.
For exact quantities and ratios, you can find them at the bottom of the article, ready for printing. Gathering these ingredients will set you on your way to creating an unforgettable dessert that everyone will adore!
How to Make Oreo Poke Cake
Now that you have your ingredients ready, let’s dive into the steps for making this mouthwatering Oreo Poke Cake! Follow along carefully, and you’ll create a dessert that’ll make everyone in your house smile. Trust me, the process is just as satisfying as the final result!
Step 1: Bake the Cake
First, preheat your oven according to the instructions on the chocolate cake mix box. Pour the mix into a 9×13 pan, following the box’s guidelines for adding eggs, oil, and water. Bake it until it’s fluffy and a toothpick inserted in the center comes out clean. Just a warm, chocolatey aroma will fill your kitchen!
Step 2: Cool and Poke
Once the cake is baked, let it cool for at least 30 minutes. This is crucial! If you poke holes in a hot cake, you risk it falling apart. After it’s cooled, grab the end of a wooden spoon. Poke holes all over the cake, making them about an inch apart. Approach this step with child-like glee; it’s fun and it lets the creamy sweetened condensed milk seep into the cake!
Step 3: Pour the Sweetened Condensed Milk
Here comes one of my favorite parts! Take that sweetened condensed milk and pour it all over the surface of the poked cake. Make sure to focus on those holes, letting the creamy goodness flow in! The cake will absorb the milk, creating a deliciously moist texture that’s pure bliss.
Step 4: Prepare the Pudding Mixture
In a medium bowl, combine the cookies and cream pudding mix with ½ cup of whole milk. Whisk it until it’s smooth and creamy. This step is like a magic trick; it transforms simple ingredients into something heavenly. The pudding adds another layer of deliciousness to your cake!
Step 5: Mix in Whipped Topping
Next, gently fold in the whipped topping into your pudding mixture. Keep mixing until everything is well combined. The texture should be light and fluffy! This delightful blend will create a cloud-like layer atop your cake, making it even more irresistible.
Step 6: Crush the Oreos
Grab a ziplock bag and toss in 10 Oreos. Seal the bag tight, and then take your trusty rolling pin to crush those cookies! You want sandy, crumbly pieces, so let out some frustration while having fun. Then, add these crushed morsels to your whipped topping mixture and stir gently.
Step 7: Combine and Spread
Now, spread the whipped topping and crushed Oreo mixture over the top of your cake. Be generous! Lick your spoon clean afterward, because this part is street-legal for raiding the dessert. Ensure an even coating for that beautiful presentation—everyone will want a slice!
Step 8: Final Touches
For the final touch, crush the remaining Oreos and sprinkle them generously on top of the cake. They add a delightful crunch that balances the creaminess. Plus, visually, they make the cake look so tempting. Who could resist that?
Step 9: Chill Before Serving
Last but not least, pop the cake into the fridge for at least one hour before serving. This chilling time allows the flavors to meld beautifully and ensures every bite is chilled perfection. Meanwhile, you can pat yourself on the back because you’ve just whipped up a showstopper of a dessert!
Tips for Success
- Be patient! Allow your cake to cool completely before poking holes.
- For an extra layer of flavor, try using flavored pudding mixes like chocolate or vanilla.
- Don’t hesitate to customize! Add mini chocolate chips or different crushed cookies for variety.
- Keep your Oreo Poke Cake in an airtight container in the fridge to maintain freshness.
- Serve with a scoop of vanilla ice cream for an indulgent treat!
Equipment Needed
- 9×13 Baking Pan: Essential for baking the cake. If you don’t have one, an 8×8 pan works; just adjust baking time.
- Mixing Bowls: You’ll need a couple for mixing the batter and pudding.
- Wooden Spoon: Perfect for poking holes; alternatively, you can use a skewer.
- Whisk: A must-have for mixing the pudding, but a fork works too!
- Ziplock Bag: Ideal for crushing Oreos. A clean kitchen towel can also do the trick!
Variations for Oreo Poke Cake
- Mint Oreo Poke Cake: Swap regular Oreos for mint-flavored ones. This twist brings a refreshing coolness to every bite!
- Peanut Butter Oreo Poke Cake: Add peanut butter to the whipped topping mix for a rich, nutty flavor that pairs perfectly with chocolate.
- Gluten-Free Option: Use a gluten-free chocolate cake mix and gluten-free Oreos to make this dessert suitable for gluten-sensitive friends.
- Non-Dairy Version: Substitute whole milk with almond or coconut milk and choose a dairy-free whipped topping for a deliciously creamy cake!
- Fruit-Enhanced Version: Layer in some sliced bananas or strawberries between the cake and whipped topping for a fruity surprise that adds freshness.
Serving Suggestions
- Pair your Oreo Poke Cake with a scoop of vanilla ice cream for an extra treat.
- Serve it alongside a cup of rich coffee or a sweet dessert wine for a delightful experience.
- Top servings with additional crushed Oreos for an eye-catching presentation that impresses every time.
FAQs about Oreo Poke Cake
Have questions about making this delicious Oreo Poke Cake? You’re not alone! Here are some common queries that often arise when it comes to this delightful dessert:
Can I make the Oreo Poke Cake ahead of time?
Absolutely! This cake is perfect for preparing in advance. Making it a day ahead not only saves time but also allows the flavors to meld, creating a more delicious dessert. Just be sure to store it in the fridge.
Can I use a different flavor of cake mix?
Definitely! Feel free to experiment with different flavors like vanilla or red velvet. Each variation brings its unique twist while still maintaining that mouthwatering Oreo influence.
How long will the Oreo Poke Cake last in the fridge?
When stored properly in an airtight container, this cake will last up to three days in the refrigerator. However, it’s so tasty, it’ll be hard to resist devouring it sooner!
Can I freeze Oreo Poke Cake?
Yes, you can! To freeze, wrap it tightly in plastic wrap and aluminum foil. It’s best enjoyed fresh, but a frozen cake keeps well for up to two months. Just remember to thaw it in the fridge overnight before enjoying!
What can I serve with Oreo Poke Cake?
Pair it with vanilla ice cream, fresh berries, or a rich dessert wine for a delightful experience. Adding a dollop of whipped cream elevates the sweetness too!
Final Thoughts
Making an Oreo Poke Cake brings joy not just from the delicious taste but also in the act of sharing. The laughter and smiles around the table, as forks dive into layers of chocolate and cream, create lasting memories. This dessert is a celebration of life’s sweetest moments, whether it’s for a birthday, family gathering, or just to brighten a busy day. I love how easy it comes together, yet feels special. With each bite, you can almost hear the happy murmurs saying, “More, please!” So, why not whip one up today and let the festivities begin?
PrintOreo Poke Cake

A delicious chocolate cake filled with sweetened condensed milk and topped with crushed Oreos and whipped topping. Perfect for any dessert lover!
- Prep Time: 30 minutes
- Cook Time: 30 minutes
- Total Time: 1 hour
- Yield: 12 servings 1x
- Category: Dessert
- Method: Baking
- Cuisine: American
- Diet: Vegetarian
Ingredients
- 15.25 ounce chocolate cake mix plus ingredients on the box
- 14 ounces sweetened condensed milk
- 4 ounces cookies and cream pudding mix
- 1/2 cup whole milk
- 20 Oreos crushed
- 8 ounces whipped topping
Instructions
- Bake your chocolate cake as directed on the box using a 9×13 pan.
- Let the cake cool for a minimum of 30 minutes.
- Use the end of a wooden spoon to poke holes throughout the cake.
- Pour the sweetened condensed milk all over the cake, focusing on the holes.
- In a bowl, mix dry pudding with 1/2 cup of milk and whisk to combine.
- Stir in whipped topping until well combined.
- Place 10 Oreos in a zip lock bag, seal, and crush using a rolling pin.
- Add crushed Oreos to the whipped topping mixture and stir gently.
- Spread the mixture over the cake.
- Crush the remaining Oreos and sprinkle on top of the cake.
- Chill for 1 hour prior to serving.
Notes
- Ensure the cake is completely cool before poking holes.
- Adjust the number of Oreos based on personal preference.
- Can be stored in the refrigerator for up to 3 days.
Nutrition
- Serving Size: 1 slice
- Calories: 320
- Sugar: 25g
- Sodium: 200mg
- Fat: 15g
- Saturated Fat: 7g
- Unsaturated Fat: 6g
- Trans Fat: 0g
- Carbohydrates: 45g
- Fiber: 1g
- Protein: 4g
- Cholesterol: 30mg