Soft Strawberry Cheesecake Bars are everything you want in a dessert. Honestly, it’s one of those treats that make you go “Wow!” They are creamy, a little tangy, and bursting with the sweet flavor of fresh strawberries. I first made this recipe for a summer picnic with friends, and I’ve been hooked ever since. You can barely hear the conversation when these bars are around because everyone is busy enjoying every bite!
Why You’ll Love This Recipe
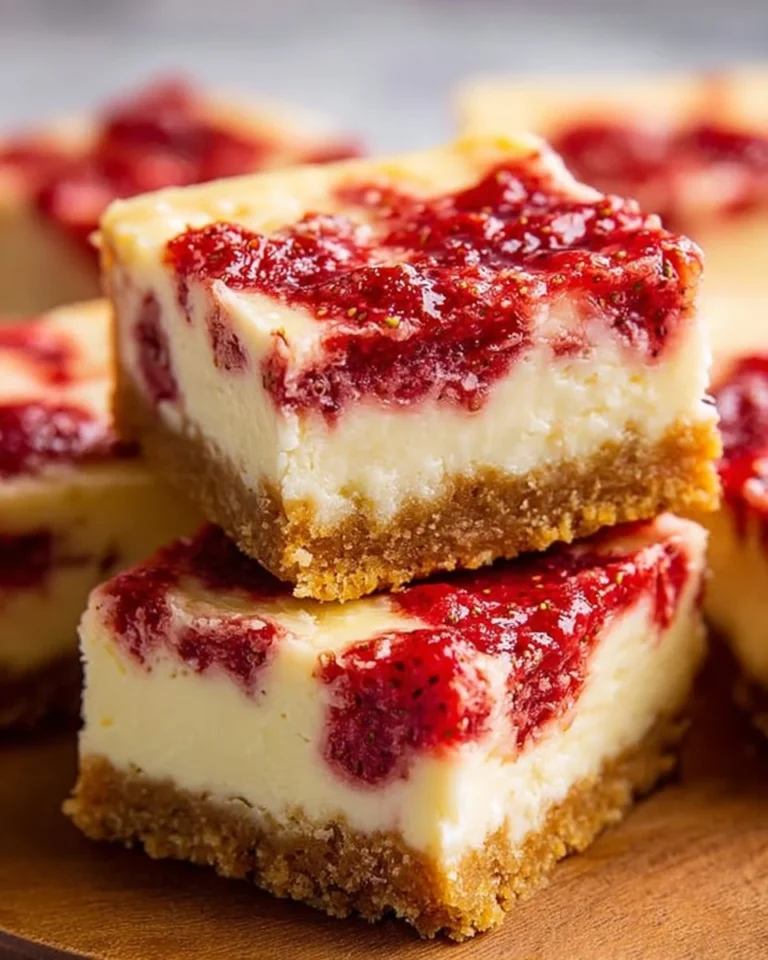
These Soft Strawberry Cheesecake Bars are not just a typical cheesecake. They’re easy to make and look so pretty. The strawberry swirl gives them a splash of color and a delicious fruity twist. You’ll find that they’re incredibly creamy yet firm enough to cut into bars. Perfect for sharing!
Let’s be real; summer strawberries make this dessert so much better. And the best part? They chill perfectly in the fridge, waiting for those unexpected guests.
So, keep reading; this part matters…
Preparation Phase & Tools to Use
Before diving into the ingredients, make sure you have the following tools handy:
- A 9×13 inch baking pan
- Mixing bowls (a medium bowl and a large bowl)
- An electric mixer or whisk
- Measuring cups and spoons
- A spatula
- A knife for swirling
It’s not complicated. Just a little prep, and you’re good to go.
Ingredients for Soft Strawberry Cheesecake Bars
Here’s what you’ll need:
- 1 1/2 cups graham cracker crumbs
- 1/4 cup sugar
- 1/2 cup unsalted butter, melted
- 2 (8 oz) packages cream cheese, softened
- 1 cup sugar
- 2 large eggs
- 1 teaspoon vanilla extract
- 1 cup fresh strawberries, pureed
- 1/4 cup fresh strawberries, chopped
Make sure your cream cheese is softened; otherwise, you’ll end up with lumps. Nobody likes lumpy cheesecake!
How to Make Soft Strawberry Cheesecake Bars at Home
Let’s get into the fun part—making these glorious bars!
-
Preheat the oven to 325°F (160°C). Grease your baking pan well. You don’t want them to stick!
-
Make the crust: In a medium bowl, mix the graham cracker crumbs, 1/4 cup sugar, and melted butter until everything is well combined. Press this mixture firmly into the bottom of your prepared pan to form the crust. It should be nice and even.
-
Create the filling: In a large bowl, beat together the cream cheese and 1 cup sugar until smooth. You want it creamy, so don’t rush this step. Add the eggs one at a time, mixing well after each addition. Then stir in the vanilla extract.
-
Assemble: Pour the cream cheese mixture over the crust! This is where it gets fun. Drop spoonfuls of the strawberry puree over the cheesecake filling and gently swirl with a knife. It doesn’t have to be perfect; a little swirl adds character! Sprinkle chopped strawberries on top for extra flavor.
-
Bake: Pop it in the oven and bake for about 30-35 minutes or until the center is set. You might need an extra minute depending on your oven, so check for doneness.
-
Cool and chill: Let the bars cool down, then refrigerate for at least 4 hours before cutting into bars. Trust me, this step is worth it. Serve chilled for the best experience!
Pro Tips for Best Results
- Texture Matters: You want your cream cheese mixture to be super smooth. If it’s lumpy, it’ll ruin your bars.
- Swirl Carefully: Don’t over-swirl the strawberry puree; a little goes a long way.
- Chill Time: Don’t skimp on chilling time; it helps the bars firm up nicely.
Variations & Customization Ideas
You can get creative with these bars! Try different fruits like raspberries or blueberries for a delightful change.
Want a bit of a tang? A squeeze of lemon juice in the cream cheese filling adds a refreshing kick.
Most people miss this step when making cheesecake, but you can even add chocolate chips to the filling for a chocolate-strawberry twist!
Common Mistakes to Avoid
- Skipping the Chill: Not letting the bars chill enough can lead to a mushy texture. Yikes!
- Overbaking: Keep an eye on them! A dry cheesecake is a sad cheesecake.
- Forget to Grease: Always grease your baking pan, or you’ll have a sticky mess on your hands.
What to Serve With Soft Strawberry Cheesecake Bars
These bars are lovely on their own, but they pair beautifully with whipped cream or a scoop of vanilla ice cream. And if you want to impress, serve them with a sprig of mint on top.
Keep it simple for a light snack or elevate it for a dessert table at a party!
Storage & Reheating Instructions
Store any leftovers in an airtight container in the fridge for up to 5 days. Trust me, they won’t last long, but just in case…
Don’t reheat them, as they’re best served cold. They’ll be a refreshing treat any time you want!
Estimated Nutrition Information
You can enjoy these cheesecake bars without too much guilt!
- Serving Size: 1 bar
- Calories: ~240
- Protein: 4g
- Carbohydrates: 30g
- Fat: 12g
This is just an estimate. Enjoy them in moderation!
FAQs
1. Can I use frozen strawberries?
Sure! Just thaw them and drain any excess liquid.
2. Can I make this a day in advance?
Absolutely! In fact, they taste even better the next day.
3. Can I substitute the graham crackers?
Yes, you can use any kind of cookie crust—oreos work great!
4. What if I don’t have a 9×13 pan?
You can use any similar-sized pan; just adjust the baking time slightly.
5. Can I double the recipe?
Totally! Just make sure you have a larger pan.
Expert Tips for the Best Soft Strawberry Cheesecake Bars
- If you want the bars to be extra creamy, try using a whole block of full-fat cream cheese rather than low-fat options.
- For a more intense strawberry flavor, use fresh strawberries instead of store-bought puree!
- And lastly, use a plastic knife to cut the bars for clean edges.
Conclusion
So there you have it! Soft Strawberry Cheesecake Bars are delightful, easy to make, and perfect for any occasion. Whether you’re serving them at a family gathering or enjoying them on a quiet evening, they never disappoint. This Soft Strawberry Cheesecake Bars recipe is perfect for quick meals, easy snacks, or special occasions.
Give this recipe a try and see how it turns out! Don’t forget to save this recipe for later; you’ll want to make it again and again. Happy baking!
And if you’re looking for some more inspiration, check out my other recipes like Easy Dinner Recipes or Quick Breakfast Recipes. You never know what you’ll find!