Honestly, you’re in for a treat with these White Chocolate Raspberry Cheesecake Balls. I remember the first time I made them. It was a rainy Saturday afternoon, and I was craving something sweet but didn’t want to spend hours in the kitchen. These little bites of joy became my go-to whenever I wanted to impress friends or just indulge myself. If you’re looking for a quick and delicious way to satisfy your sweet tooth, you’ve just found it!
Why You’ll Love This White Chocolate Raspberry Cheesecake Balls Recipe
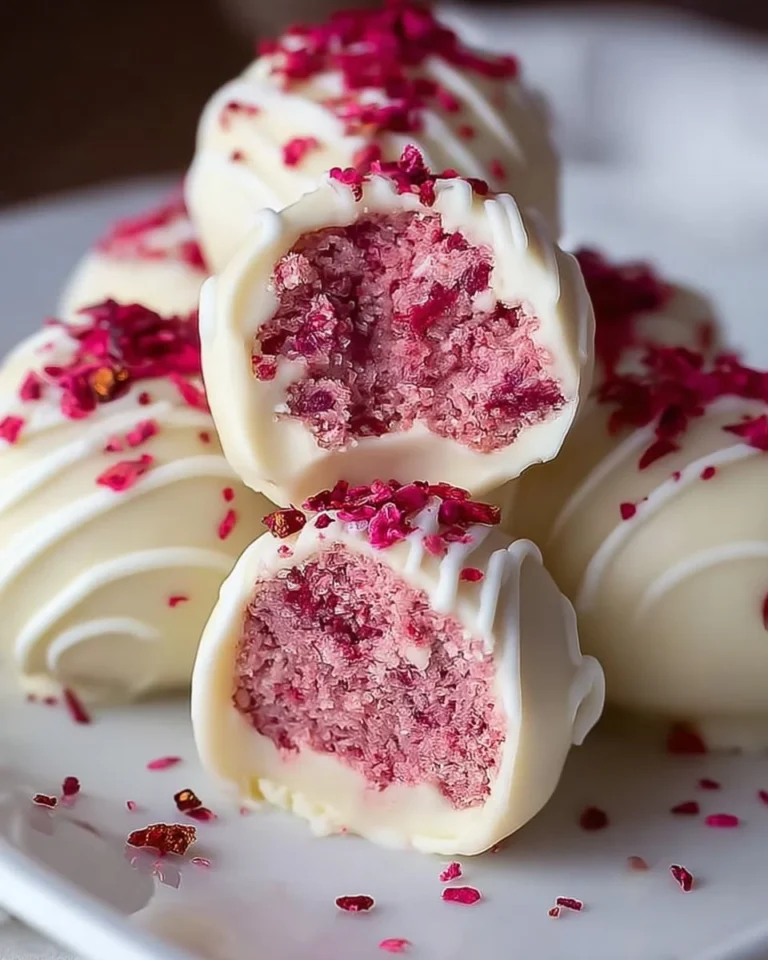
There’s something magical about the combination of white chocolate and raspberries. The creamy cheesecake filling pairs perfectly with the tartness of raspberries, and when you coat it all in silky white chocolate, trust me, you’ll be in dessert heaven. Plus, these White Chocolate Raspberry Cheesecake Balls are super easy to make and can be whipped up in no time.
They’re great for parties, quick snacks, or just a sweet treat after dinner. And let’s be real, who doesn’t love a portable dessert that you can pop in your mouth? So yeah, these little morsels of happiness are bound to become a staple in your kitchen.
Preparation Phase & Tools to Use
You won’t need much to create these delightful treats. Here’s what you’ll need to gather:
Tools
- Mixing bowl
- Spoon or spatula
- Parchment paper
- Microwave-safe bowl
- Refrigerator
Ingredients for White Chocolate Raspberry Cheesecake Balls
Here’s what you’ll need:
- 8 oz cream cheese, softened
- 1/2 cup powdered sugar
- 1/2 cup raspberry puree
- 1 tsp vanilla extract
- 1 cup white chocolate chips
- 1 tbsp coconut oil
- Crushed raspberries or sprinkles for garnish
That’s it! Did I mention there’s nothing complicated here?
How to Make White Chocolate Raspberry Cheesecake Balls at Home
Ready to dive in? Here’s how to whip up these scrumptious bites:
-
Mix the Filling: In a mixing bowl, combine the softened cream cheese, powdered sugar, raspberry puree, and vanilla extract until smooth. Make sure you really mix it well, so there are no lumps. You want it creamy!
-
Chill: Cover the bowl and chill the mixture in the refrigerator for about 30 minutes. This step helps the mixture firm up a bit, making it easier to roll into balls later.
-
Roll Them Up: Once chilled, scoop out small portions and roll them into bite-sized balls. I usually aim for about one-inch sizes—they’re just the right amount of sweetness without going overboard.
-
Melt the Chocolate: In a microwave-safe bowl, melt the white chocolate chips with coconut oil until smooth. Remember to stir every 30 seconds to prevent the chocolate from burning. It thickens more as it cools, so don’t rush this step!
-
Dip and Decorate: Dip each cheesecake ball into the melted white chocolate, coating it well, and then set them on a parchment-lined tray.
-
Garnish: Before the chocolate sets, sprinkle some crushed raspberries or sprinkles on top for that burst of flavor and visual appeal.
-
Chill Again: Refrigerate until firm, about 1 hour. Then, enjoy!
Quick tip: If you don’t have raspberry puree, you can make your own by blending fresh or frozen raspberries!
Pro Tips for Best Results
- Use Room Temperature Ingredients: Your cream cheese should be softened for easy mixing.
- Don’t Skip the Chilling: It really helps the mixture firm up, making rolling easier.
- Keep an Eye on the Chocolate: Melting chocolate can be tricky—it’ll burn if you’re not careful.
Variations & Customization Ideas
Feel free to switch things up! Here are some ideas:
- Different Chocolate: Swap white chocolate for dark or milk chocolate if that’s more your speed.
- Flavor Infusions: Experiment with adding a dash of almond or lemon extract to the cream cheese mixture for a different twist.
- Fruit Variations: Replace raspberries with blueberries or strawberries for a new flavor profile.
Common Mistakes to Avoid
- Overmixing: If you overmix the cream cheese mixture, it might end up too thin. If this happens, chill it a little longer before rolling.
- Burning the Chocolate: Melting chocolate requires patience. Stir often, or it can become a sad, clumpy mess.
- Skipping the Chill: Rolling the balls without chilling can make them mushy. Trust me on this one—give it the time it needs.
What to Serve With White Chocolate Raspberry Cheesecake Balls
These treats are fantastic on their own, but if you want to take it up a notch, consider serving them with:
- A scoop of vanilla ice cream
- Fresh raspberries or other berries
- A side of whipped cream for dipping
Storage & Reheating Instructions
Store your White Chocolate Raspberry Cheesecake Balls in an airtight container in the fridge. They should last about a week, but honestly, they might not even last that long!
No need to reheat—these are best enjoyed chilled.
Estimated Nutrition Information
(Per serving – approximately 2 balls)
- Calories: 180
- Protein: 2g
- Fat: 10g
- Carbohydrates: 22g
- Sugar: 16g
FAQs
1. Can I make these ahead of time?
Absolutely! They store well in the fridge and actually taste even better the next day.
2. Can I freeze them?
Yes, they freeze beautifully. Just make sure they’re in a good airtight container, and they’ll last a couple of months.
3. What kind of raspberries should I use?
Fresh or frozen work great! If using frozen, just let them thaw and drain excess liquid.
4. How do I get a smoother chocolate coating?
Make sure your white chocolate is completely melted. Adding a bit of coconut oil helps achieve that silky texture.
5. Can I substitute the cream cheese?
You could use a dairy-free cream cheese if needed, but the texture might change a bit.
Expert Tips for the Best White Chocolate Raspberry Cheesecake Balls
- Chill the Chocolate: Once dipped, chill them again to set the chocolate perfectly.
- Experiment with Toppings: Try crushed nuts or cookie crumbs for extra crunch.
These White Chocolate Raspberry Cheesecake Balls are not just a sweet treat; they’re a moment of joy in your day. This recipe is perfect for quick meals, easy snacks, or special occasions. You’ll want to save this recipe for later. I promise you won’t regret it!
So, gather your ingredients, and get cooking! Before you move on, give this fabulous recipe a try, and see how it turns out. Happy baking!