Easter Dirt Cups are one of those delightful treats that feel like pure childhood magic. I remember the first time I made them; my niece was just a little girl and wanted something fun for her Easter party. We both ended up covered in chocolate crumbs and laughter as we layered those cute cups together. Honestly, it turned out to be one of the best afternoons we spent in the kitchen!
From that day forward, this recipe became a go-to for when the holidays roll around. If you haven’t tried making these yet, you’re in for a treat. The combination of creamy filling and chocolatey crunch, topped with adorable decorations, is not just fun to eat but also a joy to create. Trust me; you’re going to love making these Easter Dirt Cups!
Why You’ll Love This Easter Dirt Cups Recipe
These Easter Dirt Cups are perfect for any gathering. Whether it’s a family brunch, a kids’ party, or just a Saturday night treat, they’re sure to impress. The best part? They come together in no time and require zero baking. So yeah, they’re relatively fuss-free!
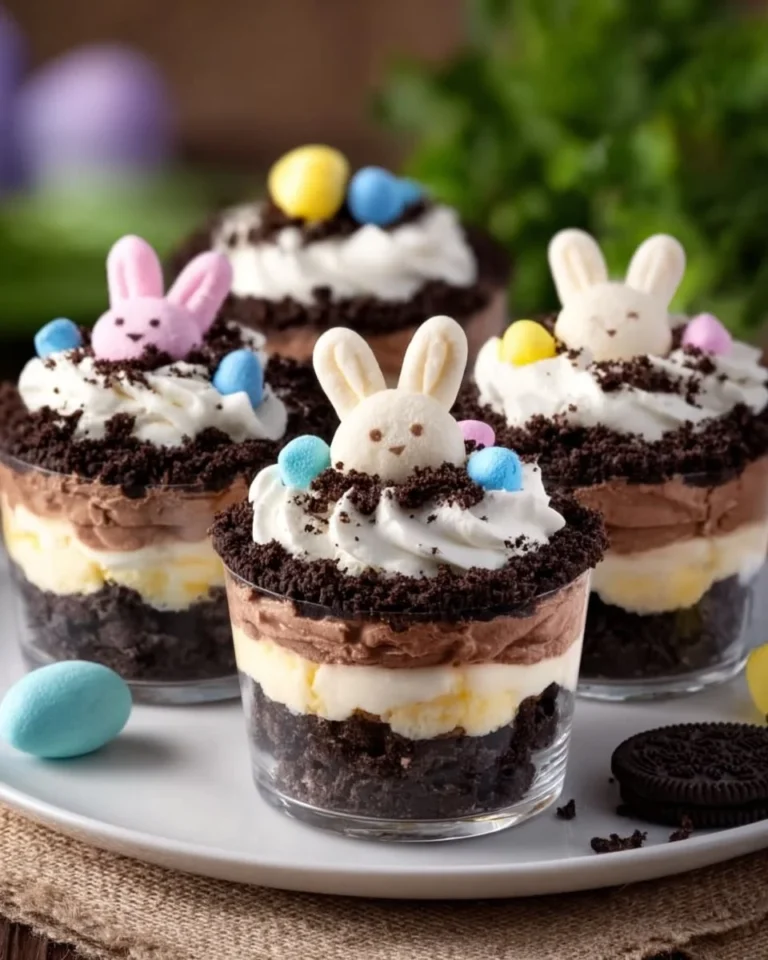
What’s really special about these cups is the ability to customize them. You can swap out ingredients or toppings to match your preferences. Plus, they’re just so darn cute with little bunny marshmallows peeking out.
Everyone at the table gets to indulge in a sweet, crunchy dessert that brings back those nostalgic childhood vibes. And we all need a bit of whimsy in our lives, don’t you think?
Preparation Phase & Tools to Use
Getting ready to make these Easter Dirt Cups is super simple. Here’s what you’ll need before you start:
- Mixing Bowls: One for the cream cheese mixture and another for the pudding.
- Whisk or Electric Mixer: To combine your ingredients smoothly.
- Measuring Cups and Spoons: For accurate portions; trust me, it helps!
- Serving Cups or Bowls: Think small cups or even mason jars for a fun presentation.
Once you gather your tools, you’re ready to dive into the sweet chaos.
Ingredients for Easter Dirt Cups
You’ll need the following ingredients:
- 1 package chocolate sandwich cookies (14 oz), crushed into fine crumbs
- 1 package cream cheese (8 oz), softened
- 1/2 cup powdered sugar
- 1/2 teaspoon vanilla extract
- 1 package instant chocolate pudding mix (3.4 oz)
- 1 package vanilla pudding mix (optional, for layering)
- Whipped topping
- Bunny marshmallows
- Candy eggs
I’ve found that using high-quality chocolate cookies really makes a difference. Don’t skimp on the toppings, either—those cute bunny marshmallows elevate the whole look!
How to Make Easter Dirt Cups at Home
Making Easter Dirt Cups is as much fun as it is easy. Follow these simple steps:
- Mix Cream Cheese: In a mixing bowl, beat the softened cream cheese, powdered sugar, and vanilla extract until smooth.
- Prepare Pudding: Next, prepare the instant chocolate pudding mix according to the package instructions.
- Combine Everything: Mix the pudding with the cream cheese mixture until well combined. You’ll see it become this glorious, creamy blend!
- Layer the Cups: In serving cups or bowls, layer the crushed chocolate cookies, the creamy filling, and add the optional vanilla pudding if you’re feeling fancy.
- Final Touches: Top with more crushed cookies, whipped topping, bunny marshmallows, and candy eggs.
- Chill: Pop them into the refrigerator for a few hours before serving. This is key, as it allows the flavors to meld and the cups to firm up a bit.
And that’s it! Before you know it, you’ll have a delightful Easter treat that looks as good as it tastes.
Pro Tips for Best Results
- Don’t Rush the Mixing: Make sure your cream cheese is truly softened for a smooth texture.
- Chill Time Matters: Allow the cups to chill at least 2-3 hours; this step really helps everything set up nicely.
- Get Creative: Feel free to swap out decorations. Maybe you want chocolate bunnies instead of marshmallows? Go for it!
Variations & Customization Ideas
- Fruit Layer: Consider adding fresh fruits like strawberries or raspberries for a burst of flavor.
- Nutty Crunch: Incorporate crushed nuts if you’re feeling adventurous.
- Different Flavors: Experiment with different pudding mixes. Vanilla or butterscotch can add a nice twist.
Common Mistakes to Avoid
- Overmixing: If you overmix the cream cheese with the pudding, it may become too runny. Keep it light!
- Forgotten Chill Time: Skipping the chilling step might leave you with a soupy mess. Trust me, it’s worth the wait.
What to Serve With Easter Dirt Cups
These treats pair wonderfully with a light Easter brunch spread. Think fruit salads, veggie platters, or even some hot cross buns. The balance of flavors will uplift your entire meal.
Storage & Reheating Instructions
- Storage: These Easter Dirt Cups can be stored in the fridge for about 3-5 days in an airtight container— if they last that long!
- Reheating: No need to reheat since they’re served cold! Just grab one when you’re ready to enjoy.
Estimated Nutrition Information
While every recipe can vary, here’s an estimated breakdown per serving:
- Calories: ~250
- Fat: 15g
- Carbohydrates: 30g
- Protein: 3g
FAQs
1. Can I use homemade cookies?
Absolutely! Homemade crushed cookies can take these cups to the next level.
2. How do I make them gluten-free?
Just swap regular cookies with gluten-free chocolate cookies, and you’re good to go.
3. Can I use other pudding flavors?
Of course! Feel free to mix it up and explore your taste preferences.
4. How long can I keep these in the fridge?
You can keep them for about 3-5 days, but they’re best enjoyed fresh!
5. Can kids help in making these?
Definitely! Kids will love layering the cups and decorating them.
Expert Tips for the Best Easter Dirt Cups
- Keep everything cold until you’re ready to assemble. This keeps your layers nice and neat.
- Feel free to add a sprinkle of edible glitter for an extra festive touch.
Conclusion
Easter Dirt Cups are such a joyous way to celebrate the season. This Easter Dirt Cups recipe is perfect for quick meals, easy snacks, or special occasions. They’re fun, creative, and oh-so-delicious. Whether you’re hosting a spring gathering or just treating yourself, these cups will seriously shine on your table.
Save this recipe for later, and try it with your family. You won’t regret it! You’ll find that each layer brings sweetness and smiles, creating lasting memories in your kitchen. Keep reading, this part matters—you’ll absolutely love the experience!
PrintEaster Dirt Cups

Delightful, no-bake desserts perfect for Easter gatherings, combining creamy filling and chocolatey crunch.
- Prep Time: 15 minutes
- Cook Time: 0 minutes
- Total Time: 180 minutes
- Yield: 4 servings 1x
- Category: Dessert
- Method: No Bake
- Cuisine: American
- Diet: Vegetarian
Ingredients
- 1 package chocolate sandwich cookies (14 oz), crushed into fine crumbs
- 1 package cream cheese (8 oz), softened
- 1/2 cup powdered sugar
- 1/2 teaspoon vanilla extract
- 1 package instant chocolate pudding mix (3.4 oz)
- 1 package vanilla pudding mix (optional, for layering)
- Whipped topping
- Bunny marshmallows
- Candy eggs
Instructions
- Mix Cream Cheese: In a mixing bowl, beat the softened cream cheese, powdered sugar, and vanilla extract until smooth.
- Prepare Pudding: Next, prepare the instant chocolate pudding mix according to the package instructions.
- Combine Everything: Mix the pudding with the cream cheese mixture until well combined.
- Layer the Cups: In serving cups or bowls, layer the crushed chocolate cookies, the creamy filling, and add the optional vanilla pudding if you’re feeling fancy.
- Top with more crushed cookies, whipped topping, bunny marshmallows, and candy eggs.
- Chill: Pop them into the refrigerator for a few hours before serving.
Notes
Get creative with decorations and toppings to customize your Easter Dirt Cups!
Nutrition
- Serving Size: 1 cup
- Calories: 250
- Sugar: 20g
- Sodium: 250mg
- Fat: 15g
- Saturated Fat: 8g
- Unsaturated Fat: 5g
- Trans Fat: 0g
- Carbohydrates: 30g
- Fiber: 1g
- Protein: 3g
- Cholesterol: 30mg