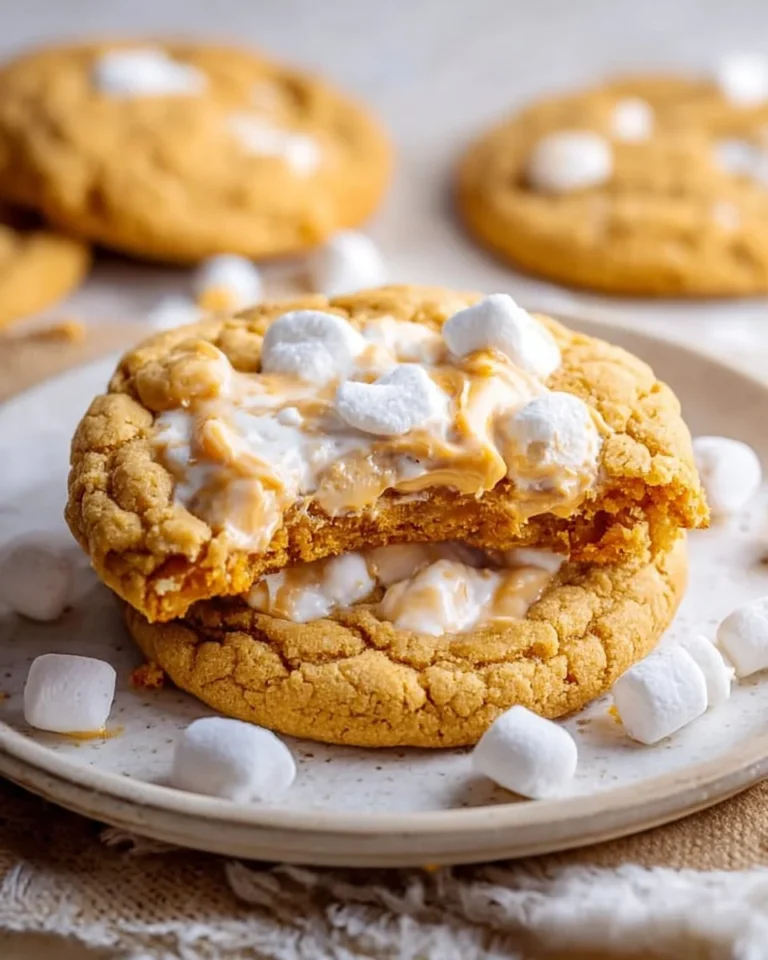
Soft and Chewy Fluffernutter Cookies are my absolute favorite indulgence. There’s something magical about the combination of peanut butter, marshmallows, and a chewy cookie that takes me back to childhood. I made these for the first time when my kids were having a sleepover, and let me tell you, they disappeared within minutes. Honestly, the smiles on their faces were priceless! You’ll see, once you try them, they’ll become a staple in your kitchen too.
Why You’ll Love This Soft and Chewy Fluffernutter Cookies Recipe
So why does this Soft and Chewy Fluffernutter Cookies recipe stand out? First off, it’s that delightful balance of sweet and salty you can’t resist. The creamy peanut butter paired with the gooey marshmallows creates an irresistible texture that is simply heavenly.
Plus, it’s incredibly easy to whip together. If you’ve ever had a long day and wanted a cozy dessert that feels like a warm hug, this is it. You’ll find yourself reaching for these cookies again and again. They’re perfect for quick meals, easy snacks, or special occasions.
Preparation Phase & Tools to Use
Before you get started, you’ll need a few basic kitchen tools to make your baking experience smooth and enjoyable:
- A large mixing bowl
- A whisk or electric mixer
- Measuring cups and spoons
- Baking sheets (lined with parchment paper)
- A wire rack for cooling
Having everything prepared will help you breeze through the recipe.
Ingredients for Soft and Chewy Fluffernutter Cookies
Here’s what you’ll need:
- 1 cup creamy peanut butter
- 1 cup granulated sugar
- 1 cup brown sugar
- 2 large eggs
- 1 teaspoon vanilla extract
- 2 cups all-purpose flour
- 1 teaspoon baking soda
- 1/2 teaspoon salt
- 1 cup mini marshmallows
No fancy ingredients here, just simple staples you’ll likely have on hand. Keep reading, this part matters…
How to Make Soft and Chewy Fluffernutter Cookies at Home
Ready to bake some deliciousness? Let’s get started!
-
Preheat your oven to 350°F (175°C). This step is crucial—trust me, you don’t want to rush it!
-
In a large bowl, mix together creamy peanut butter, granulated sugar, and brown sugar until smooth. It should feel like a thick, lovely paste.
-
Beat in the eggs one at a time, then stir in the vanilla extract. You might wonder why one egg at a time; it just makes the mixture blend better.
-
In another bowl, combine flour, baking soda, and salt. This is key! Don’t skip this step, as blending dry ingredients first helps distribute the baking soda evenly.
-
Gradually add the dry mixture to the peanut butter mixture, mixing until just combined. Overmixing can lead to tough cookies—no one wants that!
-
Fold in the mini marshmallows. You’ll feel like a kid again with all those little puffs of sweetness.
-
Drop rounded tablespoons of dough onto baking sheets lined with parchment paper. If you’re feeling fancy, shape them a little—who doesn’t love a perfectly round cookie?
-
Bake for 10-12 minutes, or until the edges are lightly golden. There’s one mistake that can ruin this: letting them bake too long! Soft is what we want here.
-
Allow cookies to cool on the baking sheet for a few minutes before transferring them to a wire rack to cool completely. This helps them firm up a bit!
Pro Tips for Best Results
- Let your peanut butter sit out for a bit. If it’s too cold, it doesn’t mix well.
- If you want extra gooeyness, use a little more marshmallows. More is always better, right?
- Quick tip: Don’t skip the cooling part! They might break if you get too excited.
Variations & Customization Ideas
Feel free to get creative! Here are a couple of ideas:
- Add chocolate chips for a chocolate-peanut butter- marshmallow explosion. Yum!
- Swap out the mini marshmallows for chocolate or butterscotch chips—it changes the flavor surprisingly well.
Common Mistakes to Avoid
- Overmixing the dough: It can lead to tough cookies, so be gentle during mixing.
- Not measuring your ingredients properly: Baking is like a science experiment; accuracy counts!
What to Serve With Soft and Chewy Fluffernutter Cookies
These cookies pair perfectly with a glass of cold milk or a cup of hot coffee. You could even serve them alongside a scoop of ice cream for a decadent dessert option. Ever had that combination? Trust me, you won’t regret it!
Storage & Reheating Instructions
Store these cookies in an airtight container at room temperature for up to a week. If you want to keep them fresher for a longer time, freeze them in a freezer-safe container. Just pop them in the microwave for a few seconds to warm them back up. So good!
Estimated Nutrition Information
Here’s a rough idea of what you’re getting in each cookie (if you make about 24 cookies):
- Calories: 150
- Protein: 3g
- Carbohydrates: 20g
- Fat: 7g
- Sugar: 10g
FAQs
1. Can I use crunchy peanut butter?
Sure! It’ll give your cookies a crunch!
2. What if I don’t have mini marshmallows?
You can use regular marshmallows, just cut them into smaller pieces.
3. How do I know when my cookies are done baking?
Look for lightly golden edges. They’ll look slightly underdone in the middle; that’s okay!
4. Can I refrigerate the dough before baking?
Absolutely! Just let it sit out for a few minutes to soften before baking.
5. What’s the best way to freeze these cookies?
Make sure they’re cooled completely, then layer them between parchment paper in a freezer-safe bag.
Expert Tips for the Best Soft and Chewy Fluffernutter Cookies
- Always remember to give your cookies space on the tray—they expand as they bake!
- If you want to add nuts, peanuts work well, but keep your audience in mind—some folks have nut allergies!
Conclusion
This Soft and Chewy Fluffernutter Cookies recipe is perfect for quick meals, easy snacks, or special occasions. They’re easy to make and even easier to love. Seriously, once you bake them, it’s hard to go back to any other cookie. So give it a try and watch as these cookies win hearts at your home just like they did in mine. Save this recipe for later; you’ll want to revisit it!